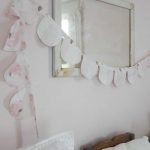
How to Make Fabric Bunting for Children's Room
Learn how to make fabric bunting for a nursery, child’s room or playroom.
Servings: 1
Cost: 5
Equipment
- Fabric scissors
- Sewing machine
Ingredients
- fabric scraps
- optional - quilt binding
- optional - double fold bias tape
Instructions
- For the first step, take a scrap piece of fabric and make a pattern for the shape you want.
- For each bunting piece, cut two pieces from the pattern, so you can sew them together and hide the raw edges inside.
- Put two bunting pieces together, right sides together, and sew around the outside with a 1/2″ seam, leaving the top open.
- Turn the bunting pieces right side out and press the seams flat.
- Topstitch around each bunting piece to make the seams lay flat.
- Repeat for however many bunting pieces you want. This will depend on how long you want the bunting to be.
- Take a piece of fabric that is 3″ wide and as long as you want your bunting to be. This will vary, depending on where you want to hang it. I made mine 106″ long this time.
- Press the long edges inside, so that they meet in the middle. Then, fold them in half, and press again.
- Take your oval bunting pieces and sandwich the unfinished tops inside the casing.
- Start sewing them in, being sure to catch both sides of the casing, and the top of the bunting piece, in your seam.
- Continue to add in new bunting pieces as you sew. I spaced mine about half an inch apart for this project.
Notes
What is a Topstitch?
- A topstitch is a stitch that is sewn close to the original seam. It is on top of the garment, or project, and visible when it is complete. Its purpose is to make a seam lay flat.