Large, fluffy, and buttery, these sourdough sandwich rolls are the perfect way to serve up your favorite sandwiches. Start them the night before, and you will have delicious, homemade sourdough hoagie rolls the next day.

Meal planning is not one of my favorite things. If I’m very honest, I almost never do it. I buy almost the same things every week, keep our pantry stocked with the staples, and our freezer stays full of pastured meat.
One thing that does take a little planning – and which I’m happy to plan for – is sourdough. I pretty well need to plan ahead by a full day for lunch or dinner, so that I have the time I need to get the sourdough started.
Don’t let that chase you away, though. It’s easy planning, and even if you change your plans, your sourdough won’t go to waste – it’s far too delicious for that.
Most of the time, I’ll plan to make some type of sandwich, start the bread the night before, and then peek in the fridge to come up with a plan.
When I first made these sourdough sandwich rolls, we had some frozen ground beef. So I placed it in the fridge to thaw, and the next day, made some meatball subs.
I mixed the ground beef with breadcrumbs made from sourdough bread, then added fresh milk, eggs, parmesan cheese, and plenty of seasonings. I cooked the meatballs in a cast iron skillet, then added a little bit of pasta sauce to each sourdough sandwich roll.
Topping them with the meatballs and a thick slice of mozzarella, I then baked the meatball subs for a few minutes until the cheese was melty and soft.
They were absolutely delicious. If you were in a pinch for time, you could easily make this meal ahead of time and just assemble and bake a different day.
Double the meatballs and you’ll be able to pull off spaghetti and meatballs one day, then make sandwiches a day or two later.

Why you will love this recipe:
Super simple. The stand mixer does most of the work. No hand kneading involved. Just knead, ferment, knead again, and shape.
Healthy. Fermented grains are much healthier than unfermented grains. The natural yeasts help break down the phytic acid, producing a more nutritious grain with vitamins and minerals that are easier to absorb than unfermented grains.
Perfect sandwich bread. These rolls make the perfect medium for any sandwich. Layer on your favorite meats, cheeses, salads, spreads, or more, and this buttery soft roll will take any sandwich up a dozen notches.

Tips For Making Sourdough Sandwich Rolls
- If you are totally new to sourdough, make sure to check out how to make a sourdough starter here.
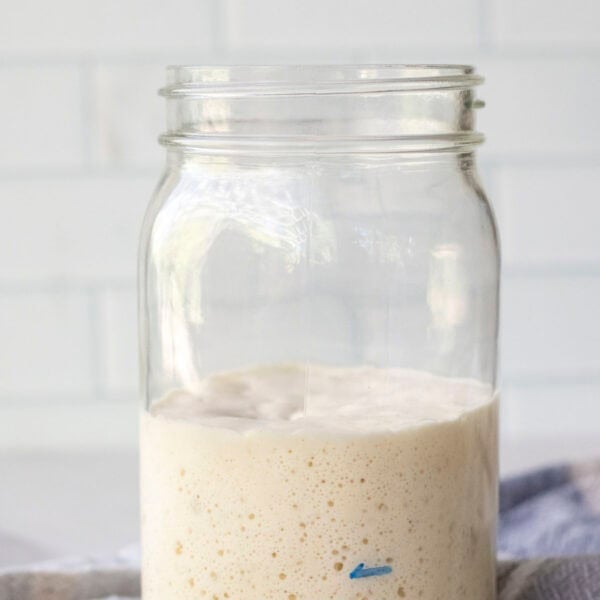
- You want to have a bubbly and active starter for this recipe. Make sure to feed your starter 4-12 hours before starting this recipe. You will know if your starter is ready to use if there are a lot of bubbles. Also, if you take a small spoonful of the starter and place it in a glass of water and it floats, then it’s ready.
- When fermenting dough overnight, make sure to cover the bowl with a tight cover like plastic wrap, beeswax wrap, or a bowl with a lid. If you cover your dough with just a towel and let it ferment for longer periods of time, you will often find yourself with a dry, hard skin that isn’t so pleasant.
- Spray the tops of them with water before baking and halfway during baking time. This make for a crispy outside and soft interior.
This post contains affiliate links, which means I make a small commission at no extra cost to you. See my full disclosure here.

Tools you may need:
Stand mixer with dough hook
Grain mill (optional, we just love our freshly milled grains)
Measuring cups and spoons
Parchment paper
Bench scraper (optional, but very helpful)

How To Make Sourdough Sandwich Rolls
The Day Before:
Feed sourdough starter 4-12 hours before starting your dough. It should be nice and bubbly before mixing the ingredients together.
When your starter is ready to use, it will be full of bubbles and at least double in size. You can also take a small spoonful of the starter and place it in a glass of water; if it floats, it is ready.
The Night Before:
In a stand mixer with a dough hook, add active sourdough starter, bread flour, water, butter, salt, and honey. Knead for 5-10 minutes, it should pull away from the sides of the bowl and be stretchy.
The dough should pass the ‘window pane’ test, which is when you take a small chunk of dough and, pinching and stretching it into something of a rectangle, you should be able to stretch it thin enough to see through it … like a window pane. If the dough breaks apart, it may need a little more kneading.
Place in a greased bowl and cover with plastic wrap, beeswax wrap, or a tight lid. You don’t want to cover breads with just a towel, because it can leave a hard, not-so-desirable skin on the dough.
Allow to ferment 8-12 hours at room temperature. You can place the in the fridge after the bulk ferment if you want to wait to bake the dough.
The Next Day
Divide into 6 equal parts and shape.
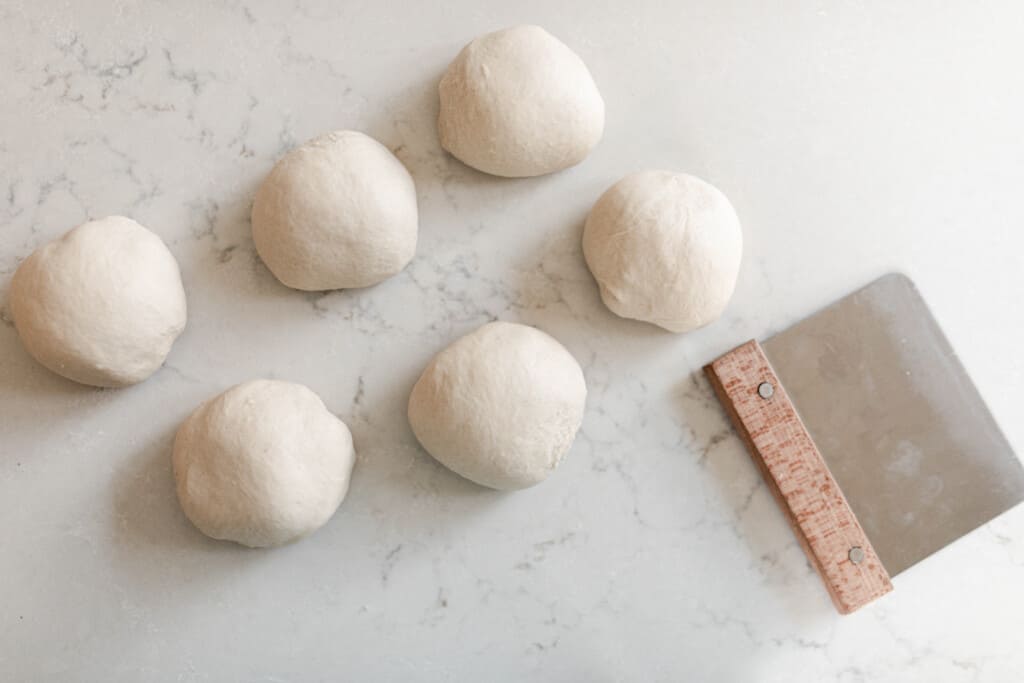
How to shape:
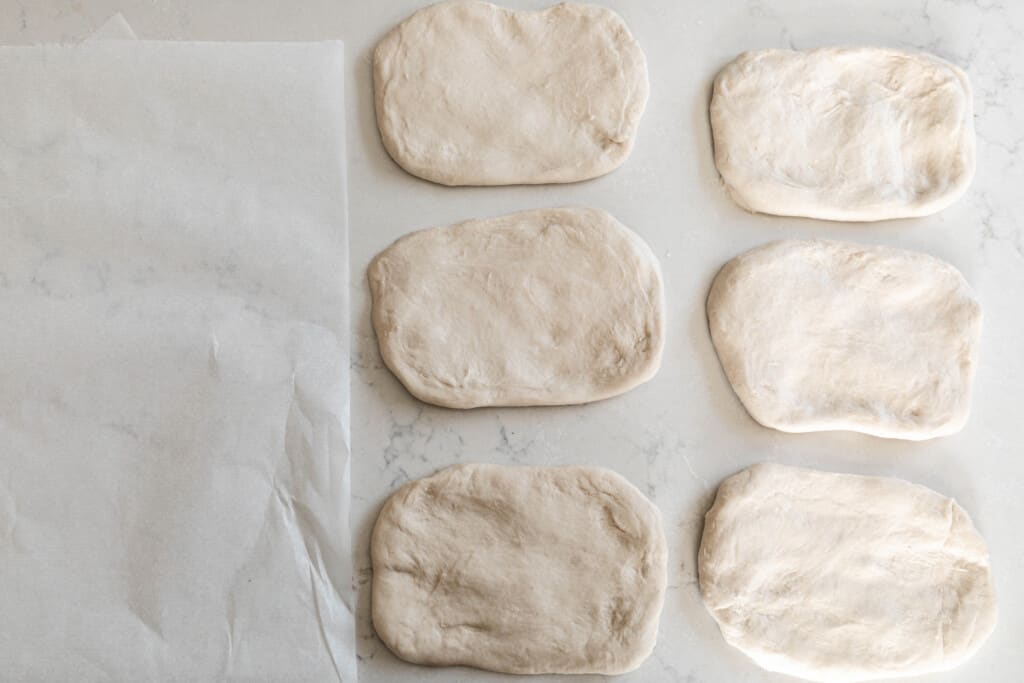
On a lightly floured surface, roll out each piece of dough into a rectangle, about 1/4 inch thick. Roll it up and pinch the ends closed.
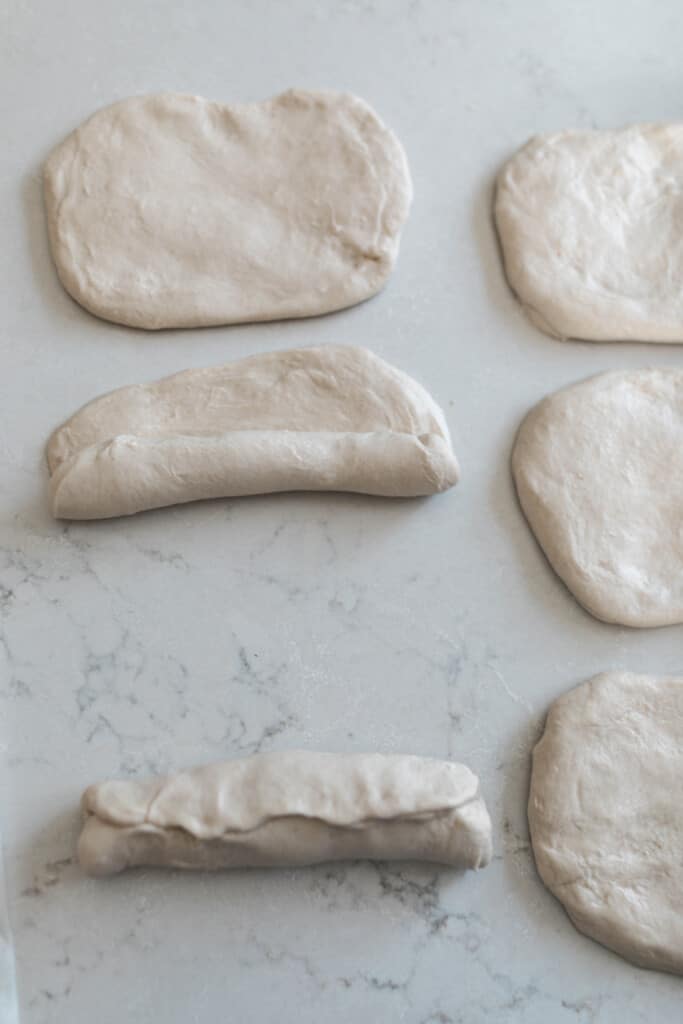
Place the shaped rolls onto a parchment lined baking sheet (seam side down) and allow to double in size. Depending on the temperature of your house and how active your starter is, this can take 1-3 hours.
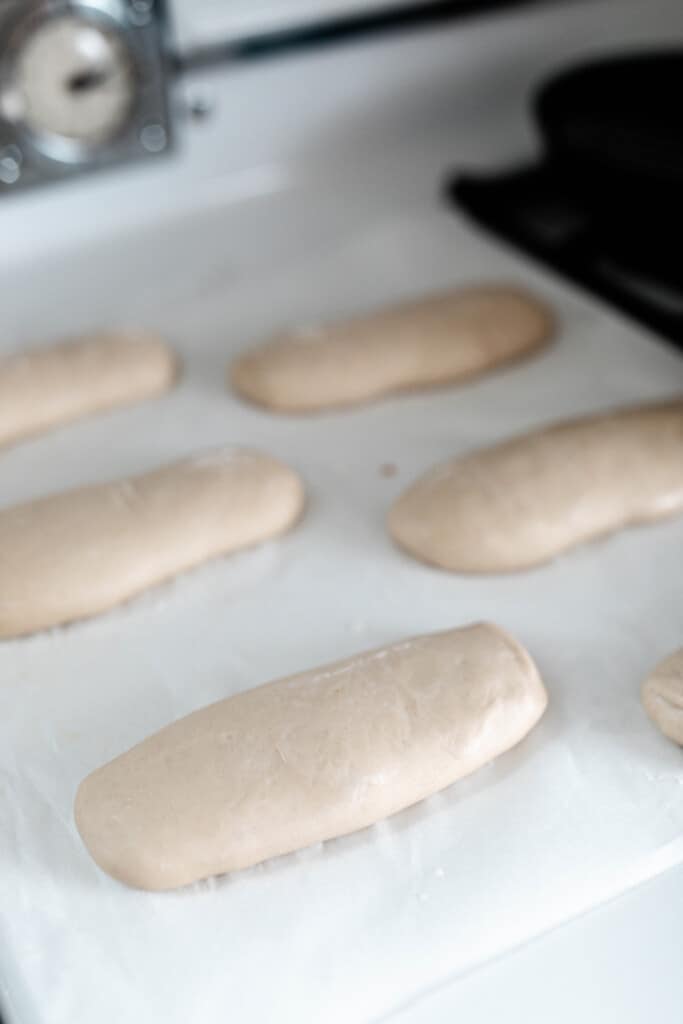
Once the rolls have risen, preheat the oven to 375 degrees.
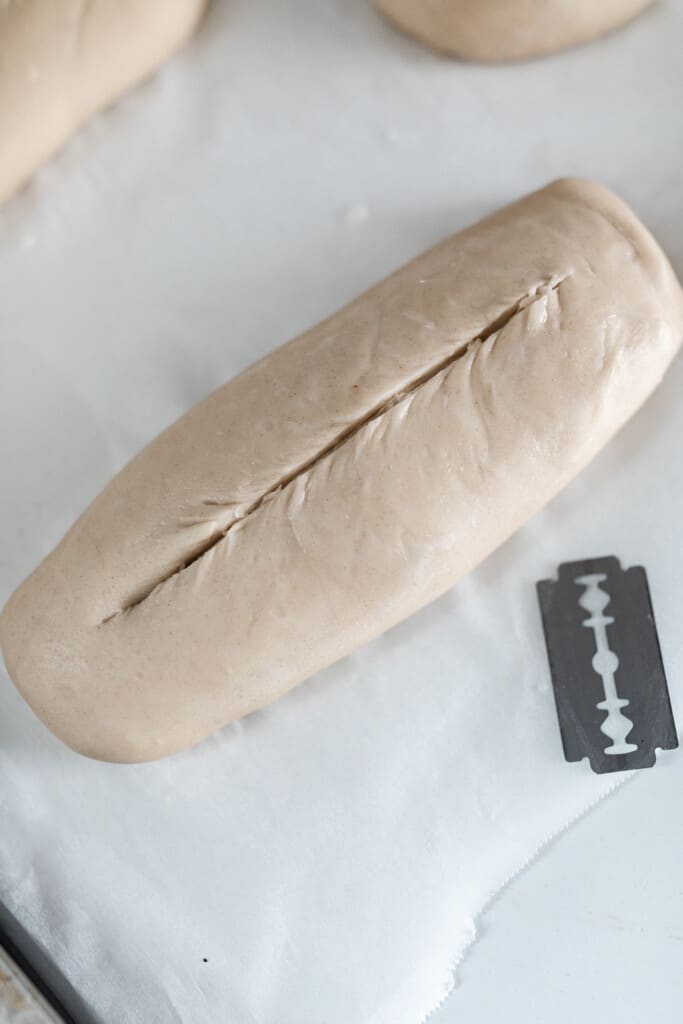
You can also slash with a razor (like I do in my sourdough bread recipes). Also optional.
Spray the tops of them with water before baking and halfway during baking time. This make for a crispy outside and soft interior.
Bake at 375° for 15-20 minutes until golden brown. Allow to cool, and enjoy.

Quick Sourdough Sandwich Rolls:
In a stand mixer with a dough hook, combine all the ingredients.
Knead until the dough is stretchy and passes window pane test. This will take about 5-10 minutes at medium speed.
Divide, shape, and rise until doubled … about 1-3 hours.
Bake at 375° for 15-20 minutes until they just start to turn golden brown.
Find More Delicious Sourdough Recipes:
- Einkorn Sourdough Bread
- Sourdough Chocolate Chip Cookies
- Homemade Sourdough Bagels
- Sourdough Breakfast Strata
- Sourdough Coffee Cake
If you try this recipe and love it, I would love if you could come back and give it 5 stars! Tag me on Instagram @farmhouseonboone
Sourdough Sandwich Rolls

Ingredients
- 1 cup sourdough starter
- 3 cups bread flour, all purpose will also work
- 1 cup water
- 2 tablespoons honey
- 1 1/2 teaspoon salt
- 1/4 cup unsalted butter, room temp
Instructions
- Feed sourdough starter 4-12 hours before starting your dough. It should be nice and bubbly before mixing the ingredients together.
- In a stand mixer with a dough hook, add active sourdough starter, bread flour, water, butter, salt, and honey. Knead for 5-10 minutes, until it pulls away from the sides of the bowl and is stretchy. It should also pass the ‘window pane’ test.
- Place in a greased bowl and cover with plastic wrap, beeswax wrap, or a tight lid. You don’t want to cover breads with just a towel, because it can leave a hard, not-so-desirable skin on the dough.
- Allow to ferment 8-12 hours at room temperature. You can place the in the fridge after the bulk ferment if you want to wait to bake the dough.
- Divide into 6 equal parts and shape.
- On a lightly floured surface, roll each piece of dough out into a rectangle, about 1/4 inch thick. Roll it up and pinch the ends closed.
- Place the shaped rolls onto a parchment lined baking sheet (seam side down) and allow to double in size. This can take 1-3 hours.
- Once it has risen, preheat the oven to 375 degrees.
- Slash the rolls with a razor if desired.
- Spray the tops of them with water before baking and halfway during baking time. This make for a crispy outside and soft interior.
- Bake at 375° for 15-20 minutes until golden brown. Allow to cool, and enjoy.
Notes
- Find directions for a faster (not long-fermented version) in the post above.
- The sourdough starter used in this recipe should be active (very bubbly).
- Optional: To create a crispy crust, spray the tops of them with water before baking and halfway during baking time.
Nutrition
Nutrition information is automatically calculated, so should only be used as an approximation.




brilliant! I am putting meatball subs on my menu plan for this week, too. I do like to make a menu plan, actually, even though I usually end up changing it. Thanks for another great-looking sourdough bread recipe!
These were meh. I was hoping we’d love them but they’re too dense and heavy for sandwiches (for us).
I’ve made these twice now and they turned out way too sticky and thin, I could barely even shape them without adding a ton more flour after fermentation. I’ve noticed in some of your videos you just scoop your measuring cup into the flour versus the spoon and level method. Could that be why? I’m not using enough flour doing the spoon and level method?
Made these today and we made hot sandwiches off a chuck roast. I will be making these rolls again and again! Thanks for the recipe!
I put all of the ingredients in the stand mixer before fermentation (because I didn’t read the directions properly) and it turned out perfectly! I will probably stick to this method just because it’s easier to only use the mixer once.
I did too and it turned out perfectly. It worked, so I’m with you, not changing it.
I just found this recipe tonight & have not tried it yet. I plan to very soon. In the interest of helping fellow bakers I wanted to add that those of you that have a dough that you feel is too sticky simply means you’ve likely added too much water.
In bread baking how much water you add to a recipe depends on how much water your particular flour needs. Different brands of flours have different absorption rates. Different starters can be at different stages in their chemical processes making a starter thicker or thinner as well. For those reasons, don’t just dump all the water in that a recipe calls for & then decide the recipe might be screwed up. Instead, start with adding half of the water and then slowly add a tablespoon or two at the time until your dough reaches your desired consistency. You’ll soon get the hang of whether or not you need to add less or more. Don’t just write a recipe off because it didn’t work for you the first time when there are more factors at play than whether or not you thing a recipe is correctly written. Weather is also another factor that can effect your baking, so if possible avoid baking on damp days, or simply adjust the amount of liquid in the recipe according to what is needed on a given day. The season can be another factor. You may find the same recipe needing more or less water than listed at different times of the year. Keep trying & have fun with it.
Thank you for this information. For this particular recipe I ended up add a 1/2 cup more flour but next time I will try not so much water. Im trying to become better at bread especially sourdough. Since finding Lisa’s recipes I have had great success. But I always appreciate extra tips from seasoned bakers. Thanks again.
I was just going to say this exact thing! I only added 1/2 the water to start. My dough turned out beautifully. I’m still waiting for the second rise atm so I don’t have an end verdict.
Great tips. Thanks for sharing that.
Followed recipe and it was so sticky. I thought maybe after it soaked up flour from the roll out it would be better. Nope. Baked them and it was a flop. They look pretty and smell amazing. I’ll use it for dipping but not likely able to make sandwiches. I’ll try again with WAY more flour. It would be great if someone posted how much extra flour they added. I worry about adding too much. New fo bread baking.
I needed an extra 2-3 cups flour, but then it’s not 100% fermented so it’s a disadvantage. Mine turned out delicious, I will just have to adjust next time so I can let it ferment. It must be because of different climates and even sourdough must react differently depending on weather, I can only imagine.
These sandwich rolls were so so good! They were light and fluffy and soft with a delicious sour taste to them! The dough is really easy to whip up too, I just did it about 10 minutes ago to ferment overnight and make again because they were so good! I thought the dough was going to be difficult to work with the next day because it was so sticky so I used a little more flour as I was portioning them out and shaping them. I let them do a second rise, uncovered in my oven with the light on and after they were risen I slashed it down the middle and baked. I didn’t do the egg wash. Took about 20 minutes for me and they were so good! I can’t wait to eat them with your meatball sub recipe tomorrow!
I think this will be the last recipe I try of hers. I have no idea how she measures for her recipes but without fail the dough is always soft. I always have to add extra flour and end up hoping I’ve done it right. A proper recipe done in grams should not need second guessing. It’s a shame because she makes her posts and videos look so lovely. Fingers crossed I added enough flour to be able to work the dough tomorrow. I’m gluten intolerant and won’t be able to add flour after the initial mixing.
Agreed..I’ve learned to skip recipes without gram specifications..
Working on it. I actually had this recipe on my list for this week.
Yikes I just realized I put the salt in with all the other ingredients before Step 2. Will it still ferment/rise properly?
(I would like to add that so far after step 1 my dough ball is perfect! Thank you for your sourdough expertise!)
Personally, I always melt my salt in the warm water before adding the starter and everything else. Has always worked out great for me in this recipe and other sourdough recipes!