Large, fluffy, and buttery, these sourdough sandwich rolls are the perfect way to serve up your favorite sandwiches. Start them the night before, and you will have delicious, homemade sourdough hoagie rolls the next day.

Meal planning is not one of my favorite things. If I’m very honest, I almost never do it. I buy almost the same things every week, keep our pantry stocked with the staples, and our freezer stays full of pastured meat.
One thing that does take a little planning – and which I’m happy to plan for – is sourdough. I pretty well need to plan ahead by a full day for lunch or dinner, so that I have the time I need to get the sourdough started.
Don’t let that chase you away, though. It’s easy planning, and even if you change your plans, your sourdough won’t go to waste – it’s far too delicious for that.
Most of the time, I’ll plan to make some type of sandwich, start the bread the night before, and then peek in the fridge to come up with a plan.
When I first made these sourdough sandwich rolls, we had some frozen ground beef. So I placed it in the fridge to thaw, and the next day, made some meatball subs.
I mixed the ground beef with breadcrumbs made from sourdough bread, then added fresh milk, eggs, parmesan cheese, and plenty of seasonings. I cooked the meatballs in a cast iron skillet, then added a little bit of pasta sauce to each sourdough sandwich roll.
Topping them with the meatballs and a thick slice of mozzarella, I then baked the meatball subs for a few minutes until the cheese was melty and soft.
They were absolutely delicious. If you were in a pinch for time, you could easily make this meal ahead of time and just assemble and bake a different day.
Double the meatballs and you’ll be able to pull off spaghetti and meatballs one day, then make sandwiches a day or two later.

Why you will love this recipe:
Super simple. The stand mixer does most of the work. No hand kneading involved. Just knead, ferment, knead again, and shape.
Healthy. Fermented grains are much healthier than unfermented grains. The natural yeasts help break down the phytic acid, producing a more nutritious grain with vitamins and minerals that are easier to absorb than unfermented grains.
Perfect sandwich bread. These rolls make the perfect medium for any sandwich. Layer on your favorite meats, cheeses, salads, spreads, or more, and this buttery soft roll will take any sandwich up a dozen notches.

Tips For Making Sourdough Sandwich Rolls
- If you are totally new to sourdough, make sure to check out how to make a sourdough starter here.
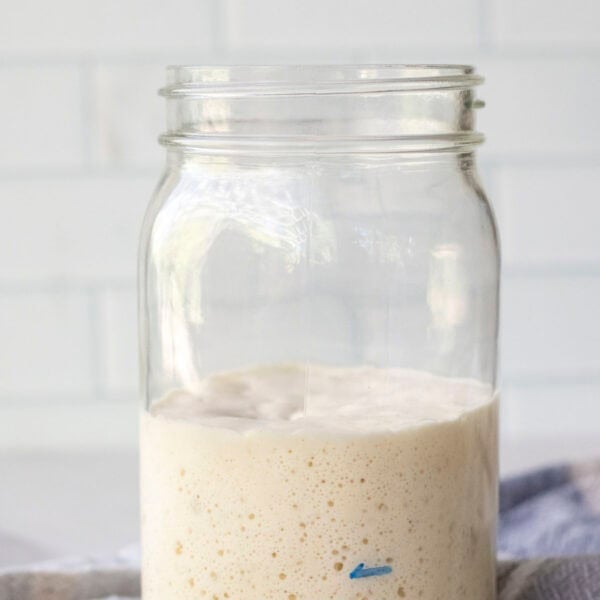
- You want to have a bubbly and active starter for this recipe. Make sure to feed your starter 4-12 hours before starting this recipe. You will know if your starter is ready to use if there are a lot of bubbles. Also, if you take a small spoonful of the starter and place it in a glass of water and it floats, then it’s ready.
- When fermenting dough overnight, make sure to cover the bowl with a tight cover like plastic wrap, beeswax wrap, or a bowl with a lid. If you cover your dough with just a towel and let it ferment for longer periods of time, you will often find yourself with a dry, hard skin that isn’t so pleasant.
- Spray the tops of them with water before baking and halfway during baking time. This make for a crispy outside and soft interior.
This post contains affiliate links, which means I make a small commission at no extra cost to you. See my full disclosure here.

Tools you may need:
Stand mixer with dough hook
Grain mill (optional, we just love our freshly milled grains)
Measuring cups and spoons
Parchment paper
Bench scraper (optional, but very helpful)

How To Make Sourdough Sandwich Rolls
The Day Before:
Feed sourdough starter 4-12 hours before starting your dough. It should be nice and bubbly before mixing the ingredients together.
When your starter is ready to use, it will be full of bubbles and at least double in size. You can also take a small spoonful of the starter and place it in a glass of water; if it floats, it is ready.
The Night Before:
In a stand mixer with a dough hook, add active sourdough starter, bread flour, water, butter, salt, and honey. Knead for 5-10 minutes, it should pull away from the sides of the bowl and be stretchy.
The dough should pass the ‘window pane’ test, which is when you take a small chunk of dough and, pinching and stretching it into something of a rectangle, you should be able to stretch it thin enough to see through it … like a window pane. If the dough breaks apart, it may need a little more kneading.
Place in a greased bowl and cover with plastic wrap, beeswax wrap, or a tight lid. You don’t want to cover breads with just a towel, because it can leave a hard, not-so-desirable skin on the dough.
Allow to ferment 8-12 hours at room temperature. You can place the in the fridge after the bulk ferment if you want to wait to bake the dough.
The Next Day
Divide into 6 equal parts and shape.
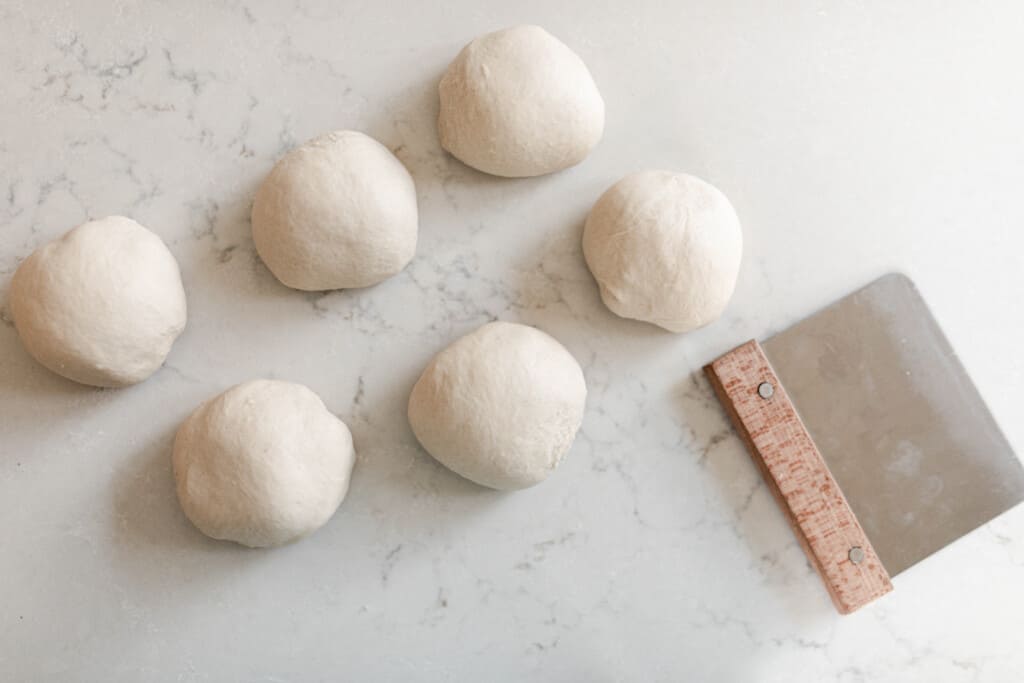
How to shape:
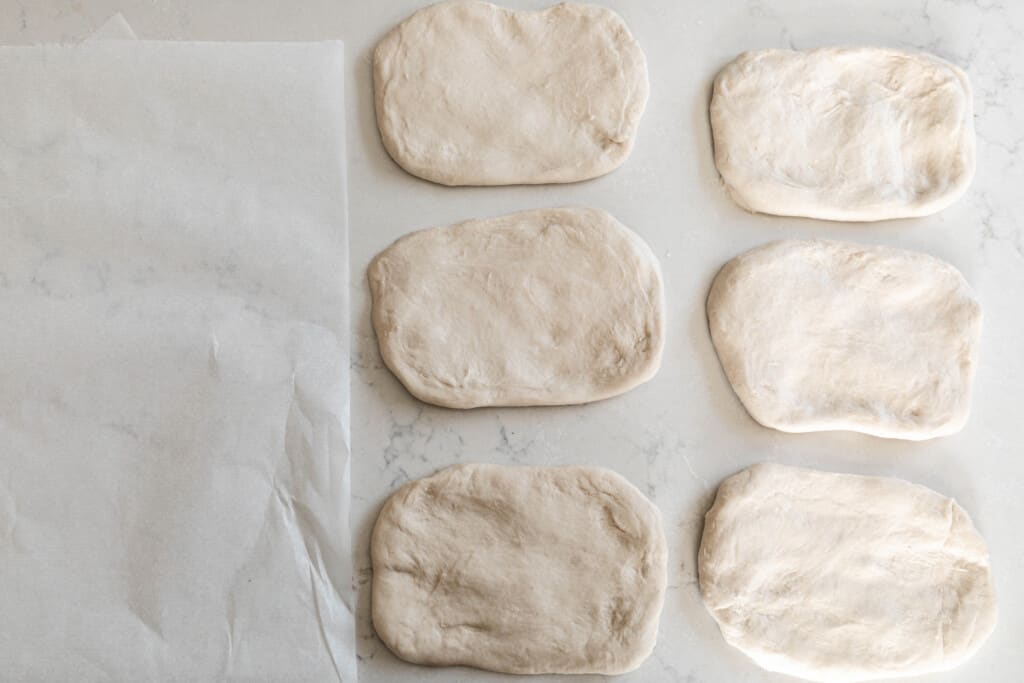
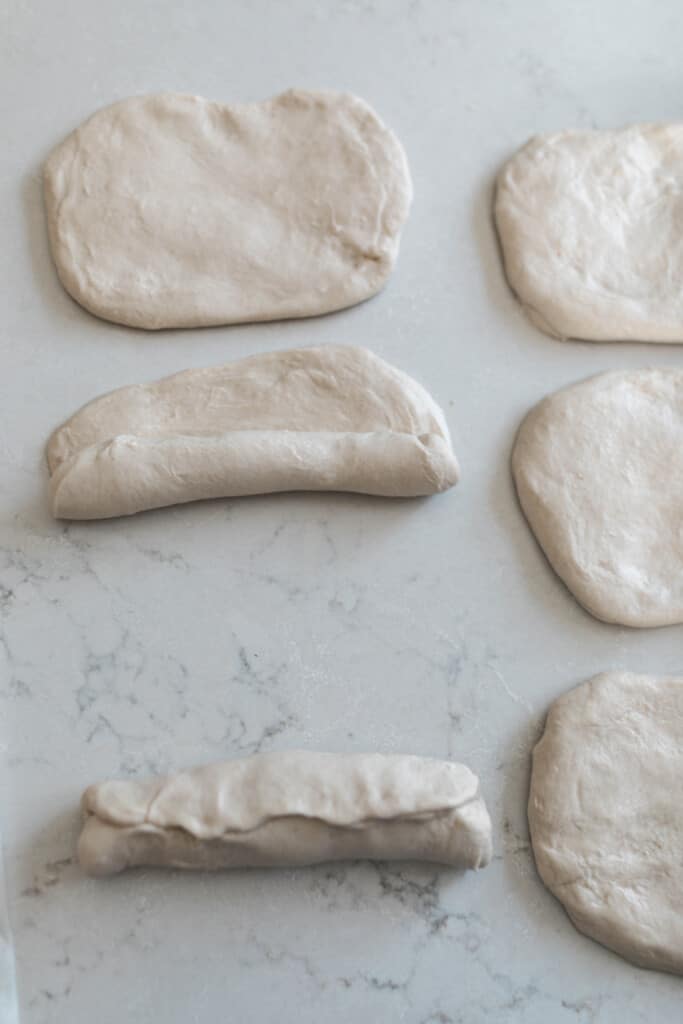
On a lightly floured surface, roll out each piece of dough into a rectangle, about 1/4 inch thick. Roll it up and pinch the ends closed.
Place the shaped rolls onto a parchment lined baking sheet (seam side down) and allow to double in size. Depending on the temperature of your house and how active your starter is, this can take 1-3 hours.
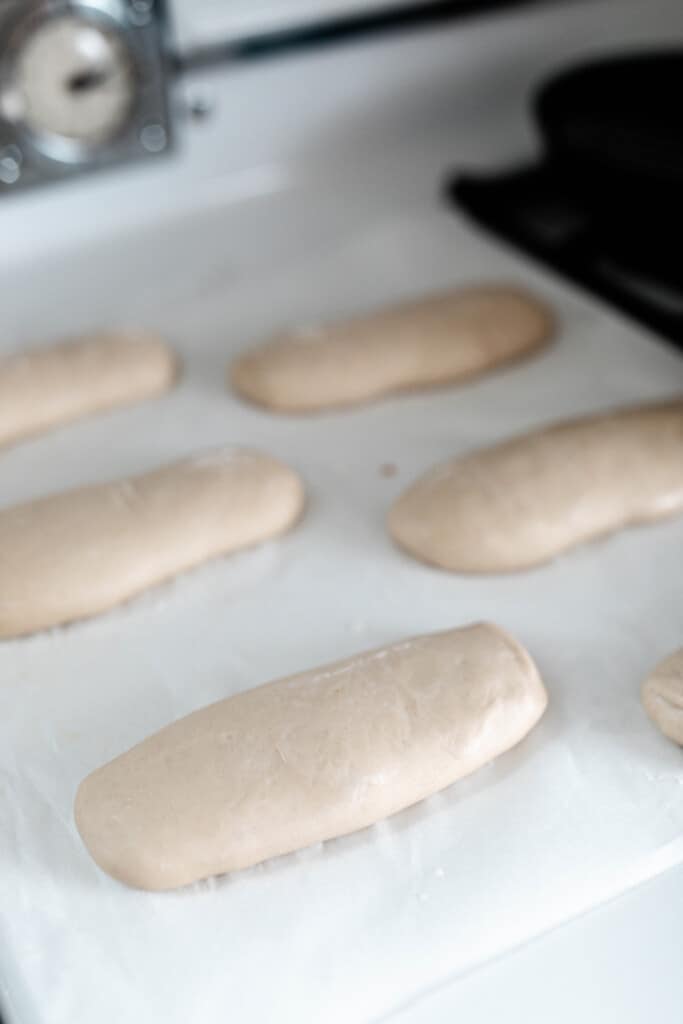
Once the rolls have risen, preheat the oven to 375 degrees.
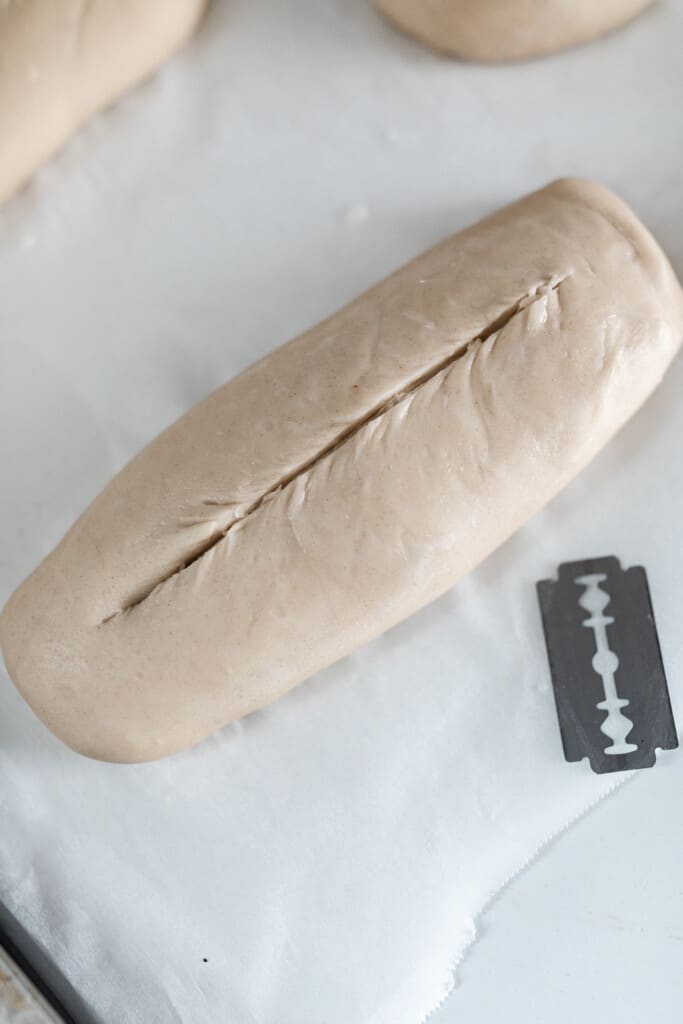
You can also slash with a razor (like I do in my sourdough bread recipes). Also optional.
Spray the tops of them with water before baking and halfway during baking time. This make for a crispy outside and soft interior.
Bake at 375° for 15-20 minutes until golden brown. Allow to cool, and enjoy.

Quick Sourdough Sandwich Rolls:
In a stand mixer with a dough hook, combine all the ingredients.
Knead until the dough is stretchy and passes window pane test. This will take about 5-10 minutes at medium speed.
Divide, shape, and rise until doubled … about 1-3 hours.
Bake at 375° for 15-20 minutes until they just start to turn golden brown.
Find More Delicious Sourdough Recipes:
- Einkorn Sourdough Bread
- Sourdough Chocolate Chip Cookies
- Homemade Sourdough Bagels
- Sourdough Breakfast Strata
- Sourdough Coffee Cake
If you try this recipe and love it, I would love if you could come back and give it 5 stars! Tag me on Instagram @farmhouseonboone
Sourdough Sandwich Rolls

Ingredients
- 1 cup sourdough starter
- 3 cups bread flour, all purpose will also work
- 1 cup water
- 2 tablespoons honey
- 1 1/2 teaspoon salt
- 1/4 cup unsalted butter, room temp
Instructions
- Feed sourdough starter 4-12 hours before starting your dough. It should be nice and bubbly before mixing the ingredients together.
- In a stand mixer with a dough hook, add active sourdough starter, bread flour, water, butter, salt, and honey. Knead for 5-10 minutes, until it pulls away from the sides of the bowl and is stretchy. It should also pass the ‘window pane’ test.
- Place in a greased bowl and cover with plastic wrap, beeswax wrap, or a tight lid. You don’t want to cover breads with just a towel, because it can leave a hard, not-so-desirable skin on the dough.
- Allow to ferment 8-12 hours at room temperature. You can place the in the fridge after the bulk ferment if you want to wait to bake the dough.
- Divide into 6 equal parts and shape.
- On a lightly floured surface, roll each piece of dough out into a rectangle, about 1/4 inch thick. Roll it up and pinch the ends closed.
- Place the shaped rolls onto a parchment lined baking sheet (seam side down) and allow to double in size. This can take 1-3 hours.
- Once it has risen, preheat the oven to 375 degrees.
- Slash the rolls with a razor if desired.
- Spray the tops of them with water before baking and halfway during baking time. This make for a crispy outside and soft interior.
- Bake at 375° for 15-20 minutes until golden brown. Allow to cool, and enjoy.
Notes
- Find directions for a faster (not long-fermented version) in the post above.
- The sourdough starter used in this recipe should be active (very bubbly).
- Optional: To create a crispy crust, spray the tops of them with water before baking and halfway during baking time.
Nutrition
Nutrition information is automatically calculated, so should only be used as an approximation.




I made this today. I forgot to add the butter but they were still delicious! Thank you for such an easy and fantastic look at sourdough buns. I told my husband if he knew how easy they were he’d divorce me and make them himself!
I would have preferred they browned a bit more and I used a whole egg in the wash.
Fine without the butter?? That would be a lot easier.
The dough does come out very sticky.. If anyone knows the trick please let us know the weight (in grams) of the flour and the hydration level of the starter. That would be very helpful
So I had a perfect first rise but when I tried doing my second rise I barely got any. It was a bit soupy when I started to kneed it this morning so I think I might have needed to add more flour this morning. Thoughts?
Do you have the gram measurements for this recipe perhaps? I find it so much easier to follow a recipe by weight, especially because people weigh 1 cup differently. Thank you!
Had the same experience with a sticky dough, and I weighed the flour exactly (3 cups = 375 grams). Like my grandmother says, just add enough flour until it “feels right”, lol
Can’t wait until they come out of the oven! Upping our hoagie game here in Philly.
Love it! This is the way my grandma & mom taught me. Go by look, feel & taste
Lisa,
These were delicious! My entire family loved them (including the kiddos). We had them with meatballs subs which is a favorite around here. Thanks for all the work you do to share your yummy recipes.
Same for me. I find that to be the case with most of Lisa’s recipes with flour. I am in Virginia so maybe the climate is different here too. I just keep adding flour until I get the right consistency which she mentions above (dough shouldnt stick to sides of the bowl and pass window pane test)!
These look so good! I love these types of rolls, but when I’ve had them they’re usually store-bought and loaded with who knows what. Looking forward to expanding my sourdough repertoire and trying these!
Have you tried with einkorn ?
Hi Lillian, I am in QLD so it is always warm here. I find a lot of Lisa’s sourdough recipes to be quite sticky so I make sure I have a 100% hydration starter, any less and it becomes too sticky. I also go of grams rather than cups. So for this recipe I just measured what one cup of flour is and base the rest of the ingredients off that. If that makes sense. Lastly, I cut my ferment time in half or go off the less time for example, Lisa recommends feeding starter 4-12 hours before beginning this recipe and I can have an active starter within an hour of feeding. Hope this is helpful. A bit of experimentation and you’ll get the hang of it.
Hi Lisa,
I tried these twice, they are way too sticky and wet so I couldn’t roll and shape them. I’m in Australia could it be because of our climate? Should I add more flour?
They still taste amazing though
I just made these, and my dough was more like batter, but I added a ton more flour while it was kneading and they turned out beautifully!!
I have found with these I added a little bit more flour. But I realized I needed to keep kneading it just like the brioche bread and if you are patient it does eventually come together and passes the window test. Just a hint that. works. She said 10-15 min. to let the machine knead to come together, but mine has always taken 20-30. But I figured, it will leave it run till it does! And it always does! I was a regular bread maker, but sourdough is a different animal. Trial and error and eventually you get comfortable with it! Have fun learning!