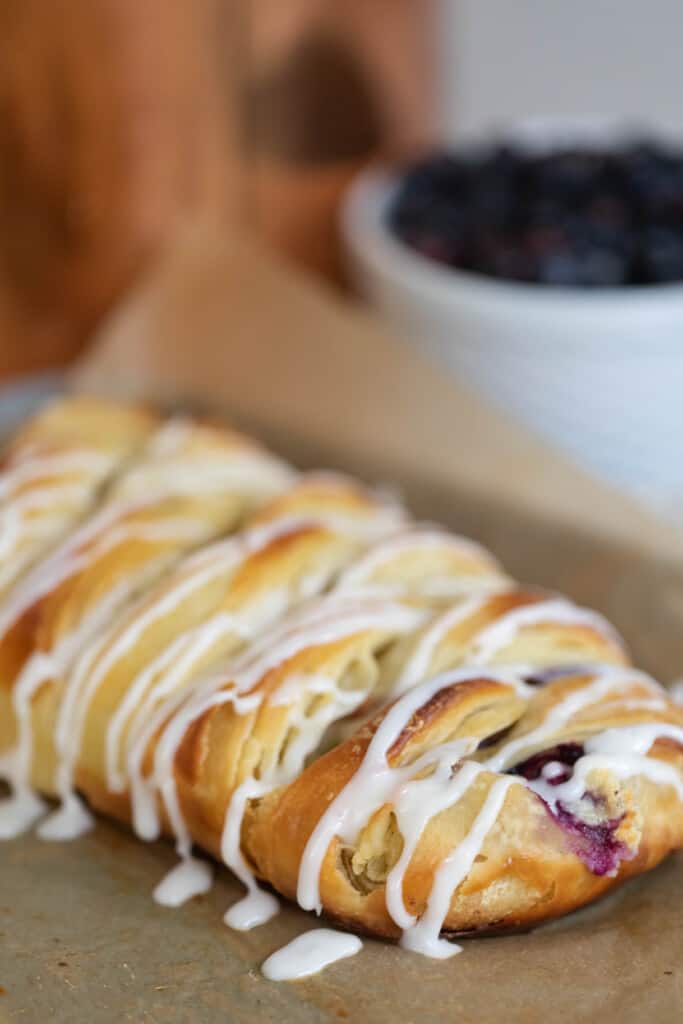
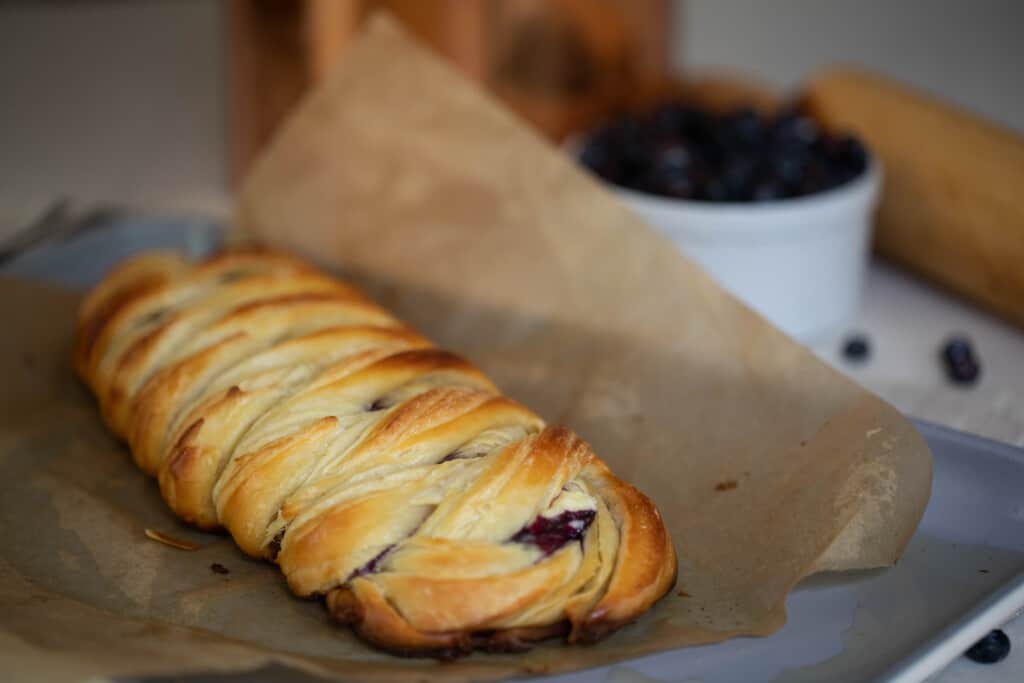
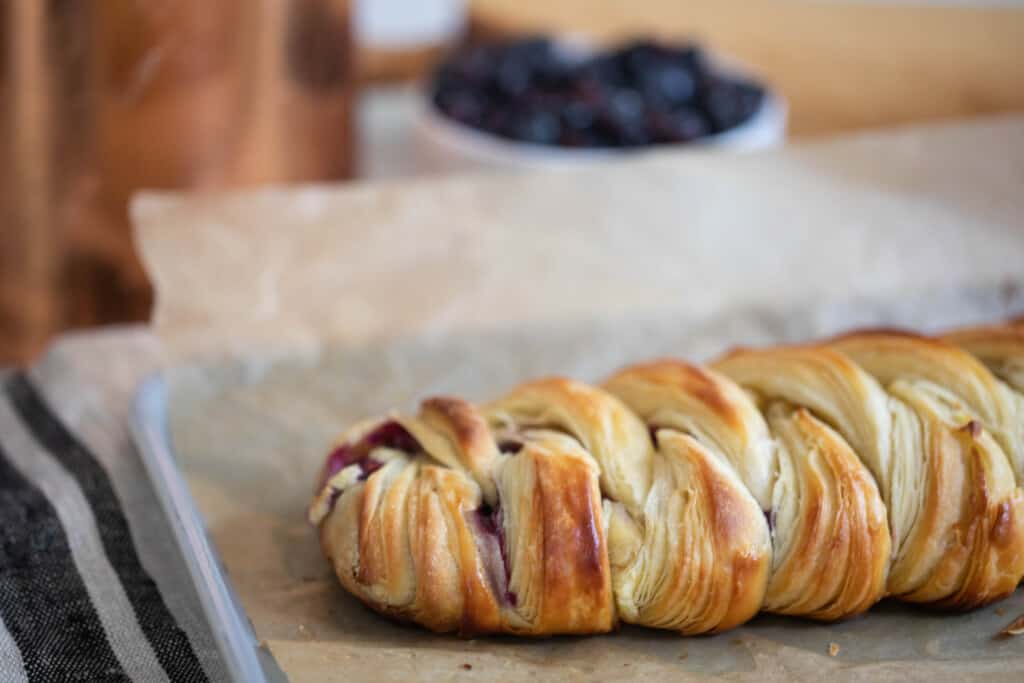
Sourdough pastry braids are a delicious sourdough puff pastry with a cream cheese and fruit filling that is baked until golden to create a beautiful bread that is perfect for special occasions.

Have you seen the common theme here yet? I’m on a sourdough pastry kick. I just talked about how I get onto food kicks in the last post (strawberry stuffed French toast, just in case you missed it) and pastry is another one.
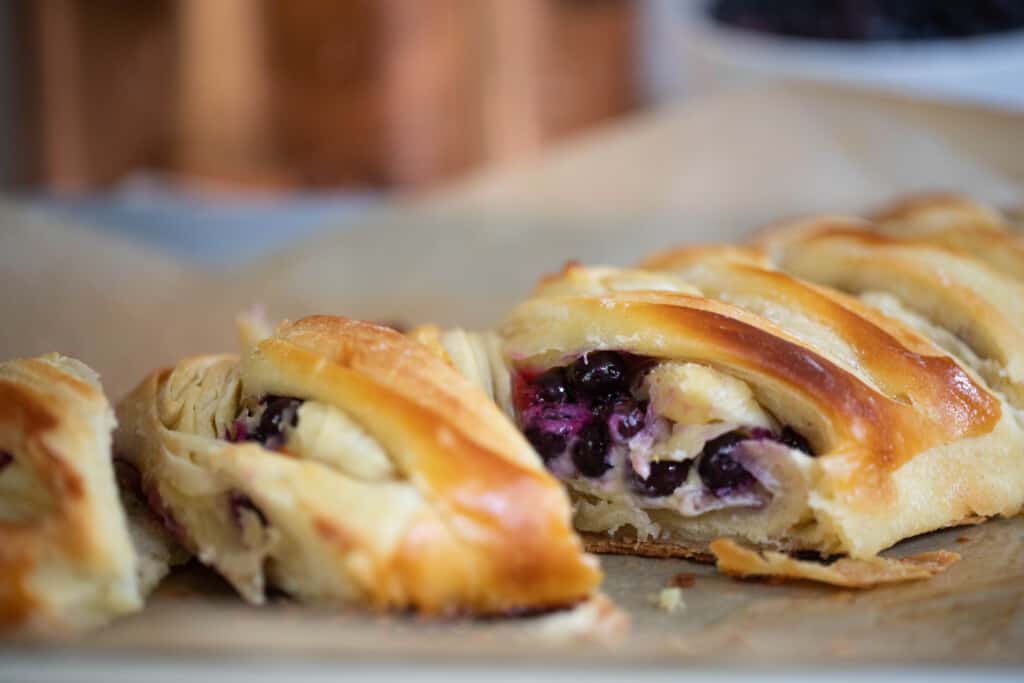
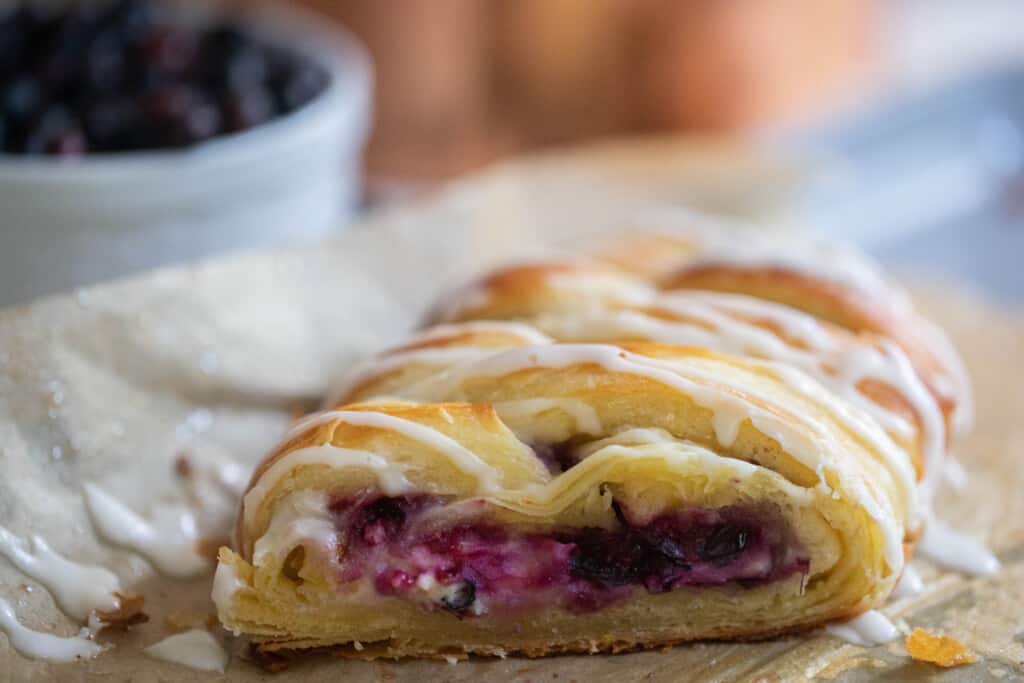
From sourdough croissants to Danish pastry, and now sourdough butter braids. This has become one of our favorite recipes. It is just like those fancy beautiful braided breads you can buy at a bakery, but made right at home with your favorite filling (sweetened cream cheese filling with fresh blueberries is my favorite) and a sourdough twist.
Lately, over on Instagram, I’ve been talking a lot about how those who are gluten sensitive can enjoy grains that have been fermented. Just because you may not be able to digest unfermented grains doesn’t mean you can never enjoy those things again.
That is why I love sourdough so much. You can find a sourdough version of just about any recipe you could desire. From brownies, to challah bread, to bagels, pizza, and more. The limits are endless. Just make sure to long ferment the dough for better digestion.
Tips
- During lamination you don’t want the dough to get too warm, so you want to work fairly quickly. The butter will just melt into the dough rather than creating the flaky layers. If the butter does get too warm, you can stick it in the fridge for 10-30 minutes and then continue working on the dough.
- The dough and the butter should be about the same temperature. This is so when you are laminating the dough the butter doesn’t push out.
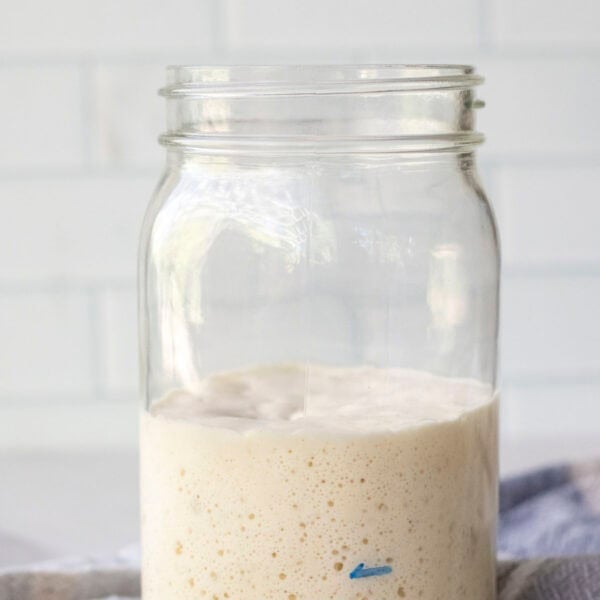
- This recipe uses natural yeast rather than commercial yeast to rise the dough. If you are totally new to sourdough, make sure to check out how to make a sourdough starter here.
- I suggest placing a baking sheet on a lower rack where the pastry braid is baking just in case any butter leaks out during baking. The pan will catch the butter, rather than possibly dripping to the bottom of the pan
This post contains affiliate links, which means I make a small commission at no extra cost to you. See my full disclosure here.
FAQ:
Some butter leakage is normal. But if it is leaking a lot something may have gone wrong during the lamination. The butter and dough may have gotten too soft making them combine together rather than creating flaking layers.
I recommend placing an empty baking sheet under the baking sheet with the braid. This will catch any butter that leaks out and prevents it from hitting the bottom of the oven causing potential issues.
They are almost identical except that danish pastry dough is more of an enriched dough (like brioche) and includes eggs.
Ingredients
Dough Ingredients:
- All purpose flour
- Sugar
- Active sourdough starter, bubbly and active
- Whole milk
- Egg
- Vanilla extract
- Salt
Butter for laminating
- 16 tablespoons cold unsalted butter
- 1 tablespoon all purpose flour
Cream Cheese Filling
- Cream cheese – I like to use my homemade Greek yogurt cream cheese since we currently have so much milk.
- Granulated sugar
- Egg yolk
- Lemon juice
- Vanilla extract
Filling ideas:
Fresh, canned or frozen fruit. If using canned fruit, make sure to drain any excess liquid. For frozen fruit, use from frozen, don’t let it thaw.
Lemon curd
Pie filling
Jam
Egg wash:
- 1 large egg white, beaten lightly with 1 tablespoon cold water
Glaze
- 1 cup confectioners’ sugar
- 2 tablespoons milk
- 1 teaspoon vanilla
- pinch of salt
Tools you may need:
Stand mixer with dough hook attachment. Could also use a hand mixer for creating the cream cheese filling.
Rolling Pin
Baking sheet – I like these stainless steel baking sheets
Parchment paper
Large bowl
Bench scraper
How To Make Sourdough Pastry Braids
Add the flour, sugar, sourdough starter, milk, egg, vanilla and salt to the bowl of a stand mixer with the dough hook attachment.
Mix on low speed for about 5 minutes or until it becomes a glossy and smooth dough. This recipe actually doesn’t need to knead for a super long time and doesn’t have to pass the windowpane test. You can also easily do this by hand. Mix and knead to make a shaggy, sticky dough. Continue to knead for about 5-10 minutes.
Form the dough into a ball and place in a large greased bowl. Cover with plastic wrap, foil, or a beeswax wrap and place in a warm place for about 4 hours.
Place the bowl in the refrigerator to continue fermenting for 8 hours, or up to 3 days.
Laminating the dough with butter
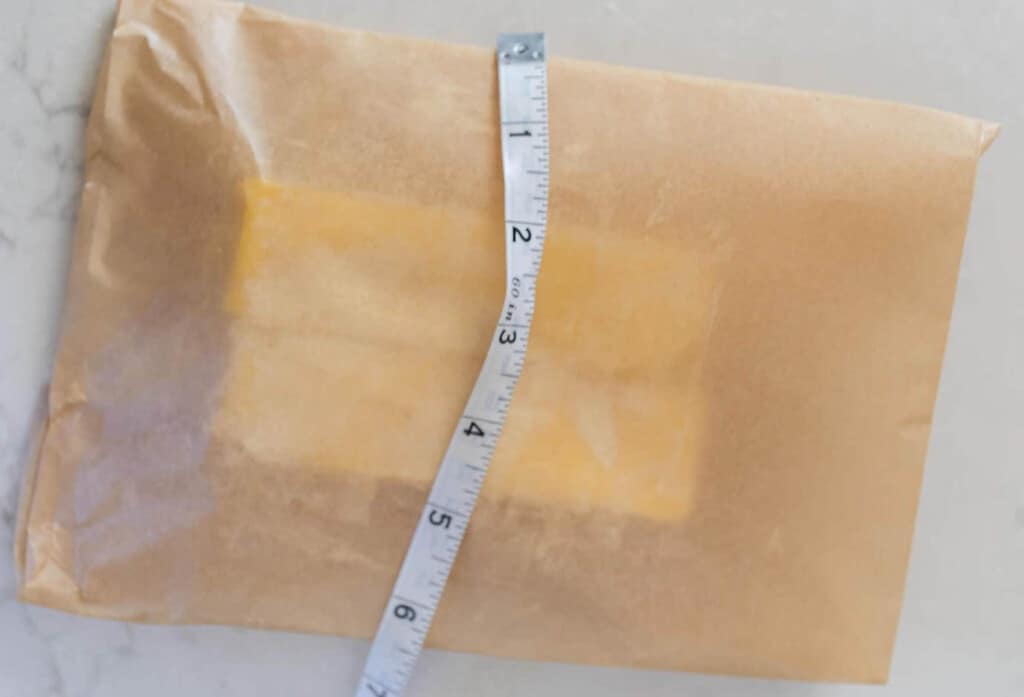
To roll the butter block out into a 6″ by 8″ rectangle, place the sticks of butter on a large piece of parchment paper. Sprinkle it with flour.
Fold the parchment paper around the butter, so that the butter will fill the entire envelope once you roll it out. You are aiming for a butter block that is 6″ by 8″. It doesn’t need to be too precise here. You just want to make sure the pastry dough can entirely encase the butter when you roll it out for laminating.
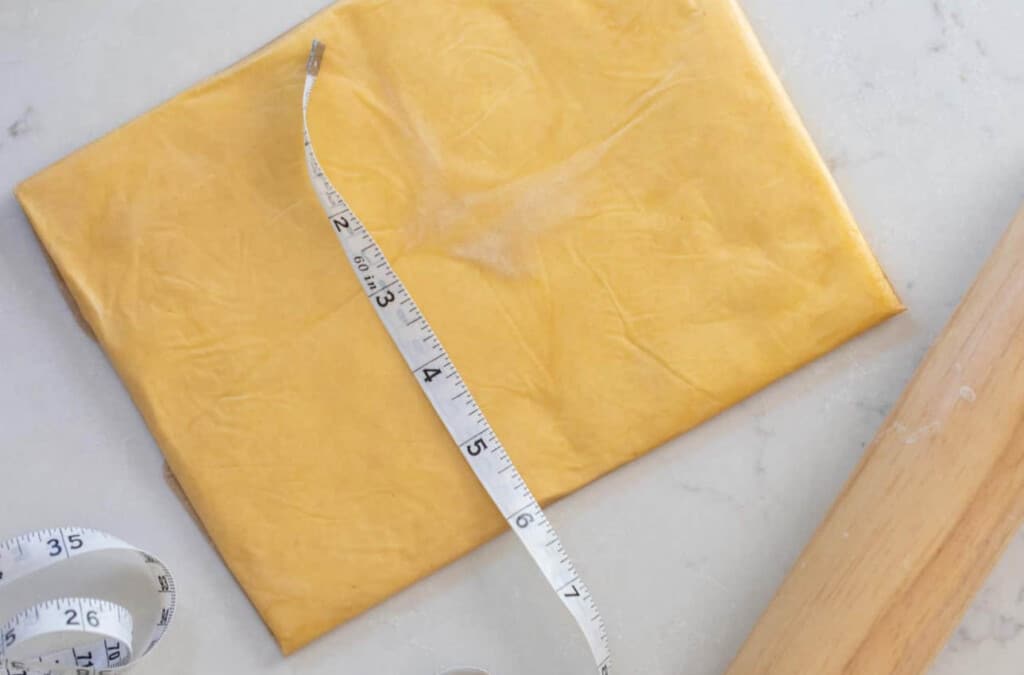
Tap out the butter with a rolling pin lightly to start to spread the butter, then roll smooth.
Chill the butter for 10 minutes. You want the butter to stay nice and cold to create the flaky butter layers. Too warm and it will just smush out. Cold butter is essential.
Remove the pastry dough from the refrigerator and place on a lightly floured surface.
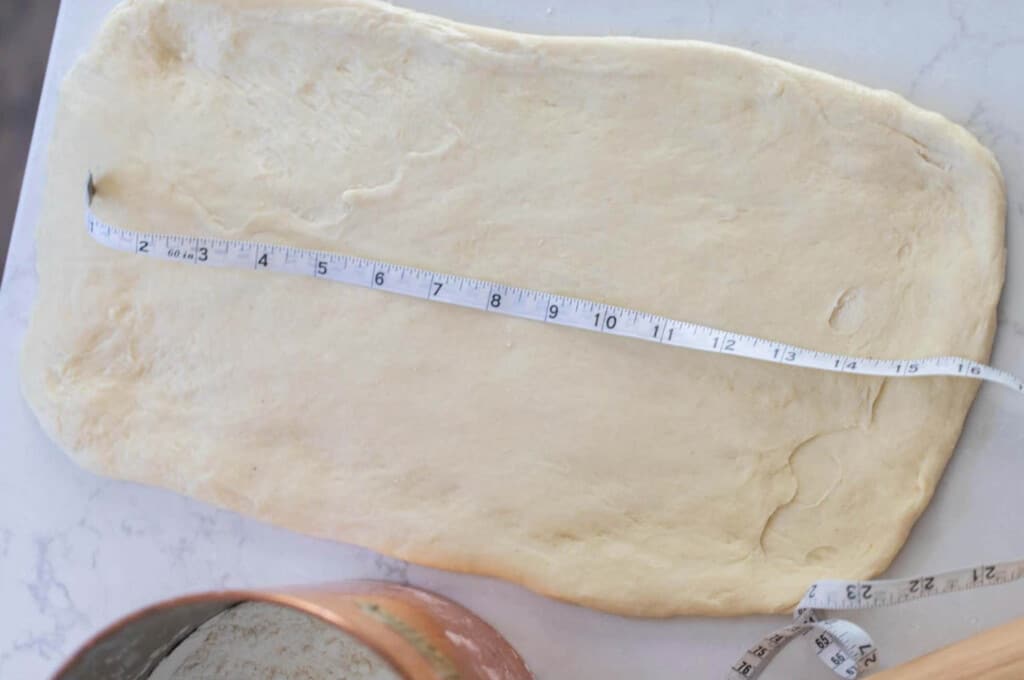
Roll it out into a 16″ by 8″ inch rectangle.
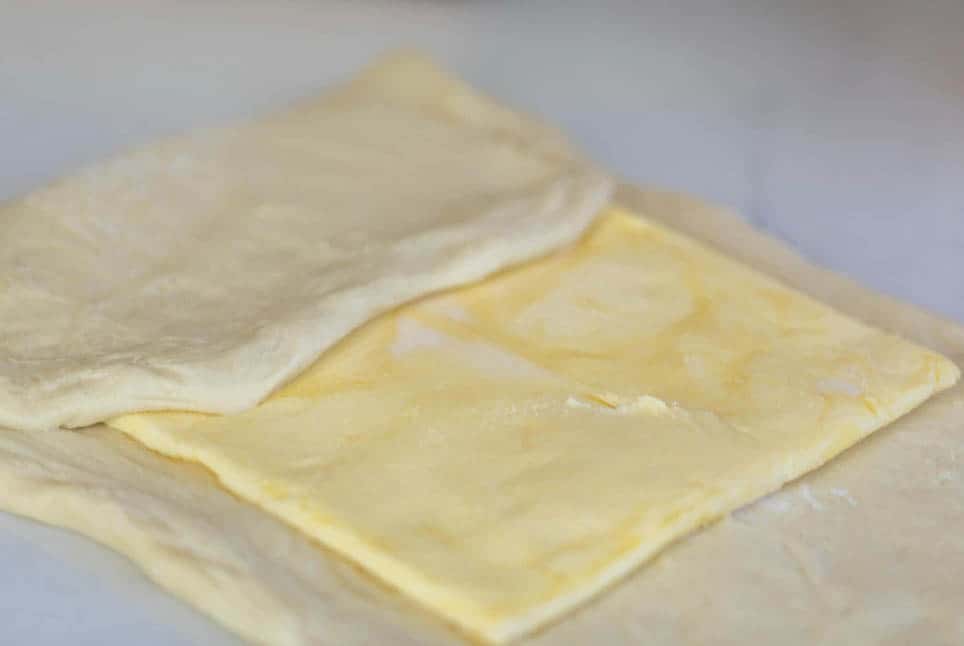
Place the butter packet in the middle of the dough. Fold the edges over, so they meet in the middle and completely encase the butter. Pinch the middle seam and sides closed, so none of the butter can escape.
First fold
Roll the dough, with the butter sealed inside, back out into a 16″ by 8″ inch rectangle on a lightly floured work surface.
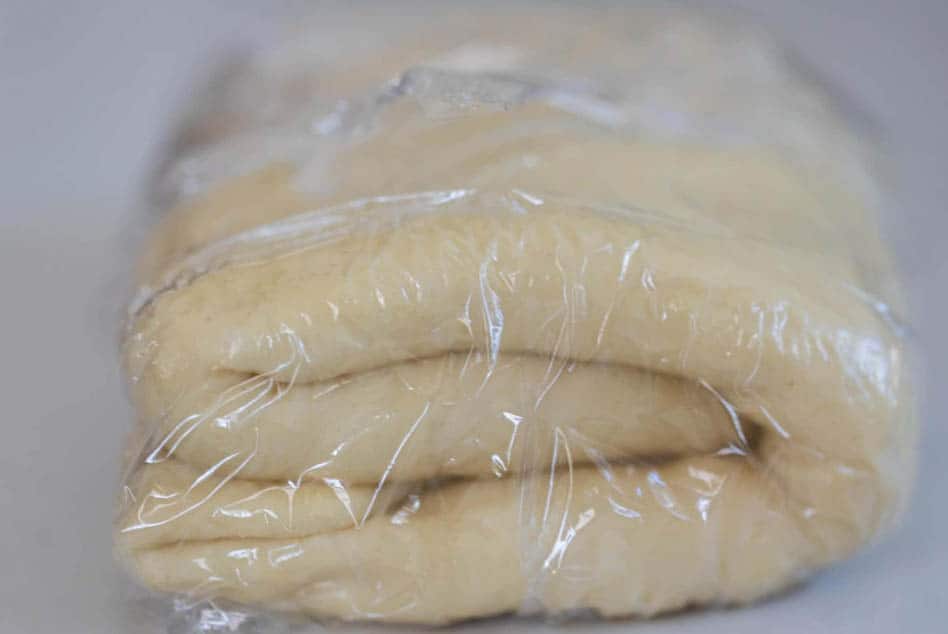
Fold each side into the center again; then fold one side over the other to make a rectangle with 4 layers of dough. (See picture)
Wrap the dough in plastic wrap and put it back in the refrigerator for 30 minutes.
Second fold
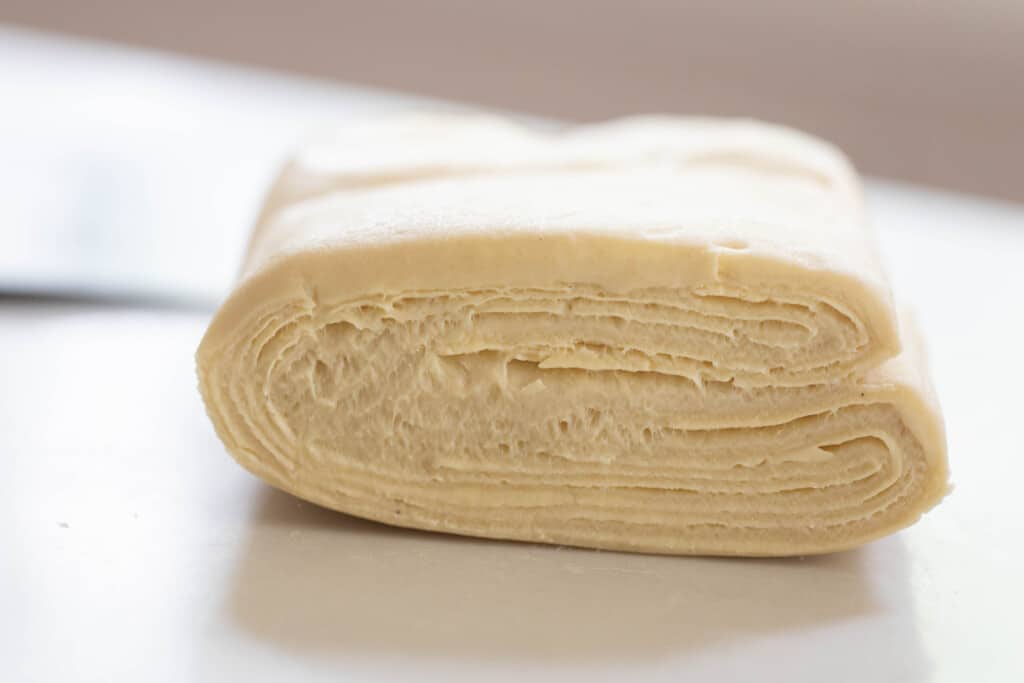
Roll the dough out into another 16″ by 8″ inch rectangle.
Again, fold each side into the center; then fold one side over the other to make a rectangle with 4 layers of dough.
Wrap the dough in plastic wrap and put it back in the refrigerator for 2 hours up to 12 hours.
Make the pastries
Preheat the oven to 400 degrees.
Divide the dough in half.
Put the half you aren’t working with back in the refrigerator, so that it doesn’t get warm while you are shaping the other.
Roll the pastry dough out into a 12” by 9” rectangle. Visually divide the dough into three equal sections. You could also mark it with small cuts, if desired.
Place on a prepared baking sheet.
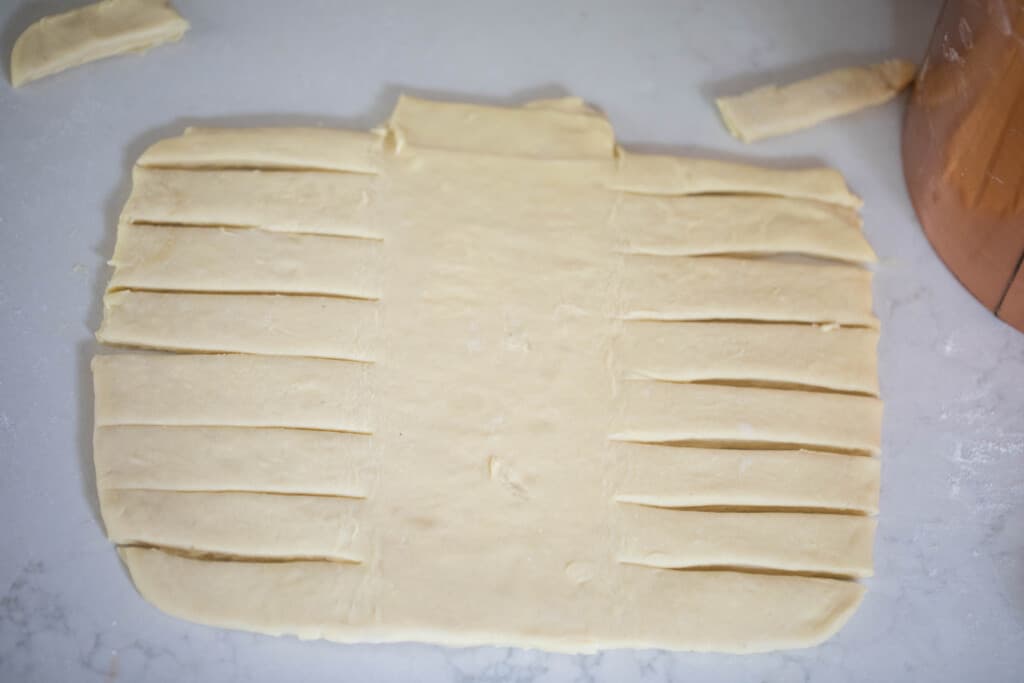
Using a sharp knife or pizza cutter, cut 10 strips on each side of the filling, avoiding cutting into the center of the dough. Remove the strips from the top (leaving the center portion). This gives you a bit of dough to encase the filling.
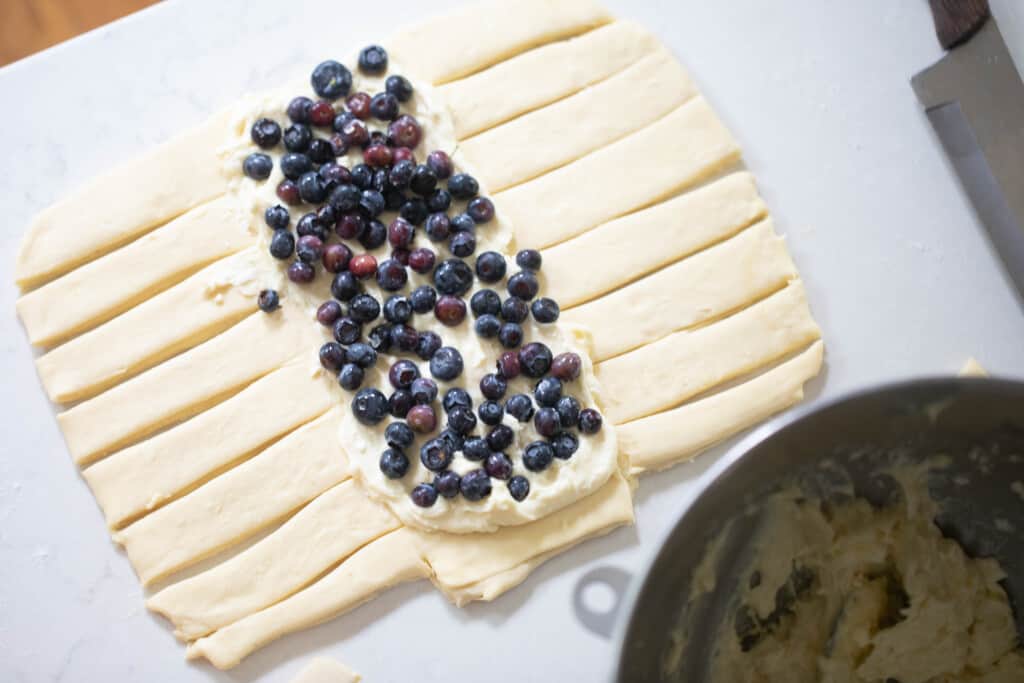
Spread the cream cheese filling down the center of the long side. Top it with fruit, jam or pie filling.
Fold the remaining top piece of dough down over the filling.
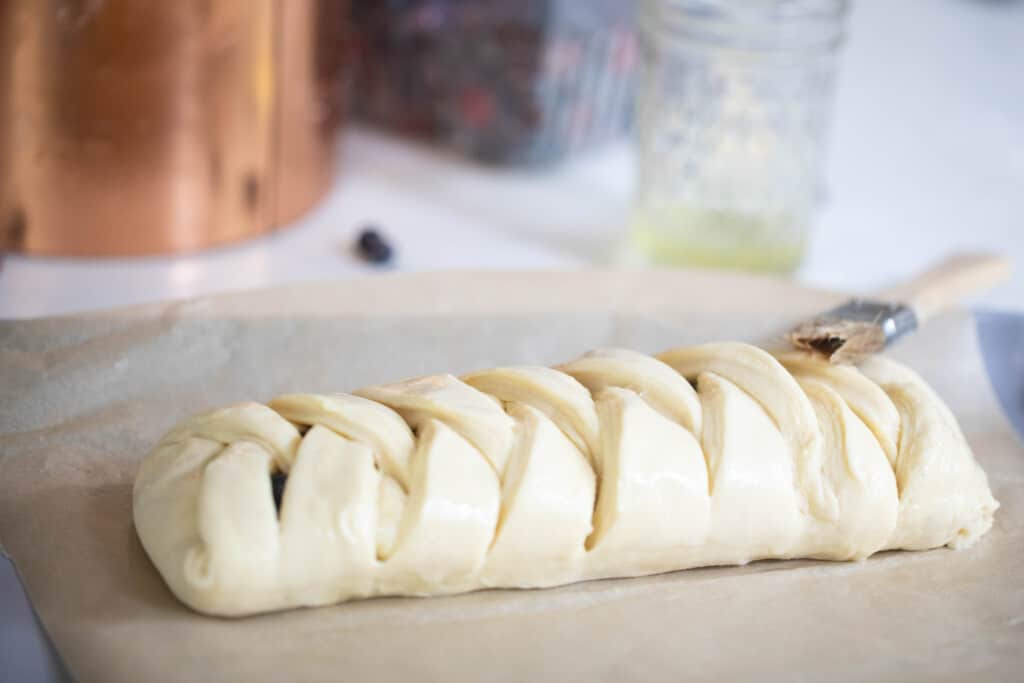
Next fold the strips to the center, alternating sides to create a braid. You can choose your favorite braiding technique. Angle them down a bit, so that by time you get to the bottom, there is enough dough to encase the bottom of the pastry braid.
Chill for one hour.
Brush with an egg wash.
Bake for 20-22 minutes, or until golden brown.
Spread the glaze on top. (optional)
Serve warm.
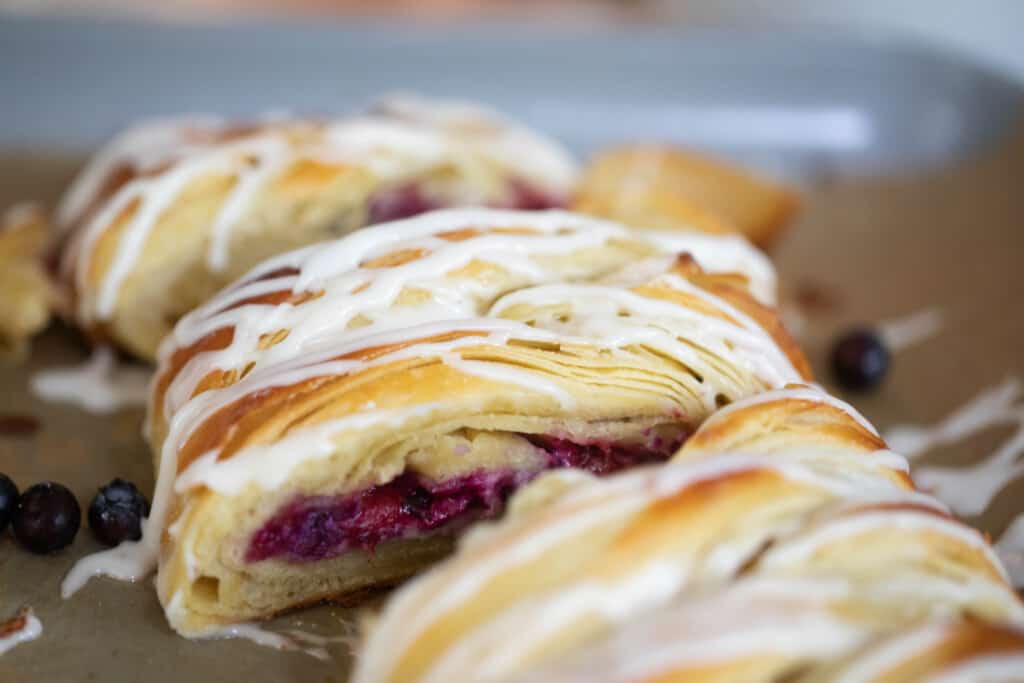
Storage:
Store in an air-tight container in the fridge for up to 7 days. Can also be frozen for up to 3 months. Allow to cool completely, wrap in plastic wrap and place in a freezer safe ziploc bag. Remove as much air as possible.
Find More Delicious Sourdough Recipes:
- Sourdough Challah Recipe: A soft and fluffy traditional Jewish bread
- Cinnamon Raisin Sourdough Bread
- Sourdough Lemon Poppy Seed Muffins
- Sourdough Snickerdoodle Cookies
If you try this recipe and love it, I would love if you could come back and give it 5 stars! Tag me on Instagram @farmhouseonboone .
Sourdough Pastry Braid

Video
Ingredients
Dough
- 3 cups all purpose flour, 420 grams
- 1/4 cup sugar, 50 grams
- 1/2 cup sourdough starter, bubbly and active (113 grams)
- 3/4 cup whole milk, 183 grams
- 1 large egg
- 1/2 teaspoon vanilla
- 1 teaspoon salt, 5 grams
Butter for laminating
- 16 tablespoons cold unsalted butter, 2 sticks or 227 grams
- 1 tablespoon all purpose flour, 9 grams
Cream Cheese filling
- 8 ounces cream cheese
- 1/4 cup granulated sugar
- 1 large egg yolk
- 1 teaspoon lemon juice
- 1/2 teaspoon vanilla extract
Filling ideas:
- 3/4 cup fresh, canned or frozen fruit
- Lemon curd
- Pie filling
- Jam
Egg wash:
- 1 large egg white, beaten lightly
- 1 tablespoon cold water
Glaze
- 1 cup confectioners’ sugar
- 2 tablespoons milk
- 1 teaspoon vanilla
- pinch salt
Instructions
- Add the flour, sugar, sourdough starter, milk, egg, vanilla and salt to the bowl of a stand mixer with the dough hook attached. Mix on low speed until the dough becomes smooth and glossy. You can also easily do this by hand. Mix and knead to make a shaggy, sticky dough. Continue to knead for about 5-10 minutes
- Form the dough into a ball and place in a bowl. Cover with plastic wrap, foil, or a beeswax wrap and place in a warm spot for about 4 hours.
- Place the bowl in the refrigerator to continue fermenting for 8 hours, or up to 3 days.
Laminating the dough with butter
- To roll the butter block out into a 6" by 8" inch rectangle, place the sticks of butter on a large piece of parchment paper. Sprinkle it with flour.
- Fold the parchment paper around the butter, so that the butter will fill the entire envelope once you roll it out. You are aiming for a butter block that is 6 inches by 8 inches. You don’t need to be too precise here. You just want to make sure the pastry dough can entirely encase the butter when you roll it out for laminating.
- Tap out the butter with a rolling pin lightly to start to spread the butter, then roll smooth.
- Chill the butter for 10 minutes. You want the butter to stay nice and cold to create the flaky butter layers. Too warm and it will just smush out. Cold butter is essential.
- Remove the pastry dough from the refrigerator and place on a lightly floured surface.
- Roll it out into a 16" by 8" inch rectangle.
- Place the butter packet in the middle of the dough. Fold the edges over, so they meet in the middle and completely encase the butter. Pinch the middle seam and sides closed, so none of the butter can escape.
First fold
- Roll the dough, with the butter sealed inside, back out into a 16" by 8" inch rectangle.
- Fold each side into the center again; then fold one side over the other to make a rectangle with 4 layers of dough. (See picture)
- Wrap the dough in plastic wrap, and put it back in the refrigerator for 30 minutes.
Second fold
- Roll the dough out into another 16" by 8" inch rectangle.
- Again, fold each side into the center; then fold one side over the other to make a rectangle with 4 layers of dough.
- Wrap the dough in plastic wrap, and put it back in the refrigerator for 2 hours, up to 12 hours.
Make the pastries
- Preheat the oven to 400 degrees.
- Divide the dough in half. Put the half you aren’t working with back in the refrigerator, so that it doesn’t get warm while you are shaping the other.
- Roll the pastry dough out into a 12” by 9” rectangle. Visually divide the dough into three equal sections. You could also mark it with small cuts, if desired.
- Spread the cream cheese filling down the center. Top it with fruit, jam or pie filling.
- Using a sharp knife, cut 10 strips on each side of the filling, avoiding cutting into the center. Remove the outside strips from the top. This gives you a bit of dough to encase the filling.
- Fold the remaining top piece of dough down over the filling.
- Next, fold the strips to the center, alternating sides to create a braid. Angle them down a bit, so that by time you get to the bottom, there is enough dough to encase the bottom of the pastry braid.
- Chill for one hour.
- Brush with an egg wash.
- Bake for 20-22 minutes, or until golden brown.
- Spread the glaze on top. (optional)
- Serve warm.
Notes
- During lamination you don't want the dough to get too warm, so you want to work fairly quickly. The butter will just melt into the dough rather than creating the flaky layers. If the butter does get too warm, you can stick it in the fridge for 10-30 minutes and then continue working on the dough.
- The dough and the butter should be about the same temperature. This is so when you are laminating the dough the butter doesn't push out.
- I suggest placing a baking sheet on a lower rack that where the pastry braid is baking, just in case any butter leaks out during baking. The pan will catch the butter, rather than possibly dripping to the bottom of the pan
Nutrition
Nutrition information is automatically calculated, so should only be used as an approximation.




Omg these are delicious , I made homemade raspberry preserves to spread on the cream cheese spread , I will be making these a lot , thank you for this amazing recipe
I’d like to try this but a little confused. Does this make two braids? Otherwise, when divide the dough in half and start assembling, what happens to the other half that you put back in the fridge??
Yes, it makes two.
Is the amount of butter listed for both braids or just one?
Thanks!
Both.
I made these and… wow! Awesome!!
Much easier than I thought!
I missed the last fridge step so one was a bit softer when they went into the oven but still came out great!
Question- can this pastry dough be used for, say, apple turnovers?
Thanks
This was so delicious!! I wanted to have it right away in the morning before my kids went to school, so I assembled the braids the night before, kept in the fridge overnight, and put directly into the preheated oven in the morning. They turned out perfectly! Thanks for the amazing recipe, Lisa!
After the whole process is done, instead of chilling in the fridge for an hour, do you like you could freeze for a later date and just pull it out when you want to bake it?
Probably!
I have done this with excellent results! Just made an apricot/peach braid, and a strawberry/blueberry braid, freeing for when company comes next month! I defrosted completely in the refrigerator overnight before baking for 22 minutes according to directions. Crisp, puffy and delicious!
This looks amazing! Do you think it could work with cold coconut oil too? I’ve had to ditch dairy for my baby but am dying for a sweet like this!
I haven’t tried it, but it would probably work!
This was very tasty, and my first attempt at a laminated dough. Only issue for me was that I had a lot of butter leakage, resulting in a smoky mess in my kitchen 🙂 probably the result of my technique? I also failed to refrigerate it for the additional hour after I did the braid, which could have contributed.
I last comment would be that I baked it for 26 minutes in a convection oven, and the center portion was still not fully cooked. Probably a variation of my high elevation and my oven. Regardless, overall this was an easy recipe, and I’m eating the whole thing 🙂
The last hour of refrigeration really helps that butter! This is a challenging recipe, so with practice you will become a pro!
This recipe was absolutely fantastic and a hit for Christmas! My husband requests a cheese danish once a year for Christmas and for the last 7 years, I have used a different recipe and haven’t been happy with it, but I tried this one and it was MUCH easier than the previous recipe I was using and it yielded a much better result. It takes a bit of planning for the timing, but overall – it was easy to follow and incredibly delicious! I was worried because after leaving in the fridge for the ferment, the dough was pretty firm and felt tough, however after rolling it out, it got much more pliable. The only change I did was use maple sugar instead of white and powdered sugar. I did follow the recipe and placed the braid in the fridge for an hour (and the others a left in there a around 12 hours and then the other for a little over a day and they still baked great). The other danish recipe you have, for the individual danishes, says to leave them out to puff for an hour – which I did for my old danish recipe so I wasn’t sure what the difference between the braid and the individuals were. Leaving in the fridge was totally fine though. Thank you for this recipe Lisa, it was great!
This looks fantastic!! Do you think the recipe would work well if I prepared it up the last hour of refrigeration and kept it in the fridge overnight to bake first thing in the morning? I’d love to have this Christmas morning, but don’t want to have to do much. Haha!
Totally don’t blame you. You can totally make the pastry dough days before you are ready to make this recipe. I wouldn’t put it together until the morning of. I would be afraid the pastry would get soggy if the filling sat on the pastry overnight.
These turned out delicious! I was set on making these ahead of time so actually shaped them Saturday evening for Monday morning. Don’t know unless you try, right? Haha! Anyways, the bottoms were still crisp and delicious along with the rest of the flaky dough. Such a great recipe! I will be making these again for sure!
Thank you so much for all of your wonderful recipes! Let me know if you will ever have a cookbook out. I would definitely buy it in a heartbeat! 💗
Thank you for your kind words! So glad you enjoy my recipes! A cookbook may be in the works, so stay tuned!