A sourdough baguette is the perfect side to nearly any dinner. With a perfect crispy crust and chewy interior, you’ll love the savory tang of this classic French bread.
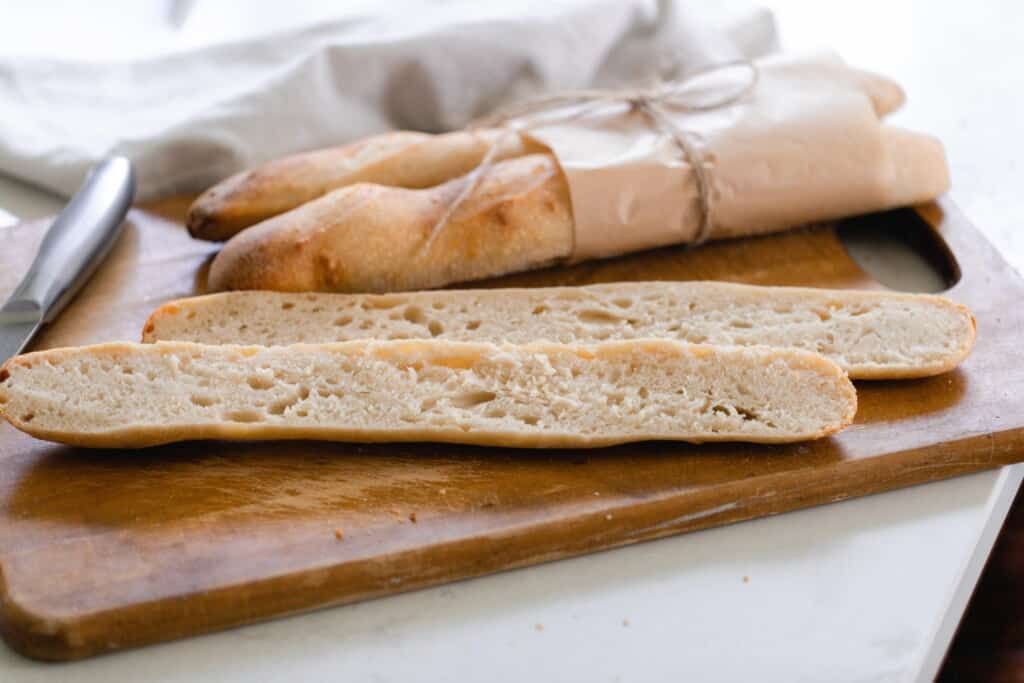
I’ve been experimenting with sourdough bread for a few years now.
And every time I try something new, I am always so blown away at just how much you can do with a sourdough starter.
These sourdough baguettes are no exception!
I always keep bread on hand as it is a staple side dish to many dinners here at the farmhouse. A fresh slice of sourdough baguette with homemade herb butter is quickly becoming the bread of choice with the kids.
Although it does take some patience to make these and get it just right, it will be worth it once you get it down!

What is a Sourdough Baguette?
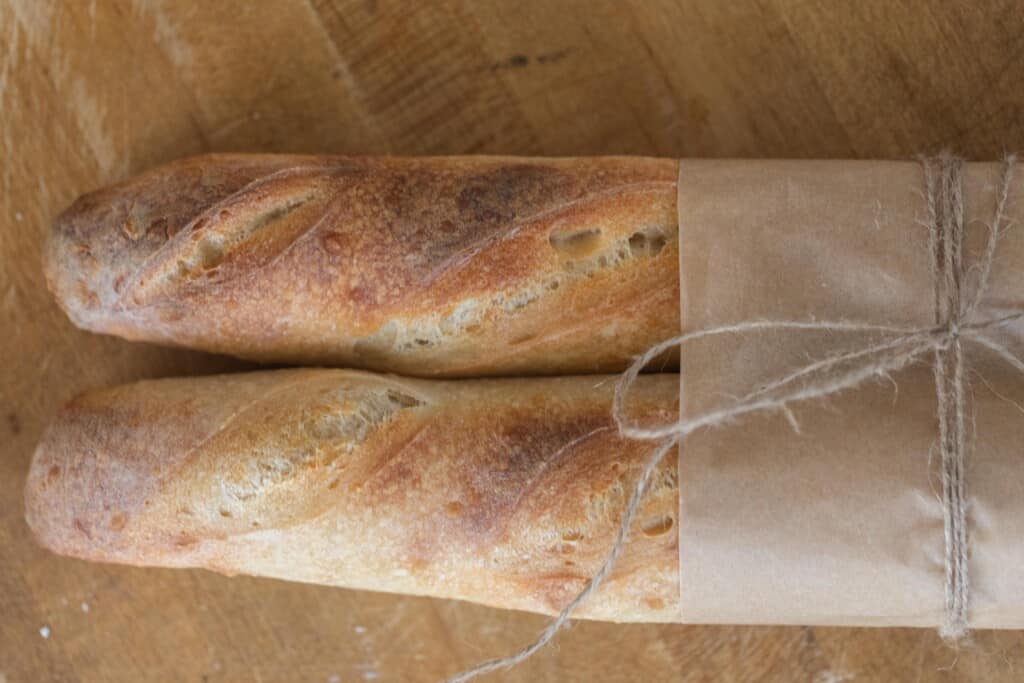
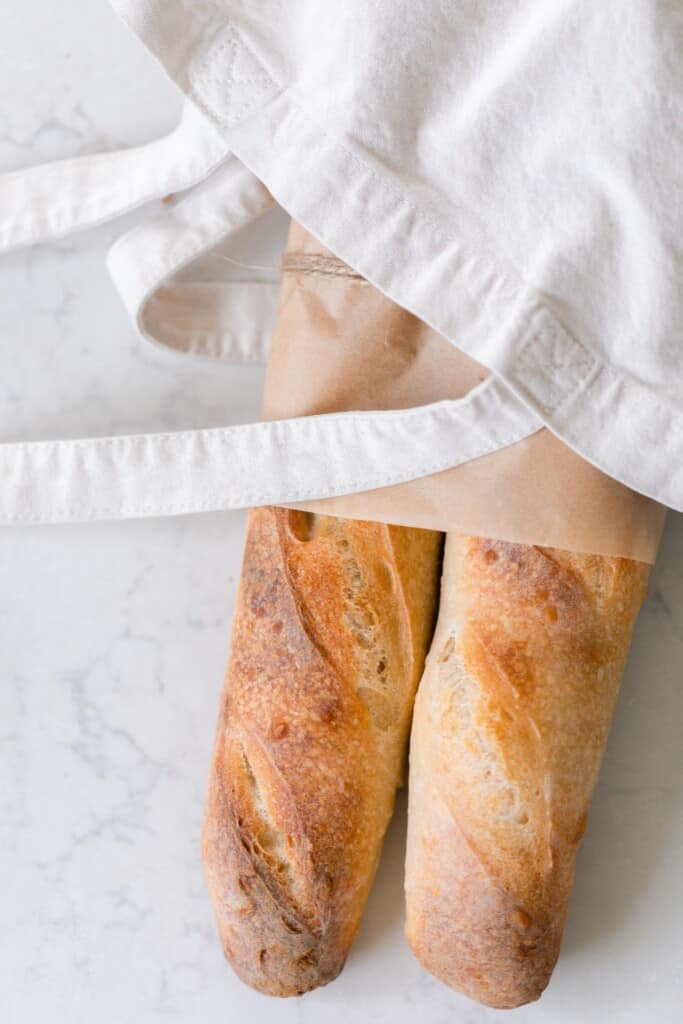
A baguette is a French bread that is known for its long, thin shape and golden crust.
Traditionally, French baguettes are made with yeast. However, using sourdough starter as your leavening agent adds a delicious, tangy flavor that really takes this bread over the top!
This post contains affiliate links, which means I make a small commission at no extra cost to you. See my full disclosure here.
Why you’ll love this recipe:
Flavorful: Traditional baguettes are made with a few staple ingredients. Having the sourdough starter added gives this bread a bit more of that sourdough tang we all know and love! If you want even more flavor, these are perfect for dipping into this bread oil recipe.
Nutritious: Since you are using sourdough, you get all the benefits of fermented grains. This means it is more digestive and the nutrients are more available for your body to absorb.
Impressive: You’ll impress all of your dinner guests when you have a beautiful, golden crusted sourdough baguette on the dinner table.
Tips for Success:
- You’ll need an active sourdough starter for this recipe. New to sourdough? Click here to learn how to make a sourdough starter and here for how to care for one.
- During the rising process and bulk fermentation, make sure to cover the dough with a damp towel or plastic wrap to avoid any unpleasant crusts from forming.
- The time it takes for your dough to double is not an exact science. There are many environmental factors that play a role. Rising times will vary for everyone.
FAQ:
What is the difference between a French baguette and a sourdough baguette?
The only difference is your leavener. Sourdough uses a special starter made with flour and water, while a traditional French baguette is normally made with commercial yeast.
You’ll still get the same shape and crust, but you’ll also get a more robust flavor with sourdough.
Why is sourdough bread better for you?
Thanks to the fermented grains in sourdough, it is typically easier to digest. That also means it’s easier on your body to absorb the vitamins and minerals in the bread.
How do you eat a sourdough baguette?
We love to have a piece of sourdough baguette as a side to dinner. It can go with almost anything, but we especially love it with soup, like my Roasted Red Pepper And Tomato Soup, and even eggs!
Adding a little herb butter on a warm slice will take it over the top.

Ingredients:
All Purpose Flour
Water
Sourdough Starter – make sure it is active and bubbly!
Salt – Sea salt is best.
Tools you may need:
Baguette pan or Baker’s couche
How to make Sourdough Baguettes
Feed your sourdough starter 4-12 hours before starting the bread so it is active and bubbly once you start the bread.
Hydrate the flour

Combine your warm water and flour in a large bowl. You’ll want to let this mixture rest for 30 minutes for a process called autolyse.
Using wet hands, dimple in your sourdough starter to the rested flour and water mixture.
Sprinkle salt on top.

Mix and Rest
Using your hands, mix the dough for about 5 minutes so the dough comes together.
Cover the dough with plastic wrap or a damp towel and let the dough rest for 30 minutes.
Stretch and Fold
After the resting period, this dough will need 6 rounds of stretching and folding in order to develop the gluten and obtain a nice rise.
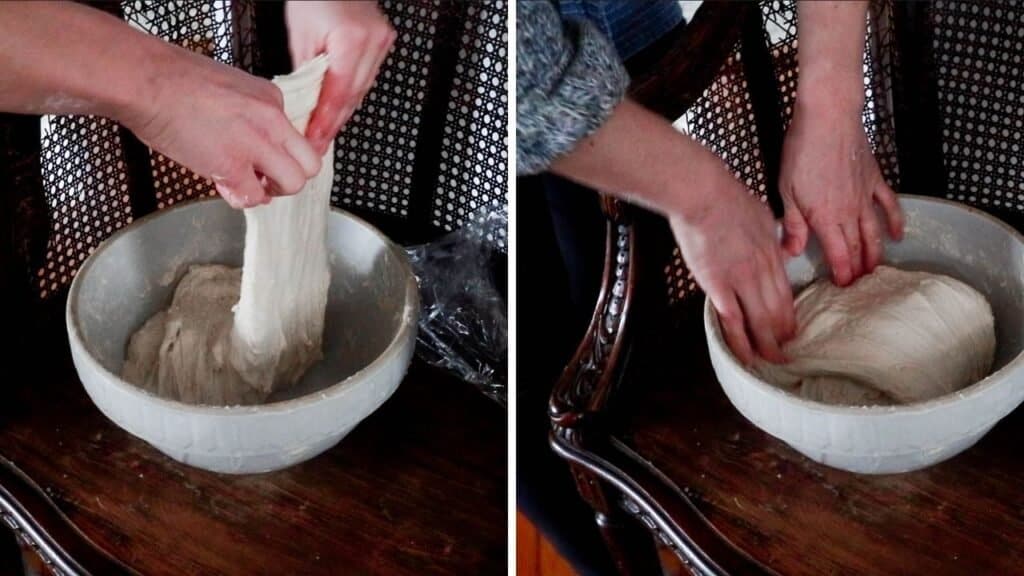
With the dough in the bowl, grab the edge of the dough firmly and pull up – stretching it upwards. Then place the dough in your hands into the center.
Turn the bowl about a quarter turn and do this stretch and fold again. Repeat this process one to two more times. This is considered one stretch and fold round.
Repeat according to the directions below. If the dough is too sticky, you can dip your hand in water.
First 3 stretch and folds – every 15 minutes.
Last 3 stretch and folds – every 30 minutes.
Bulk Ferment
When you are finished with the 6 rounds of stretch and folds, cover your dough with a wet towel or plastic wrap. Allow it to bulk-ferment until it has doubled.
The timing for this will vary greatly depending on many factors – temperature, hydration, maturity of your starter, etc.
If you’d like, you can let this step go longer for further health benefits. I typically do this in the morning and let it go all day.
When the dough is ready, there will be small bubbles on the surface.
Shape your dough
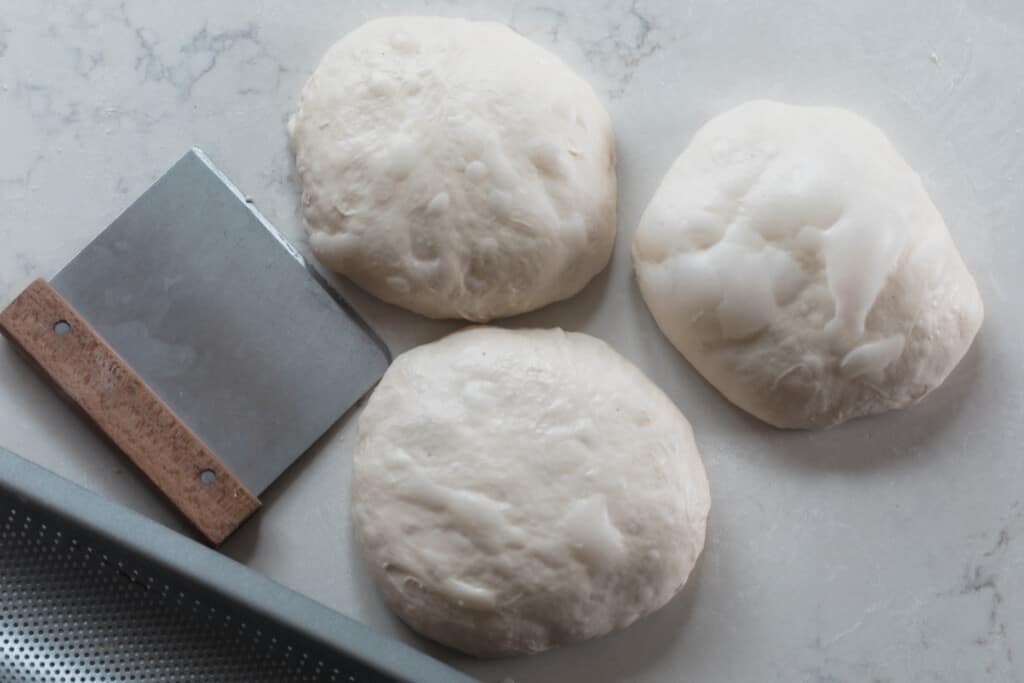
Divide the dough into three equal parts.
Pre-shape by providing slight tension and creating a ball with each piece of dough. Allow to bench rest for about 20 minutes on the counter.
Shape the baguette dough by gently stretching the dough out into a rectangle about 10” long by 5” wide.
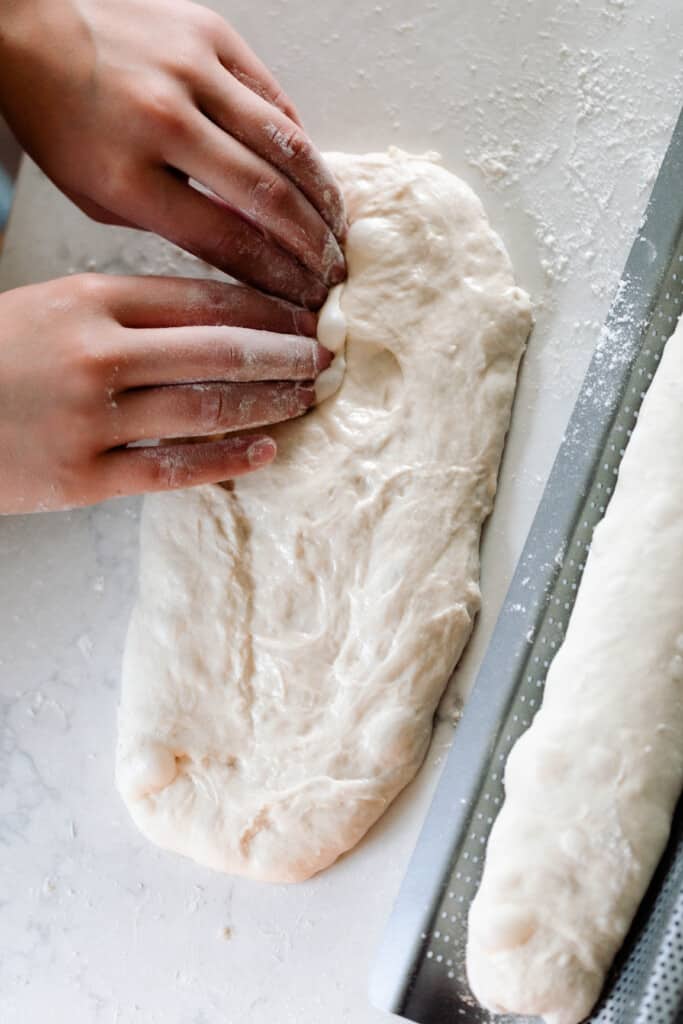
Fold one long side into the middle and press your fingers into the seam all the way down it to seal it. Repeat with the other long edge, so that there is one seam in the middle where the two sides meet.
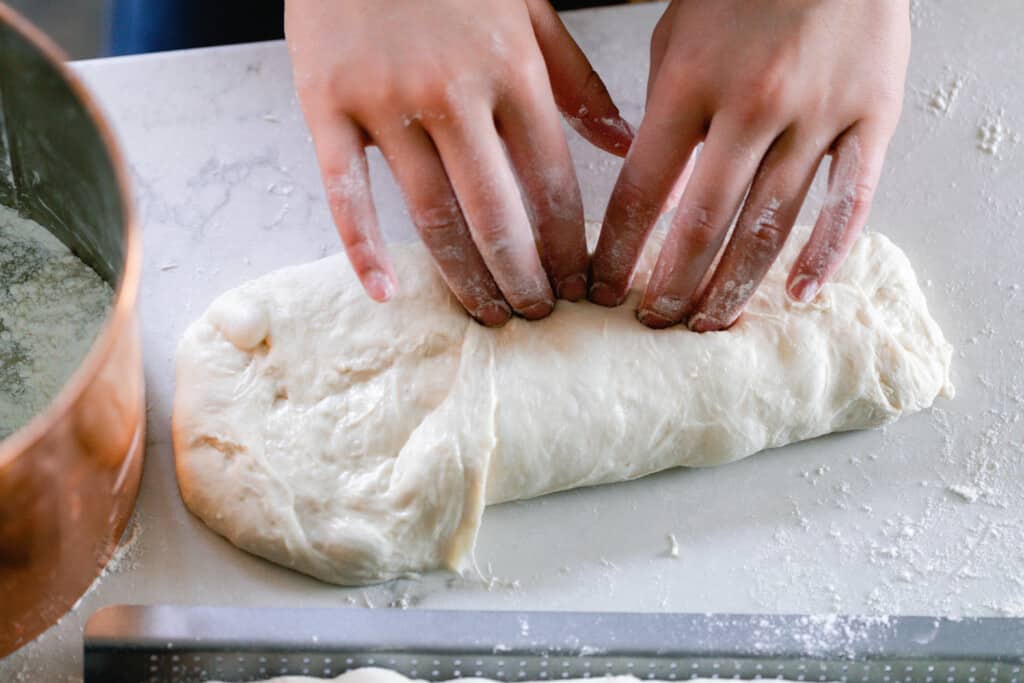
Roll the dough over, so that it is seam side down, and gently create tension along the seam by pulling it against the counter. This will also elongate the shape as you continue to pull the dough.
I like mine to be about 14” for a final length, so they can rest in my perforated baguette mold.
Repeat for the other two pieces of dough.
Let your shaped dough rise
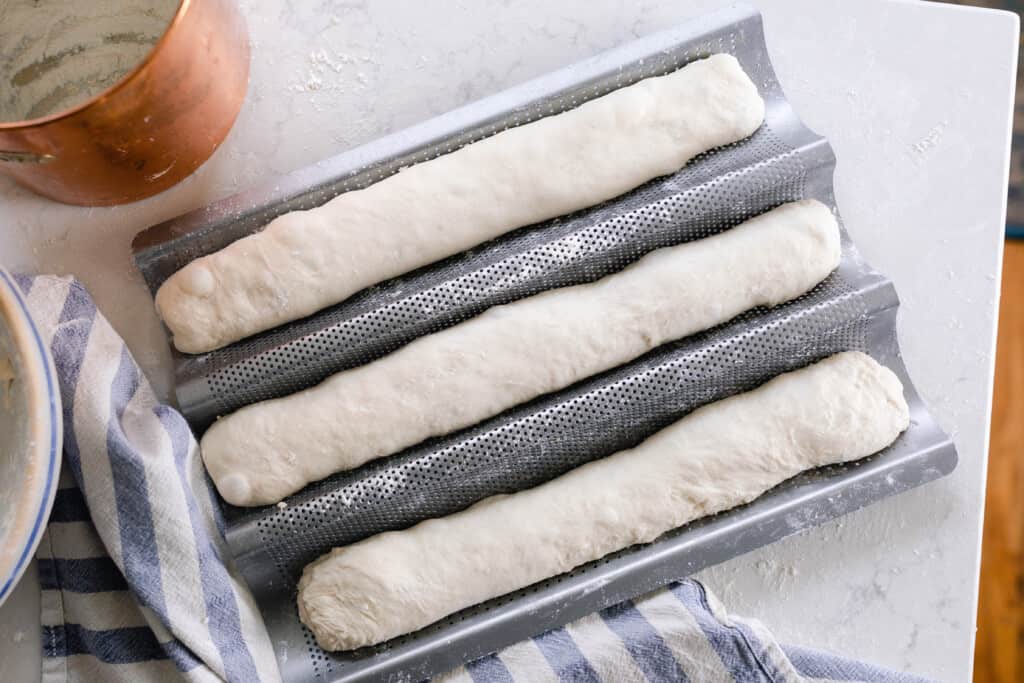
Place your shaped baguettes in a baker’s couche or baguette tray or mold.
A baker’s couche is a canvas cloth used to shape your baguettes. You could also make a DIY version using a tea or kitchen towel and a few clothes pins to help it keep its shape. If using a couche or cloth, you may want to place it all on a baking sheet so you can easily transport it. Please note: Do NOT put your couche in the oven.
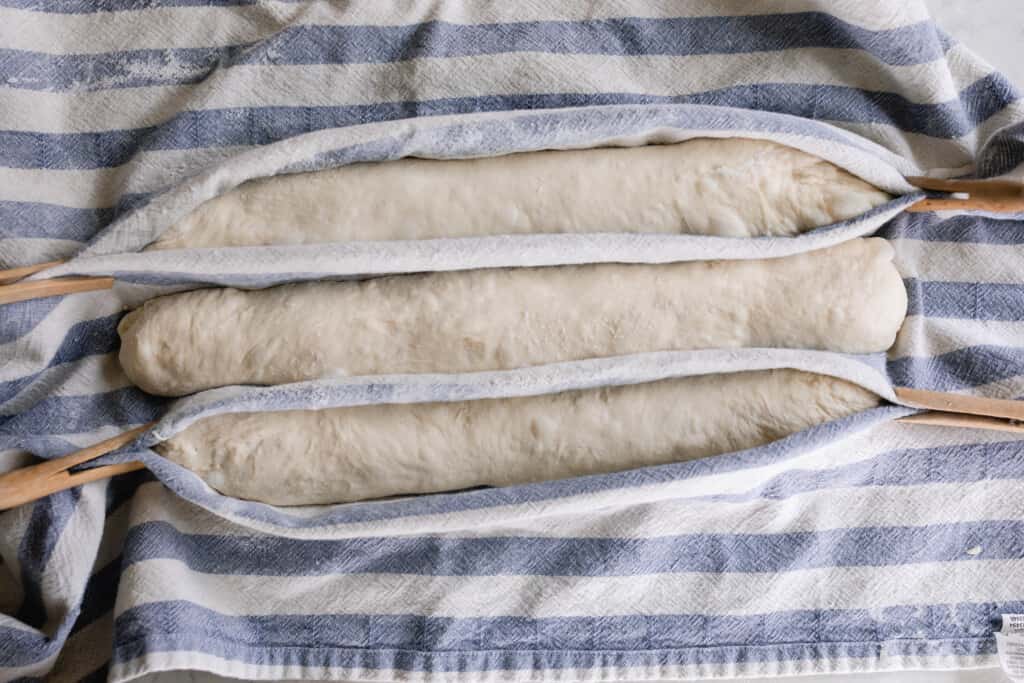
Cover with plastic wrap or place inside a large plastic bag or trash bag and refrigerate overnight or up to 36 hours.
Prep your oven and baguettes
The next day, preheat a baking stone (optional) at 500 degrees for about an hour. Although I don’t actually bake directly on the pizza stone, I like to have it in there to keep the oven very hot when I put the cold baguettes in. This helps them to poof up, also known as oven spring.
Get a pot or kettle of boiling water going.
On the rack at the bottom of the oven, add a cast iron skillet.
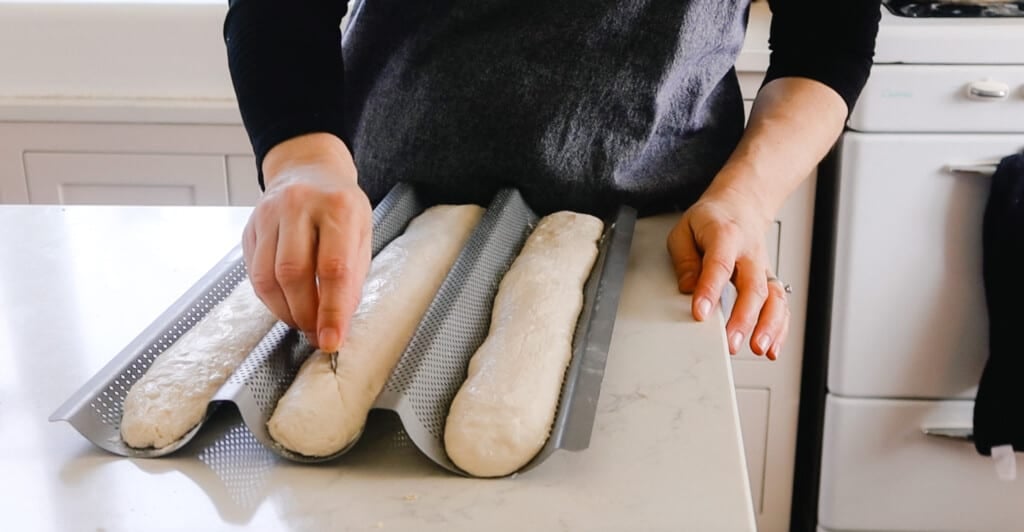
Remove the baguettes from the fridge. Score the top of the dough with 3 or 4 fairly deep scores cut at a 45 degree angle.
Fill the cast iron skillet you placed in your oven with boiling water.
This creates steam in the oven, which gives you oven spring. You can also use a long cast iron dutch oven like this one or this is another great option.
Basically, you have two options. You can either make your whole oven steamy with boiling water and heat, or enclose the baking process in a dutch oven.
Of course, baguettes are too long to fit in a regular sized dutch oven, which is why I opt for the stone and steam method.
Bake

Spritz the top of the baguettes with water for browning.
Load the baguettes onto the stone. I leave mine in the perforated baguette pan, and just place that on top of the stone. If you use a couche to shape your dough, remove the baguettes from the couche and place them directly on the stone. Do NOT put the couche in the oven.
Carefully open the oven door, as you’ll likely have quite a bit of steam come out once opened.
Reduce the heat to 450 degrees and bake for 35 minutes. In my oven, I achieve the best browning when I rotate the baguettes about 20 minutes into the baking process.
Enjoy!
Troubleshooting:

Crust is lacking crisp and golden color:
There could be a couple of factors at play here, but the most likely culprit is lack of moisture in the oven. Adding the boiling water to your oven may seem like overkill, but it is essential in developing a crisp, golden crust.
The starches in your dough will eventually absorb the moisture from the oven. With the right amount, the baguette will form a starch-like gel on the outside. This eventually turns into your crunchy crust.
The right moisture level makes all the difference in a perfect crust.

The inside of the bread is dense after cutting into it:
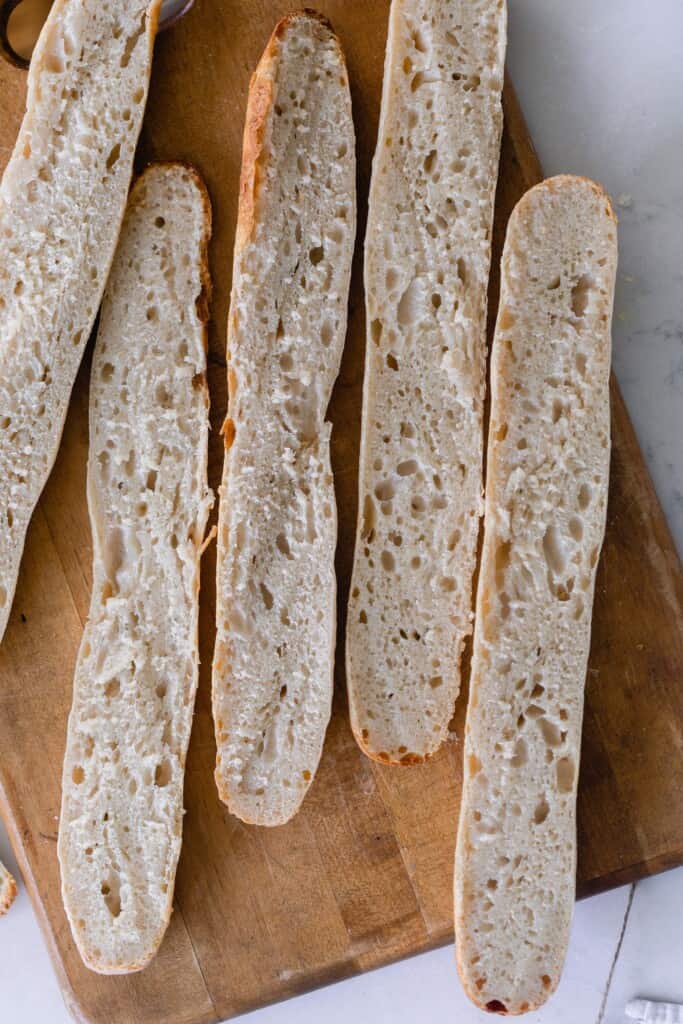
Dense bread without that airy crumb tends to indicate a lack of yeast activity, meaning your dough did not proof long enough. Don’t forget – the bulk ferment may take a lot longer depending on temperature and other environmental factors.
Baker’s Schedule:
8 a.m. – Feed sourdough starter.
12 p.m. – Combine your warm water and flour. You’ll want to let this mixture rest for 30 minutes for a process called autolyse.
12:30 p.m. – Add sourdough starter and salt. Mix dough. Let rest for 30 minutes.
1 p.m. – Begin 6 rounds of stretches and folds according to the schedule above.
3 p.m. – Cover your dough with a wet towel or plastic wrap. Allow it to bulk-ferment until it has doubled.
8:30 p.m. (or sooner/later) – Shape your dough into 3 equal parts and shape into balls. Let rest for 20 minutes.
9 p.m. – Complete final shaping of dough and place it in a baguette mold or baker’s couche. Cover and refrigerate overnight or up to 36 hours.
9 a.m. the next morning – Prep your oven and baguettes and bake!
More sourdough bread from the farmhouse
- Easy Artisan Sourdough Bread
- Jalapeño Cheddar Sourdough Bread
- Sourdough Ciabatta Bread
- Rosemary Sourdough Bread
- Sourdough Rye Bread
If you try this recipe and love it, I would love if you could come back and give it 5 stars! Tag me on Instagram @farmhouseonboone
Sourdough Baguette Recipe

Ingredients
- 625 grams all purpose flour
- 450 grams water
- 100 grams sourdough starter
- 13 grams salt
Instructions
- Feed your sourdough starter 4-12 hours before starting the bread so it is active and bubbly once you start the bread.
- Combine your warm water and flour in a large bowl. You’ll want to let this mixture rest for 30 minutes for a process called autolyse.
- Using wet hands, dimple in your sourdough starter to the rested flour and water mixture.
- Sprinkle salt on top.
- Using your hands, mix the dough for about 5 minutes so the dough comes together.
- Cover the dough with plastic wrap or a damp towel and let the dough rest for 30 minutes.
- Complete 6 rounds of stretch and folds (First 3 – every 15 minutes; Last 3 – every 30 minutes)
- When you are finished with the 6 rounds of stretch and folds, cover your dough with a wet towel or plastic wrap. Allow it to bulk-ferment until it has doubled.
- Divide the dough into three equal parts.
- Pre-shape by providing slight tension and creating a ball with each piece of dough and allow to bench rest for about 20 minutes on the counter.
- Shape the baguette dough by gently stretching the dough out into a rectangle about 10” long by 5” wide.
- Fold one long side into the middle and press your fingers into the seam all the way down it to seal it. Repeat with the other long edge, so that there is one seam in the middle where the two sides meet.
- Roll the dough over, so that it is seam side down, and gently create tension along the seam by pulling it against the counter. This will also elongate the shape as you continue to pull the dough. I like mine to be about 14” for a final length, so they can rest in my perforated baguette mold.
- Repeat for the other two pieces of dough.
- Place your shaped baguettes in a baker’s couche or baguette tray or mold.
- Cover with plastic wrap or place inside a large plastic bag or trash bag and refrigerate overnight or up to 36 hours.
- The next day, preheat a baking stone (optional) at 500 degrees for about an hour. Although I don’t actually bake directly on the pizza stone, I like to have it in there to keep the oven very hot when I put the cold baguettes in. This helps them to poof up, also known as oven spring.
- Get a pot or kettle of boiling water going.
- On the rack at the bottom of the oven, add a cast iron skillet.
- Remove the baguettes from the fridge. Score the top of the dough with 3 or 4 fairly deep scores cut at a 45 degree angle.
- Fill the cast iron skillet you placed in your oven with boiling water.
- Spritz the top of the baguettes with water for browning.
- Load the baguettes onto the stone. I leave mine in the perforated baguette pan, and just place that on top of the stone. If you use a couche to shape your dough, remove the baguettes from the couche and place them directly on the stone. Do NOT put the couche in the oven.
- Reduce the heat to 450 degrees and bake for 35 minutes. In my oven, I achieve the best browning when I rotate the baguettes about 20 minutes into the baking process.
Notes
- The timing for bulk fermentation will vary greatly depending on many factors – temperature, hydration, maturity of your starter, etc. If you’d like, you can let this step go longer for further health benefits. I typically do this in the morning and let it go all day. When the dough is ready, there will be small bubbles on the surface.
- A baker’s couche is a canvas cloth used to shape your baguettes. You could also make a DIY version using a tea or kitchen towel and a few clothes pins to help it keep its shape. If using a couche or cloth, you may want to place it all on a baking sheet so you can easily transport it. Please note: Do NOT put your couche in the oven.
- Instead of using a 9 x13 dish, you can also use a long cast iron dutch oven like this one or this is another great option.
Nutrition
Nutrition information is automatically calculated, so should only be used as an approximation.




Hi! Is refrigeration required for the baguettes? Or could you make them all the same day if started in the morning? Thank you!
You could possibly make them the same day. It would depend on how active your starter is and how warm your house it. You would probably also have to cut out a few stretch and folds. That alone take 2.75 hours. Bulk ferment usually takes anywhere from 4-12 hours. Then the second rise on the counter would take anywhere from 1-2 hours.
The bread turned out so yummy be beware of the glass dish!! I followed the recipe exactly so the pan was hot and the water was boiling. The glass exploded and broke the first pane of glass in my oven. Big mess and expensive fix. My neighbor let me use her oven since I couldn’t bake in mine and I used a cast iron to pour the water into.
So sorry that happened to you! I have never had issues with that.
The same thing happened to me! I did some research and it may have to do with if your glass dish is made from soda-lime glass (which doesn’t handle quick temperature changes well) or borosilicate (which does). Sounds like PYREX (logo in all caps) is sold in Europe and made from the resistant stuff, while Pyrex (lower case logo) is sold in the U.S. and may be prone to exploding with temperature shifts.
Ohhh that is good to know.
Can the baguettes stay in the fridge longer than 36 hours like the artisan loaves can? Thank you!
I would think that would work fine!
Glass 9×13 baking dish is NOT good. Mine just exploded when I added boiling water. They aren’t meant for 500F, apparently.
Oh no! I’m so sorry. That has never happened to me before.
I wish I had read the comments before because my pan also exploded and broke the glass in my oven. So crazy! I’ll stick to cast iron next time.
happened to me too
I use a metal roasting pan in my oven.
This literally just happened to me 🙁
Do you have the measurement in cups ? 🙈
I do not. This one works better measured. However, you can use my conversion chart if you’d like: https://www.farmhouseonboone.com/baking-conversion-chart
Can you back sooner than 12 hours ? Can we proof faster and sooner?
I’m having a hard time getting to rise to full thickness. Do you have a YouTube video on the baguettes? They are great for summer time lunches!!
I go over them in this video: https://youtu.be/wmtMnJ8SfM4
I also want to use more whole grain flour instead of AP flour. Also, is this using fresh milled flour? Do you have to make adjustments for this? I am getting ready to order a grain mill to mill my own, but have found many people saying it is very different and a huge learning curve change to bake sourdough breads with fresh milled flours. Thanks
You can sub whole wheat flour one for one with AP, but it will be denser the more whole wheat you use.
This bread is delicious! I was a little worried because it was so sticky that it was hard to shape, but it turned out great!
I used the pan of water in the bottom of the oven and squirted it with water to make steam. It came out perfect.
If you were to make this recipe with whole flours, how would you change it? I am trying to get away from using all-purpose flour.
Use Bob’s Redmill Artisan Bread flour or King Arthur bread flour or you can buy whole wheat white flour which is made from white spring wheat. You can also substitute some regular whole wheat flour (maybe 20-25% of the total flour in the recipe) for the all purpose flour. I am not an expert but I have used these substitutions & ti works well.
What if I don’t have a baking stone? Should I place the baguette pan on a baking sheet?
Yes that would work as well.