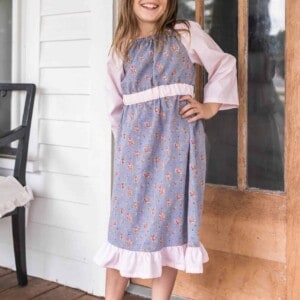
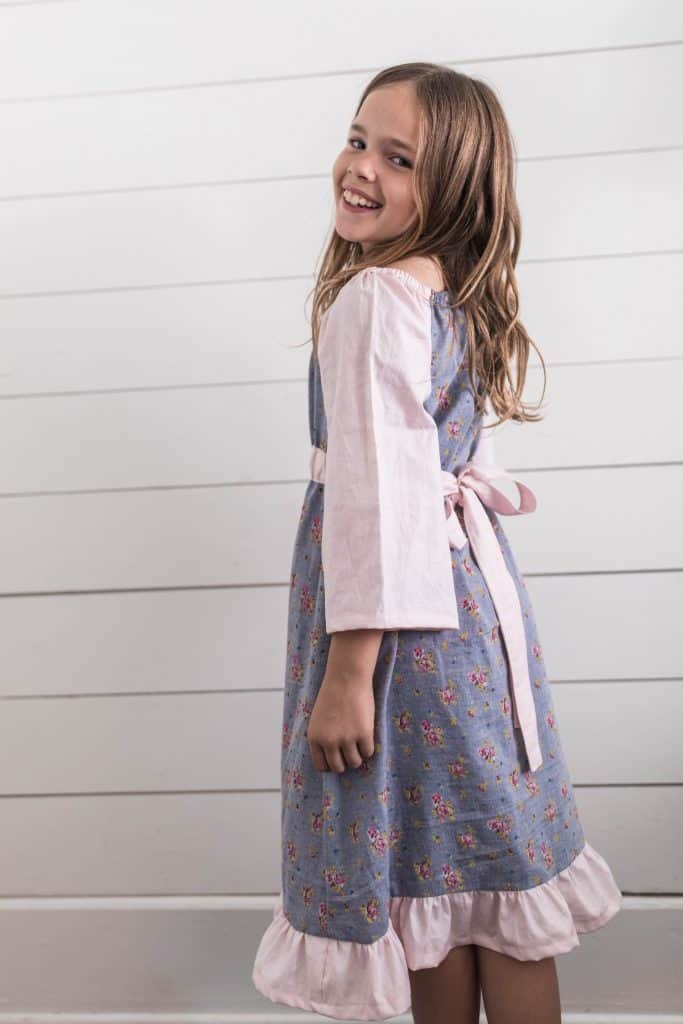
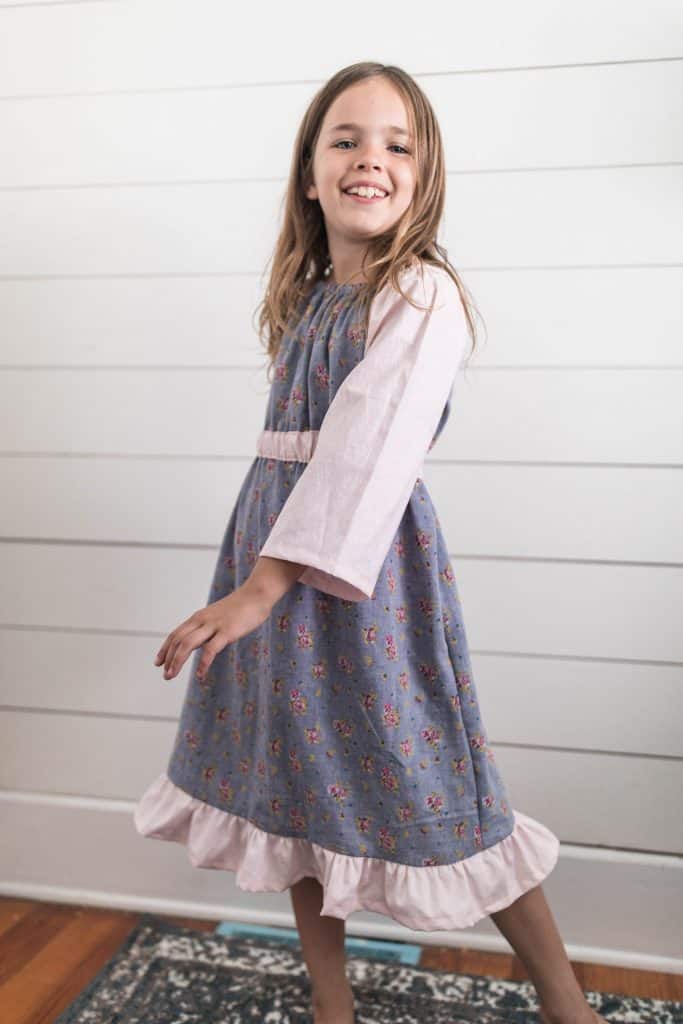
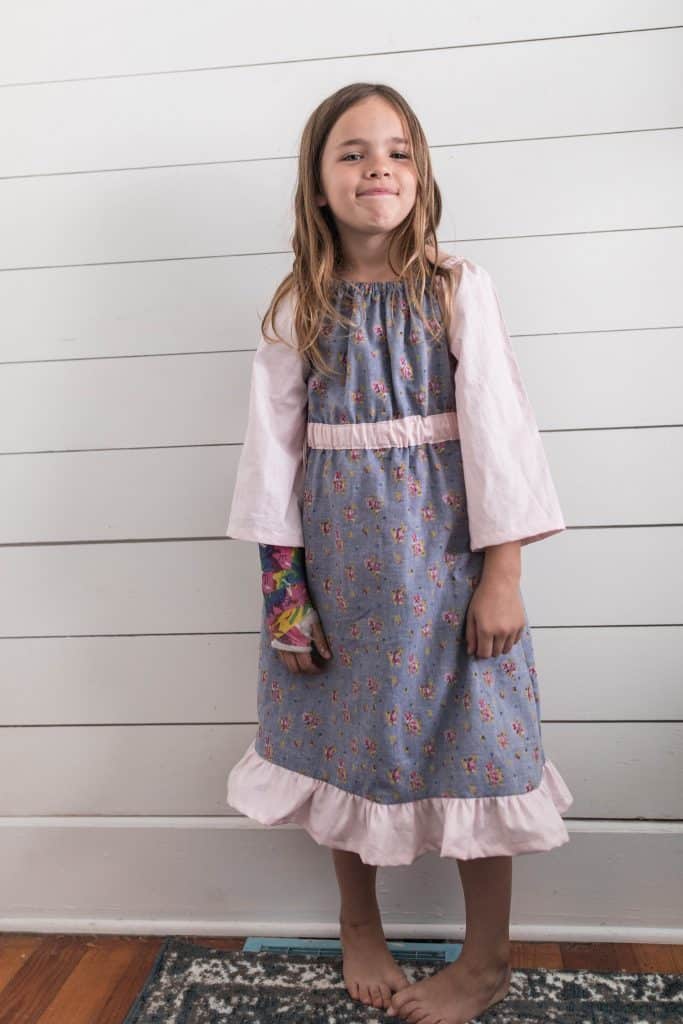
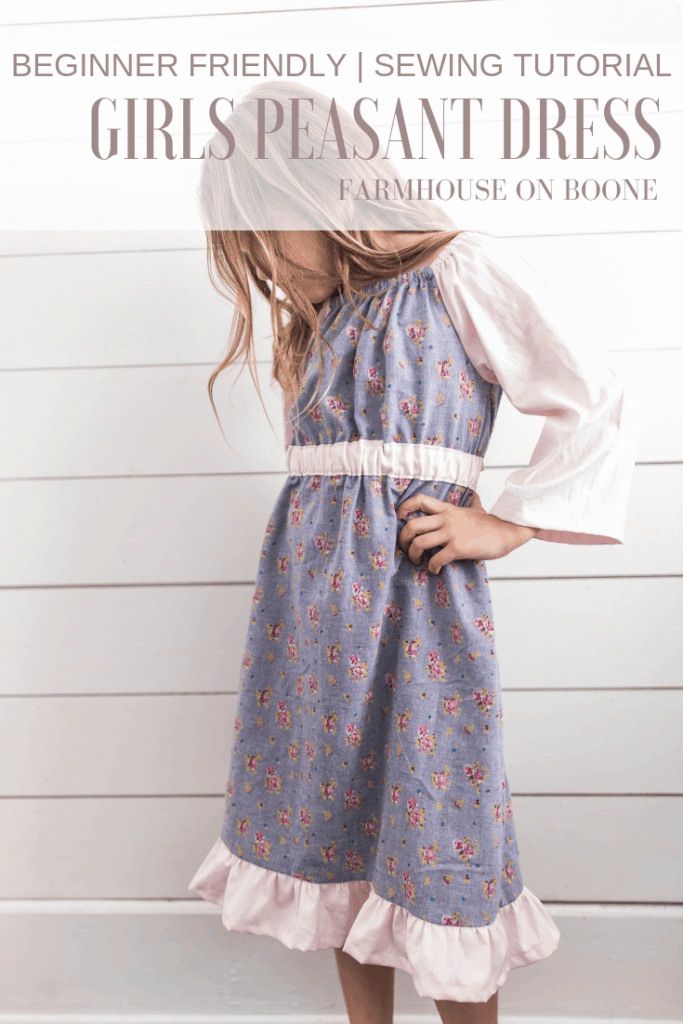
This simple peasant dress pattern for girls is a great sewing project for beginners. Very customizable sewing project, can be used as a toddler dress pattern up to girls size 10/12. The step by step video tutorial walks you through the entire process.
This post contains affiliate links, which means I make a small commission at no extra cost to you. See my full disclosure here.
The Peasant Dress
When I first started sewing dresses for my little girls, my favorite style was (and probably still is!) the peasant dress. It is by far the easiest dress to sew, and perfect for beginners.
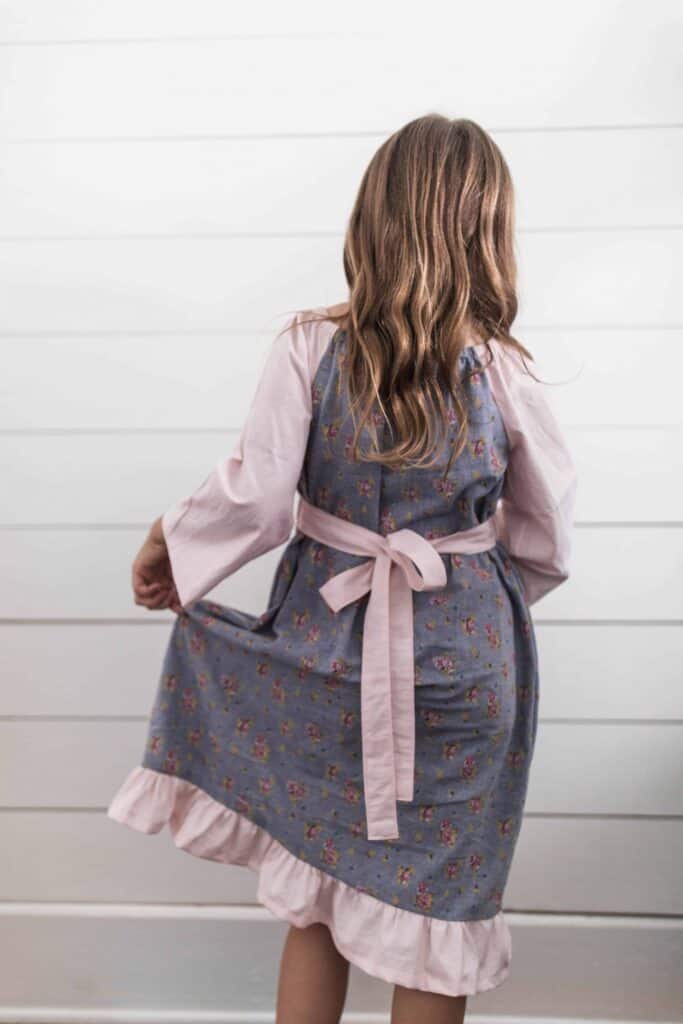
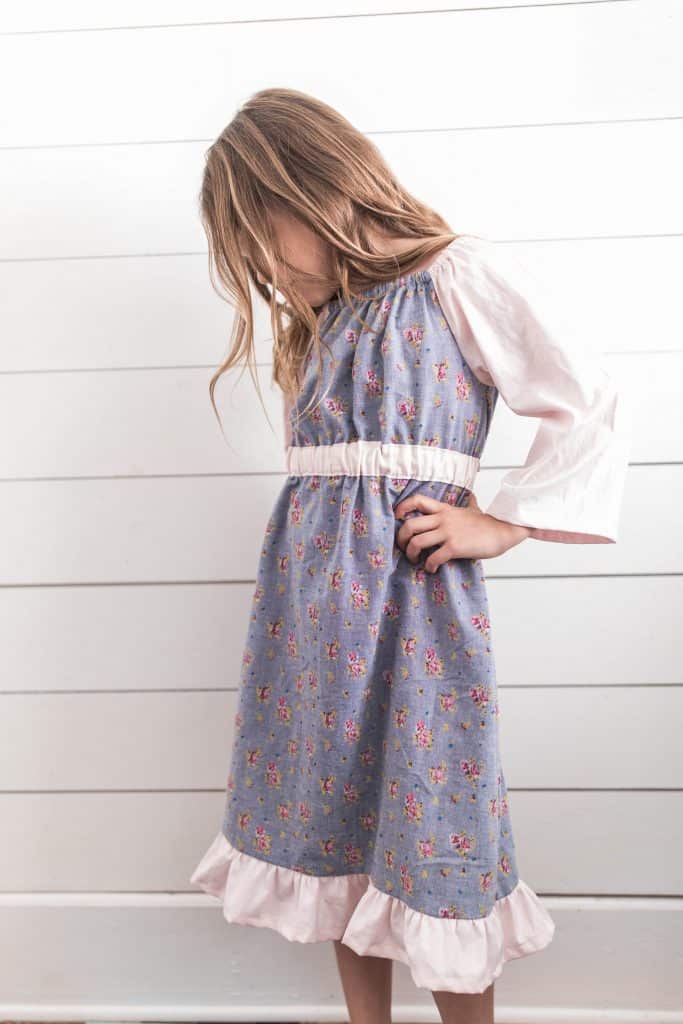
It is also sooo customizable! Once you get comfortable sewing the basic peasant dress, you can start adding layers of ruffles, aprons, different prints in the bodice, ties.
There is endless opportunities for creativity!
You can make the sleeves, long short, or 3/4. Add ruffles to the sleeve. You can crop the dress and make it a peasant top.
They are perfect for all ages and sizes. Kids can wear them for many years, because the loose shape and elastic allow for growth.
I even once made myself a peasant style top using the exact same principles!
For this tutorial today, I’m going to give you the measurements you need to sew a 3/4 sleeve length peasant style dress, with an elastic waistband and the option for one ruffle at the bottom.
Once you get good at sewing this basic style, I encourage you to run wild with customizations.
Tips For Making A Peasant Dress
- This dress is so customizable. Change up the sleeves by making them long sleeve or short. Add ruffles or belts. So many possibilities.
- It makes the perfect toddler dress pattern. Really it can go from newborn to about size 10 girls. I’ve included sizes and cut list down below.
- If you don’t have a serger, no worries. Use a zigzag stitch all the way around to finish off the raw edges.
- When you are sewing a ruffle onto a dress make sure to sew as close tot he gathering stitch as possible. This will make the prettiest ruffle. Sewing above or below the gathering stitch will not make the ruffle look very good.
Supplies Needed:
1″ non-roll elastic for the waist
Fabric- 2 yards cotton or linen work great. Avoid stretchy knits.
Coordinating thread
Tools You Will Need:
Sewing scissors
Pins
Serger- optional.
Watch The Tutorial
Simple Peasant Dress Pattern for Girls Directions
Cut out the pattern pieces
- Cut out the main dress pieces (2), sleeves (2), waist tie (1), neck elastic, waist elastic and optional ruffle pieces (2) from the cut list below.
- *If you decide to add the ruffle, notice that the cut directions call for you to decrease the main dress piece by two inches for the smaller sizes and three inches for the larger size.)
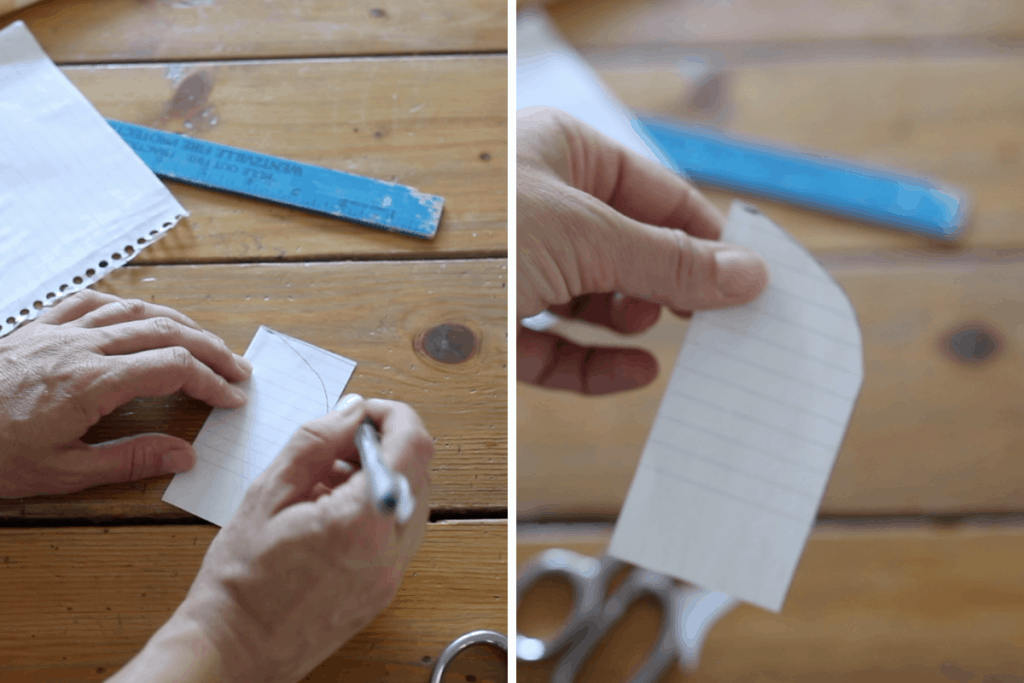
- With a small piece of paper or scrap fabric, but a rectangle 2″ by 4″ for sizes 12 months through 4T and 2″ by 5″ for 5T through 10/12.
- Now draw curved line to round off one edge of the piece. (Refer to the photo below.) This will be your pattern piece to create arm hole areas on the bodice.
- To create the armholes from the paper pattern you just created, fold one main dress piece in half with right sides together.
- Line up your little patter piece with the outside and top edges of the bodice.
- Cut around the pattern piece. Repeat for the other main dress piece and the two sleeve pieces.
Sew the peasant dress together
- Line up one sleeve piece with one main dress piece along the armholes, with right sides together. Sew around the curved armhole with a narrow 1/4″ seam. Repeat with the other sleeve piece along that same main dress piece. (Refer to the video if this is confusing.)
- Now that the sleeve pieces are sewn onto one of the main dress pieces, it is time to bring in the other main dress piece. Line up one sleeve with the other main dress piece along the armhole, with right sides together. Sew along the curved sleeve with a 1/4″ seam.
- Repeat with the other sleeve, so that the four pieces (the two main pieces and the two sleeve pieces) are attached in a circular fashion.
- Fold the dress in half with right sides together, so that the bottom raw edges of the two main pieces are lined up. With the front main piece and back main piece lined up at the armpit, pin from the bottom of the hem all the up around the armpit and to the bottom of the sleeve.
- Repeat with the other side of the dress.
- Sew the up the side seam and down the inside of the sleeve with a 1/2″ seam. Repeat with the other side.
- Finish off the raw edges inside with a serger or tight zigzag stitch.
Add the neck casing and elastic
- Fold the top edge of the dress down 1/2″ and then another 1/2″, with the raw edges hidden inside.
- Press in place.
- Sew the neck casing down with a 1/2″ seam, leaving a 1″ space open for the elastic.
- Use a safety pin to push the 3/8″ piece of elastic through the casing. (Refer to the sizing guide for the length.)
- Overlap the two ends of the elastic about 1″ and back a forward stitch several times over the elastic to attach it together and make sure it doesn’t come out.
- Sew the elastic opening closed with a topstitch.
Hem the sleeves
- Press the ends of the sleeves up about 5/8″” and then another 5/8″, hiding the raw edges inside.
- Sew the sleeve hem in place with about a 1/2″ seam.
You can make the sleeves longer for a long sleeve dress, or crop them for a short sleeve dress. It is also cute to add elastic to the ends of the sleeves, especially in styles for younger girls.
Add the waist tie and elastic waistline
- On the short ends of the waist tie piece, press over ½” toward the “wrong side” of the fabric.
- Fold the waist tie piece in half all the way down the long side, right sides together, and sew a ¼” seam. Leave the two ends open at this point.
- Using a large safety pin at one corner, turn the waist tie piece right side out.
- Press the seam flat.
- Line up the middle of the waist tie piece with the middle of the dress and pin it in place. *Refer to the waist tie placement guide below to find out how far down the waist tie should go for the size that you are making.
- For example, after I centered the waist tie on the dress, I placed the top of my size 8 daughter’s waist tie 7″ down from the finished neckline.)
- Sew a narrow seam along the op of the waist tie, from one side seam to the other.
- Repeat with the bottom of the waist tie piece.
- For the two ends of the waist tie that are still hanging off the dress, topstitch all the way around with a narrow seam.
- Push the 1″ elastic piece through the waist tie, attached to the front of the dress, with a large safety pin.
- Secure it at both ends of the elastic, near the side seams with several back and forward stitches to hold it in place.
- Stitch just beyond the elastic on both side seams to hide the elastic inside.
Hem The Skirt (Option 1)
- Fold the bottom hem up 5/8″ and then another 5/8″, hiding the raw edges inside.
- Press in place.
- Sew all the way around with a 1/2″ seam, making sure to back and forward stitch.
Add The Ruffle (Option 2)
- Stitch the two ruffle pieces together at the two short ends, with right sides together, with a 1/2″ seam.
- Use a serger or tight zigzag stitch to finish off the raw edges.
- To sew a hem in the bottom of the ruffle piece, press the bottom of the ruffle up about 5/8″” and then another 5/8″, hiding the raw edges inside.
- Sew the hem in place with about a 1/2″ seam.
- Sew a gathering stitch in the top of the ruffle piece.
- Pull the gather strings until the size of the ruffle piece matches the bottom of the dress piece.
- Pin the ruffle piece to the main dress piece with right sides together, and the side seams lined up.
- Sew the ruffle to the main dress piece, sewing closely to the gathering stitch.
- Use a zigzag stitch or serger to finish the seam.
Peasant Dress Pattern Cut list
Size 12-18 Months
For the main dress:
Cut 2 – 21″ long by 18″ wide
For the sleeves:
Cut 2 – 14.5″ long by 10″ wide
For the waist tie:
Cut 1- 47″ long by 3.5″ wide
Waist tie placement- 3.5″ down from the finished neckline
Neck elastic- 18″
Waist elastic (optional) 11″
To add a ruffle (optional) Cut 2- 4″ wide by 30″ long and decrease the length of the two main dress pieces by 2.5″.
Toddler Dress Pattern Cut List
Size 2T
For the main dress:
Cut 2 – 22.5″ long by 18″ wide
For the sleeves:
Cut 2 – 15″ long by 11″ wide
For the waist tie:
Cut 1- 50″ long by 3.5″ wide
Waist tie placement- 4″ down from the finished neckline
Neck elastic- 18.5″
Waist elastic (optional) 11.5″
To add a ruffle (optional) Cut 2- 4″ wide by 34″ long and decrease the length of the two main dress pieces by 2.5″.
Size 3T
For the main dress:
Cut 2 – 24″ long by 18″ wide
For the sleeves:
Cut 2 – 15.5″ long by 11″ wide
For the waist tie:
Cut 1- 53″ long by 3.5″ wide
Waist tie placement- 4.5″ down from the finished neckline
Neck elastic- 19″
Waist elastic (optional) 12″
To add a ruffle (optional) Cut 2- 4″ wide by 36″ long and decrease the length of the two main dress pieces by 2.5″.
Size 4T
For the main dress:
Cut 2 – 25.5″ long by 18″ wide
For the sleeves:
Cut 2 – 16″ long by 11″ wide
For the waist tie:
Cut 1- 56″ long by 3.5″ wide
Waist tie placement- 5″ down from the finished neckline
Neck elastic- 19.5″
Waist elastic (optional) 12.5″
To add a ruffle (optional) Cut 2- 4″ wide by 38″ long and decrease the length of the two main dress pieces by 2.5″.
Size 5T
For the main dress:
Cut 2 – 27″ long by 19″ wide
For the sleeves:
Cut 2 – 16.5″ long by 11″ wide
For the waist tie:
Cut 1- 59″ long by 3.5″ wide
Waist tie placement- 5.5″ down from the finished neckline
Neck elastic- 20″
Waist elastic (optional) 13″
To add a ruffle (optional) Cut 2- 4.5″ wide by 40″ long and decrease the length of the two main dress pieces by 3″.
Youth Girl’s Size Peasant Dress Pattern Cut List
Girls Size 6
For the main dress:
Cut 2 – 28.5″ long by 22″ wide
For the sleeves:
Cut 2 – 17″ long by 12″ wide
For the waist tie:
Cut 1- 62″ long by 3.5″ wide
Waist tie placement- 6″ down from the finished neckline
Neck elastic- 20.5″
Waist elastic (optional) 13.5″
To add a ruffle (optional) Cut 2- 4.5″ wide by 42″ long and decrease the length of the two main dress pieces by 3″.
Girls Size 7
For the main dress:
Cut 2 – 30″ long by 22″ wide
For the sleeves:
Cut 2 – 17.5″ long by 12″ wide
For the waist tie:
Cut 1- 65″ long by 3.5″ wide
Waist tie placement- 6.5″ down from the finished neckline
Neck elastic- 21″
Waist elastic (optional) 14″
To add a ruffle (optional) Cut 2- 4.5″ wide by 45″ long and decrease the length of the two main dress pieces by 3″.
Girls Size 8
For the main dress:
Cut 2 – 31.5″ long by 23″ wide
For the sleeves:
Cut 2 – 18″ long by 14″ wide
For the waist tie:
Cut 1- 76″ long by 3.5″ wide
Waist tie placement- 7″ down from the finished neckline
Neck elastic- 21.5″
Waist elastic (optional) 14.5″
To add a ruffle (optional) Cut 2- 4.5″ wide by 47″ long and decrease the length of the two main dress pieces by 3″.
Girls Size 10/12
For the main dress:
Cut 2 – 34″ long by 24″ wide
For the sleeves:
Cut 2 – 19″ long by 14″ wide
For the waist tie:
Cut 1- 72″ long by 3.5″ wide
Waist tie placement- 8″ down from the finished neckline
Neck elastic- 22″
Waist elastic (optional) 15″
To add a ruffle (optional) Cut 2- 4.5″ wide by 51″ long and decrease the length of the two main dress pieces by 3″.
Check out some of my other sewing tutorials
- Bow in the Back Summer Dress
- How to Make a Dress
- How to Sew a Tank Top
- Pajama Sets from Vintage Sheets
- Reversible Apron Pattern
Peasant Dress Pattern For Girls Printable Tutorial
Peasant Dress Pattern For Girls
Equipment
- Sewing machine
- Pins
- Serger
- Sewing scissors
Ingredients
- 3/8" elastic for the neck
- 1" non-roll elastic for the waist
- Fabric- 2 yards. Cotton or linen work great. Avoid stretchy knits.
- Coordinating thread
- See cut list for size chart.
Instructions
- ut out the main dress pieces (2), sleeves (2), waist tie (1), neck elastic, waist elastic, and optional ruffle pieces (2) from the cut list below. If you decide to add the ruffle, notice that the cut directions call for you to decrease the main dress piece by two inches for the smaller sizes and three inches for the larger size.
- With a small piece of paper or scrap fabric, cut a rectangle 2″ x 4″ for sizes 12 months through 4T and 2" x 5" for 5T through 10/12.
- Now draw a curved line to round off one edge of the piece. This will be your pattern piece to create arm hole areas on the bodice.
- To create the armholes from the paper pattern you just created, fold one main dress piece in half with right sides together. Line up your little pattern piece with the outside and top edges of the bodice.
- Cut around the pattern piece.
- Repeat for the other main dress piece and the two sleeve pieces.
- Line up one sleeve piece with one main dress piece along the armholes, with right sides together. Sew around the curved armhole with a narrow 1/4" seam.
- Repeat with the other sleeve piece along that same main dress piece.
- Now that the sleeve pieces are sewn onto one of the main dress pieces, it is time to bring in the other main dress piece. Line up one sleeve with the other main dress piece along the armhole, with right sides together.
- Sew along the curved sleeve with a 1/4" seam.
- Repeat with the other sleeve, so that the four pieces (the two main pieces and the two sleeve pieces) are attached in a circular fashion.
- Fold the dress in half with right sides together, so that the bottom raw edges of the two main pieces are lined up.
- With the front main piece and back main piece lined up at the armpit, pin from the bottom of the hem all the way up around the armpit and to the bottom of the sleeve.
- Repeat with the other side of the dress.
- Sew up the side seam and down the inside of the sleeve with a 1/2" seam.
- Repeat with the other side.
- Finish off the raw edges inside with a serger or tight zigzag stitch.
Fold the top edge of the dress down 1/2" and then another 1/2", with the raw edges hidden inside. - Press in place.
- Sew the neck casing down with a 1/2" seam, leaving a 1" space open for the elastic.
- Use a safety pin to push the 3/8" piece of elastic through the casing (refer to the sizing guide for the length).
- Overlap the two ends of the elastic about 1"; back and forward stitch several times over the elastic to attach it together and make sure it doesn't come out.
- Sew the elastic opening closed with a topstitch.
- Hem the sleevesPress the ends of the sleeves up about 5/8" and then another 5/8", hiding the raw edges inside.
- Sew the sleeve hem in place with about a 1/2" seam.
*You can make the sleeves longer for a long sleeve dress, or crop them for a short sleeve dress. - Add the waist tie and elastic waistline:
On the short ends of the waist tie piece, press over ½” toward the “wrong side” of the fabric. - Fold the waist tie piece in half all the way down the long side, right sides together, and sew a ¼” seam. Leave the two ends open at this point.
- Using a large safety pin at one corner, turn the waist tie piece right side out.
- Press the seam flat.
- Line up the middle of the waist tie piece with the middle of the dress and pin it in place. (Refer to the waist tie placement guide below to find out how far down the waist tie should go for the size that you are making. For example, after I centered the waist tie on the dress, I placed the top of my size 8 daughter's waist tie 7" down from the finished neckline.)
- Sew a narrow seam along the top of the waist tie, from one side seam to the other.
- Repeat with the bottom of the waist tie piece.
- For the two ends of the waist tie that are still hanging off the dress, topstitch all the way around with a narrow seam.
- Push the 1" elastic piece through the waist tie, attached to the front of the dress, with a large safety pin.
- Secure it at both ends of the elastic, near the side seams with several back and forward stitches to hold it in place.
- Stitch just beyond the elastic on both side seams to hide the elastic inside.
Hem The Skirt (Option 1)
Fold the bottom hem up 5/8" and then another 5/8", hiding the raw edges inside.- Press in place.
- Sew all the way around with a 1/2" seam, making sure to back and forward stitch.
- Add The Ruffle (Option 2)
Stitch the two ruffle pieces together at the two short ends, with right sides together, with a 1/2" seam. - Use a serger or tight zigzag stitch to finish off the raw edges.
- To sew a hem in the bottom of the ruffle piece, press the bottom of the ruffle up about 5/8"" and then another 5/8", hiding the raw edges inside.
- Sew the hem in place with about a 1/2" seam.
- Sew a gathering stitch in the top of the ruffle piece.
- Pull the gather strings until the size of the ruffle piece matches the bottom of the dress piece.
- Pin the ruffle piece to the main dress piece with right sides together, and the side seams lined up.
- Sew the ruffle to the main dress piece, sewing closely to the gathering stitch.
- Use a zigzag stitch or serger to finish the seam.
Notes
- You can make the sleeves longer for a long sleeve dress, or crop them for a short sleeve dress. It is also cute to add elastic to the ends of the sleeves, especially in styles for younger girls.
Nutrition information is automatically calculated, so should only be used as an approximation.




I know you are super busy. I love this! It would be super helpful if you had a separate printable with the size measurements as a printable. Im trying to make these for my youngest 6 girls. Personally I printed the pattern. Then went back and went to print the full blog post. Then choose pages 8-11 for all the size instructions. In case anyone else is looking to print the sizes as well. Thanks for a great tutorial!
This is a great blog post! I love the idea of a peasant dress pattern for girls – farmhouse style.
Im emailing regarding your peasant top & skirt
What size are these e.g. sm ned lg xl ?
Hello! I love your content! I have the exact same brother sewing machine and I can’t get my fabric to gather. any ideas?
What are your measurements for a cut list? I want to try an adult size, I’m assuming you’re a woman’s 8 maybe?
TY
Can u tell me the where to take measurements on a person for each cut out, to make bigger woman’s sizes? Thx
how many yards does the 10/12 size need?
Hi Lisa! I want to make one of these for my daughter. She is a 14/16… Any advice on making one for that size? How do I come up with those measurements?
I have the same exact question, 2 years later. My daughter is 10 years old, however she is super tall, and sizes a 14/16. Please send us the measurements! I hope you can answer us ! Thanks
I stumbled across your website while searching for a dress to make my daughter for a school excursion. This was so easy to make and adjust to fit her, and I learnt how to make a ruffle. Thankyou so much for sharing!
Hey Lisa,
May 2019 be awesome for you!
I’m assuming that for the pattern I’d chose another one of my daughter’s dresses, fold in half and trace around it, like you did in the ‘how to make a dress’ video. Would that be the pattern I use even if the dress I trace isn’t a peasant dress or doesn’t have sleeves?
Warmest,
Nuri
I found your tutorial for the Linen blend Pinafore April but the page that came up with all the measurements I couldn’t write down before it was GONE. Would you please send me that page and directions if you have them written down? You can email it to me. I realize the need to go fast, but I missed so much of it. IS there a direct way to find the tutorial for this apron as I have no idea how it just popped up, it’s not listed here that I could find, so HELP…. please! Sincerely, Marcia Crew
Here you go! https://www.farmhouseonboone.com/farmhouse-on-boone/diy-linen-pinafore-apron-for-women-free-pattern/