


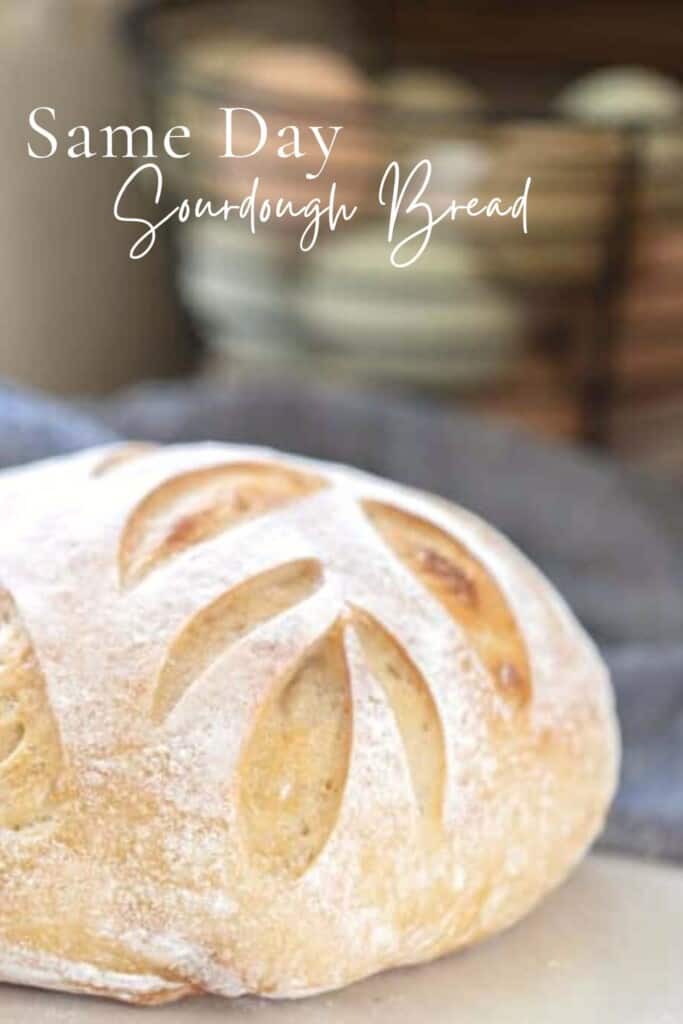
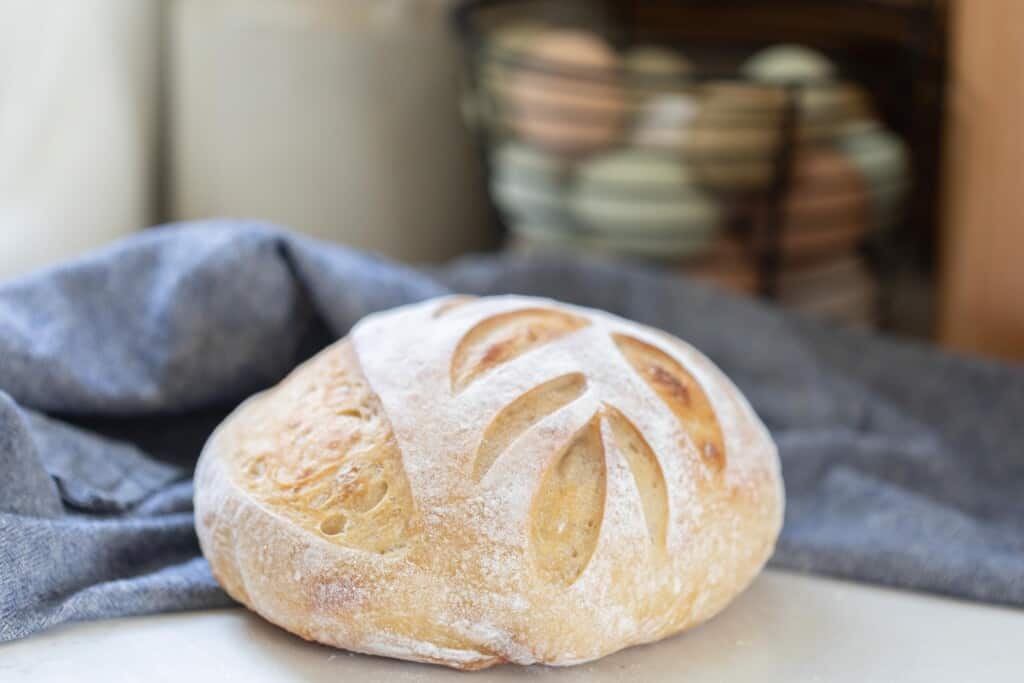
Learn how to make this delicious same day sourdough bread recipe. From feeding the starter to baking fresh bread, all done in one day. With a delightful chewy interior and crusty exterior you’ve come to expect in a sourdough boule.

The key to having your sourdough bread ready the same day you start it is starting the whole process with an active sourdough starter. Now, technically, it can actually be made the same day even if you start the morning with the starter in the refrigerator, but it won’t be ready by dinnertime.
A few weeks ago one of my children, who is particularly like her mother, requested kombucha and sourdough bread in her Easter morning basket.
I noted her request, but then failed to think about it again until Saturday morning. Pulling the starter out of the fridge around 8 am (when I finally realized that I better get going if she was going to have pretty loaves in her basket the next day) and fed it.
I put it in a really warm place to accelerate the bubble/yeast action (on top of my vintage stove with a standing pilot light) and it looked ready enough by noon to start.
I mixed up the ingredients all at once, skipping the normal first autolyse with flour and water. Next, I did 3 stretch and folds 20 minutes apart. This meant I was ready for the bulk ferment in a little over an hour.
By about 1:30 it was sitting on the back of the stove doing its thing.
Around 6:00 I divided it, shaped it, and put it in the banneton basket.
Instead of putting it in the fridge like I usually would for the final rise, I put it in the same warm place. It was ready to score and bake by 8:00 pm. There was bread put in her basket by 9:00. I only have a phone pic of my cute loaf, (it is half size to make it fit in her basket), but I had one happy girl on Easter morning.
I realize no one cares to have bread that late at night, but I thought this post would be a good one, just to let you know that it IS possible to have same day sourdough!
By feeding the starter the night before, you can have the same day sourdough recipe at a reasonable hour. So, let’s proceed with that recipe!
Why you will love this recipe:
Quicker than most sourdough recipes: Most of the sourdough breads I make usually take around 2 days or more. Where this recipe can be made in one.
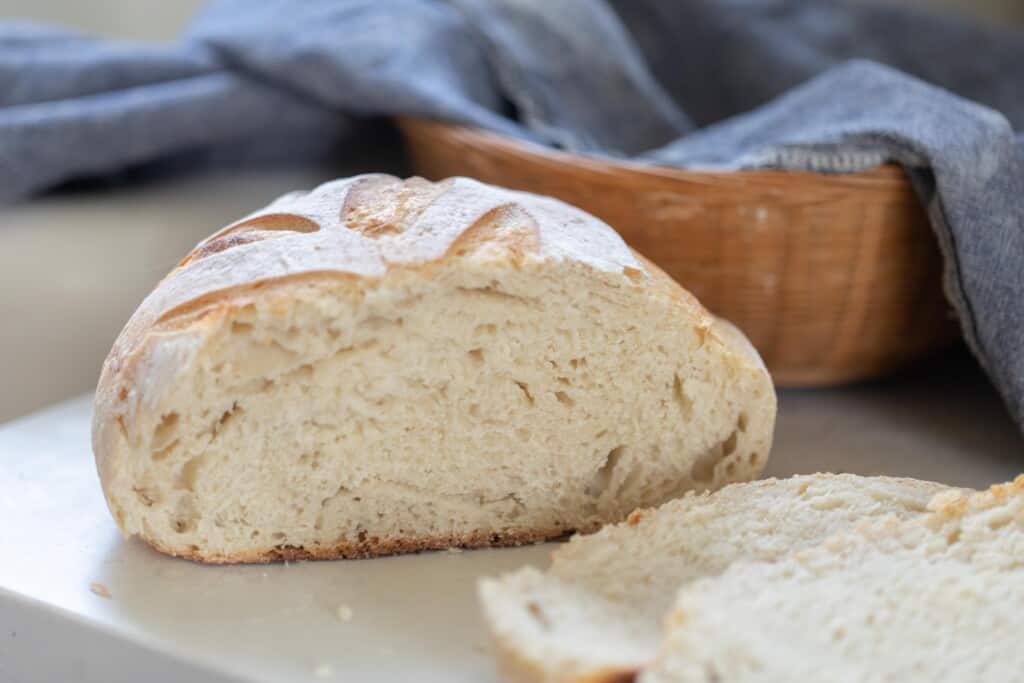
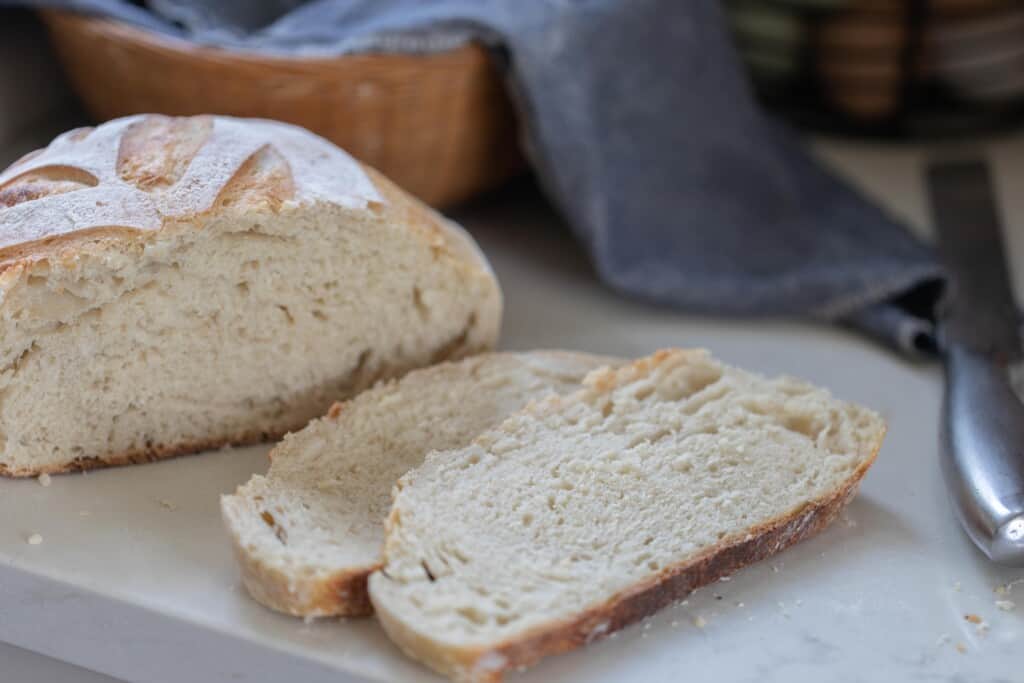
Delicious: There is nothing like a delightfully chewy and crusty loaf of bread made with natural yeast.
Easy Recipe: Perfect if you are a beginner baker. This recipe is really easy.
Tips For Making This Easy Sourdough Bread Recipe:
- To make it a little faster so you have homemade bread earlier in the day, you can feed your sourdough starter the night before. This way as soon as you wake up the next morning the starter is ready to be mixed up with the remaining ingredients rather than having to wait for the starter to double.
- Dust the top of the dough with flour so the scoring pattern stands out.
- If the dough is a little sticky during the stretch and fold process, dip your fingers in water.
This post contains affiliate links, which means I make a small commission at no extra cost to you. See my full disclosure here.
Ingredients:
All-purpose flour or bread flour
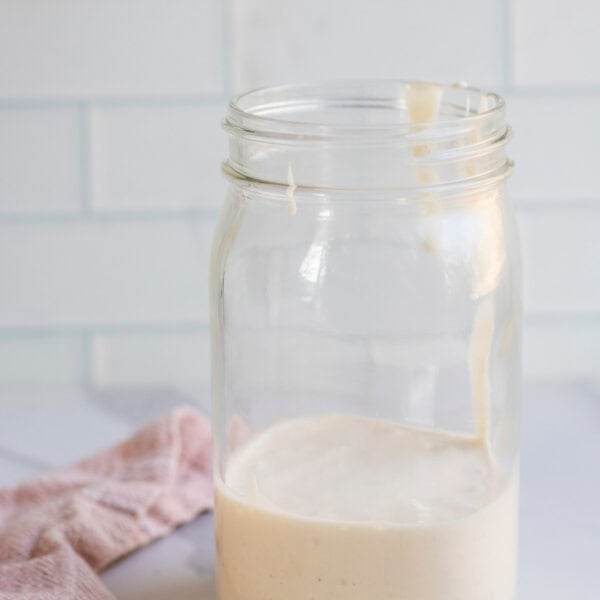
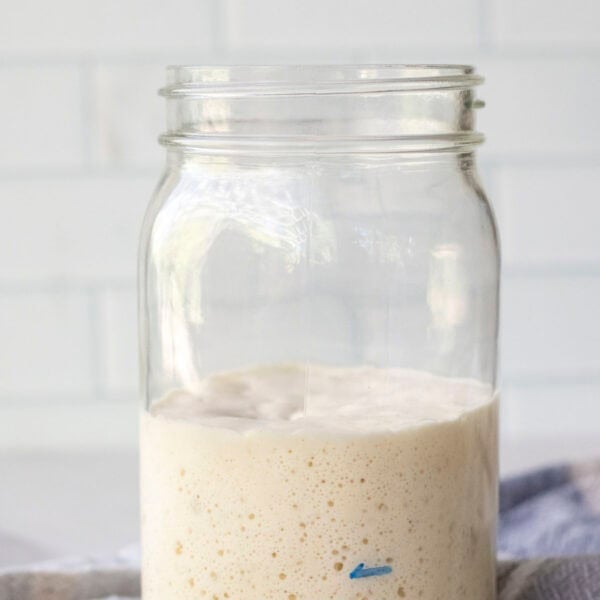
Active sourdough starter – This needs to be a mature starter that has been fed and is nice and bubbly. Should pass the float test.
Water – Preferably filtered water. Tap water may contain chlorine which can inhibit the wild yeast in the sourdough starter.
Salt – I like using sea salt or pink Himalayan salt.
Tools you may need:
Proofing basket or banneton basket
Lame, razor blade, or sharp knife
Kitchen scale

FAQ:
If you are creating a sourdough starter from scratch it will take at least 7 days (or more) before it is ready to bake with. The easiest way to have a sourdough starter ready in one day is to purchase a starter from a local bakery or get one from a friend.
Place it in a warm spot like on top of a stove with a pilot light, near a fireplace, or in the oven with a light on.
Some specialty grocery stores may have sourdough starters to buy. Another option would be a local bakery or a sourdough bread stand at a local farmers market.
Usually about 4-12 hours depending on how mature your starter is and how warm your kitchen is.
How To Make Same Day Sourdough Bread
First thing in the morning, feed your starter and place it in a warm spot. This could be in the oven with just the light on, near a fireplace, or on top of the stove with a pilot light. Placing it in a warm spot will encourage the wild yeast to get nice and bubbly.
Allow the starter to about double. About four hours. It should pass the float test. This is when you take a small amount of starter and place it in a small glass of water. If it floats it is ready to make bread. If it sinks, it is not quite ready yet.
Add warm water, active starter, salt, and flour to a large bowl. Mix together and allow to rest for 20 minutes. This is the autolyse process where the flour is being hydrated with the water. Typically, you would just add the water and flour together. But to save time we are skipping this and completing the autolyse with the starter and the salt.
Complete the first stretch and fold.
Grab the edge of the dough and pull up stretching it out as you pull upwards.
Place dough that is in your hands back into the center. Turn the bowl about a quarter turn and complete another stretch and fold. Repeat two more times. This is considered one set of stretch and folds.
Cover with plastic wrap, damp towel, shower cap or a lid. Let the dough rest for 20 minutes and complete two more rounds 20 minutes apart.
Bulk Fermentation
Let the dough bulk ferment in a warm place until it has doubled in size. This could be anywhere from 5-8 hours (or longer) depending on the temperature of your kitchen, maturity of your starter, etc.
Shape
Place the bread dough on a lightly floured surface.
Fold the sides of the dough onto itself and roll up. Then shape into a tight smooth ball by gently spinning it toward you.
Then, place your dough upside down (smooth side down) on the counter and shape. I do this by folding the two sides over to meet in the middle, pinch together and then repeat on the other two sides. This creates surface tension which helps give it a good rise and oven spring.
Transfer to a floured banneton or bowl with a floured tea towel (typically floured with rice flour, this is not necessary and all-purpose, einkorn, bread flour, etc. will work just fine) seam side up. You want the smooth side or pretty side facing down in the banneton.
Let the dough rise one more time at room temperature for 1-2 hours (depending on how warm your kitchen is) covered with a plastic bag, damp kitchen towel. Preheat the dutch oven during the final proof to speed up the process. This will also give the dough a warm place to rise.
Bake
Preheat a dutch oven to 500 degrees f for 1 hour.
Place dough on a piece of parchment paper.
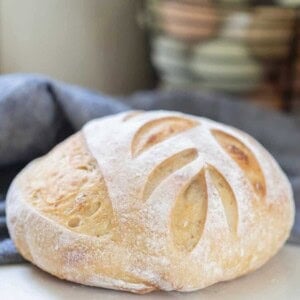
Dust the top of the dough with flour, if desired, and score with lame or razor blade. I like to do one large score (also known as an expansion score) and then a cute design for the other score.
Carefully, transfer the piece of parchment paper with the dough into the hot dutch oven. Careful not to burn your fingers.
Place the lid back on and place the dutch oven into the hot oven. Bake for 20 minutes.
Carefully remove the lid with oven mitts, turn the oven temperature down to 475, and bake an additional 15-25 minutes or until golden brown.
Baking Schedule:
8:00 am: Feed sourdough starter. Could also be done the night before. If fed the night before, start the dough right away in the morning. This will speed up the process and allow you to bake much sooner.
12:00 pm: Mix ingredients. Autolyse for 20 minutes. Next, complete 3 stretch and fold rounds 20 minutes apart.
1:30ish pm: Bulk fermentation
6:00 pm: Shape and allow rise for 1-2 hours. Preheat the oven with the dutch oven for an hour.
7-8:00 pm: Bake
Find More Sourdough Bread Recipes:
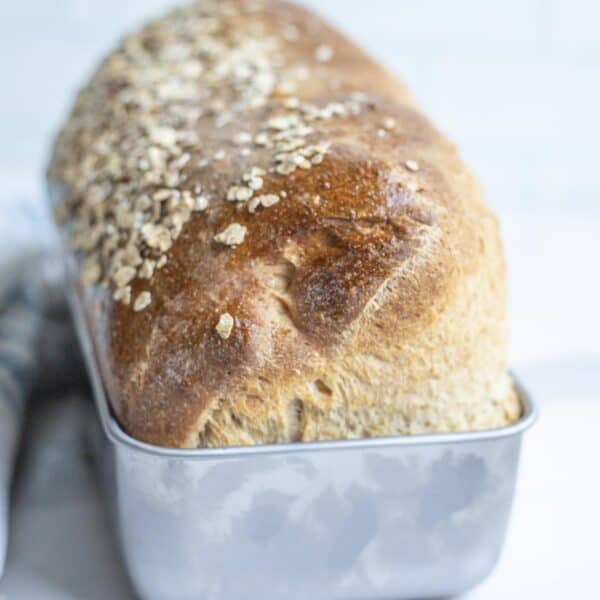
- Sourdough Sandwich Bread
- Whole Wheat Sourdough bread
- Sourdough Discard Bread: This one contains commercial yeast
- Sourdough Beer Bread
- No-Knead Sourdough Bread
If you try this recipe and love it, I would love it if you gave it 5 stars! Thank you! Tag me on Instagram @farmhouseonboone.
Same Day Sourdough Bread
Ingredients
- 475 grams all-purpose flour, 3 1/2 cups
- 100 grams active sourdough starter, 1/2 cup
- 325 grams water, 1 1/4 cups
- 10 grams salt, 1 1/2 teaspoons
Instructions
- First thing in the morning, feed your starter and place it in a warm spot.
- Allowed the starter to about double. About four hours. It should pass the float test.
- Add warm water, active starter, salt, and flour to a large bowl. Mix together and allow to rest for 20 minutes covered.
- Grab the edge of the dough and pull up stretching it out as you pull upwards. Place dough that is in your hands back into the center. Turn the bowl about a quarter turn and complete another stretch and fold. Repeat two more times. This is considered one set of stretch and folds.
- Cover with plastic wrap, damp towel, shower cap or a lid. Let the dough rest for 20 minutes and complete two more rounds 20 minutes apart.
- Let the dough bulk ferment in a warm place until it has doubled in size. This could be anywhere from 5-8 hours (or longer) depending on the temperature of your kitchen, maturity of your starter, etc.
- Place the bread dough on a lightly floured surface.
- Fold the sides of the dough onto itself and roll up. Then shape into a tight smooth ball by gently spinning it toward you.
- Then, place your dough upside down (smooth side down) on the counter and shape. I do this by folding the two sides over to meet in the middle, pinch together and then repeat on the other two sides.
- Transfer to a floured banneton or bowl with a floured tea towel (typically floured with rice flour, this is not necessary and all-purpose, einkorn, bread flour, etc. will work just fine) seam side up. You want the smooth side or pretty side facing down in the banneton.
- Let the dough rise one more time at room temperature for 1-2 hours (depending on how warm your kitchen is) covered with a plastic bag, plastic wrap or a damp kitchen towel. Preheat the dutch oven during the final proof to speed up the process.
- Preheat a dutch oven to 500°F for 1 hour.
- Place dough on a piece of parchment paper.
- Dust the top of the dough with flour, if desired, and score with lame or razor blade.
- Carefully, transfer the piece of parchment paper with the dough into the hot dutch oven. Careful not to burn your fingers.
- Place the lid back on and place the dutch oven into the hot oven. Bake for 20 minutes.
- Carefully remove the lid with oven mitts, turn the oven temperature down to 475°F, and bake an additional 15-25 minutes or until golden brown.
Notes
- To make it a little faster so you have homemade bread earlier in the day, you can feed your sourdough starter the night before. This way as soon as you wake up the next morning the starter is ready to be mixed up with the remaining ingredients rather than having to wait for the starter to double.
- Dust the top of the dough with flour so the scoring pattern stands out.
- If the dough is a little sticky during the stretch and fold process, dip your fingers in water.
Nutrition
Nutrition information is automatically calculated, so should only be used as an approximation.


The bread is amazing but I’m sure I’m doing something wrong trying to score the top. I have tried scoring just before I put it in the oven as well as doing so at start of final rise. I’ve made shallow cuts and deep cuts. Nothing works. It comes out with zero cut pattern when baked. Is my dough to wet?
That could be. Sometimes it helps to put it in the fridge for a few hours and then coat the top of the dough with some flour. That will help your designs stick and to stand out!
perfect recipe for when you don’t have two days to complete a loaf of sourdough. Simple and so tasty
This is my favorite bread recipe. It is fool proof and so easy to follow. Every shape and every time I have whipped up this recipe it has worked out perfect! I also use this with inclusions and it works perfect.
I’m sure I can use KA Bread flour with this?
Yes.
What can I use instead of parchment paper during the baking process? My parchment paper says it can only go up to 400 degrees.
I use parchment paper that only goes up to 400 degrees and I don’t have a problem with it. Mostly of the baking time, it is covered with the lid of the dutch oven.
I’m a little confused as I’m new to making sourdough. Your instructions say mix together..until when? Until the ingredients just come together, until the dough doesn’t stick to the bowl? How do I know when the dough is ready for the first 20 minute rest? Thanks!
Yes, until it comes together and forms a ball of dough. It can take up to 10 minutes in the mixer.
I’ve made this recipe two days in a row as my first ever loaves of sourdough and they turned out amazing! Would this recipe work well with inclusions? I’m scared to try a different recipe when I’m already in a roll but would like to try some different flavors.
Yes, you should be able to use add-ins for this recipe.
Oh my – I have put a thermometer in my oven to verify temp and it is spot on – but my loaves always burn to a crisp on the bottom in the first 20 minutes and when I leave it in longer to finish baking the top turns way to dark brown. I have tried lowering the temp – still to dark on the bottom – baking in dutch oven with parchment paper.
I have no problem with regular bread but this is about to be the straw that breaks the back – – -any suggestions.
I would add uncooked rice or corn meal to the bottom of the dutch oven before you put your parchment paper down. This helps to give it a little rise and off the pan directly.
The discard bread is delicious. I have ade 20 loafs, gave a lot away, rave reviews!
Lisa please, please, do some videos of just the pretty designs on your breads!
I would loooove to see how, “ you actually “did that cute bunny design!!
Please consider that for a video !! Or videos! So Like every time there’s a holiday, show us how you do your seasonal fun designs! Your breads are beautiful!
Thank you! I will consider it.