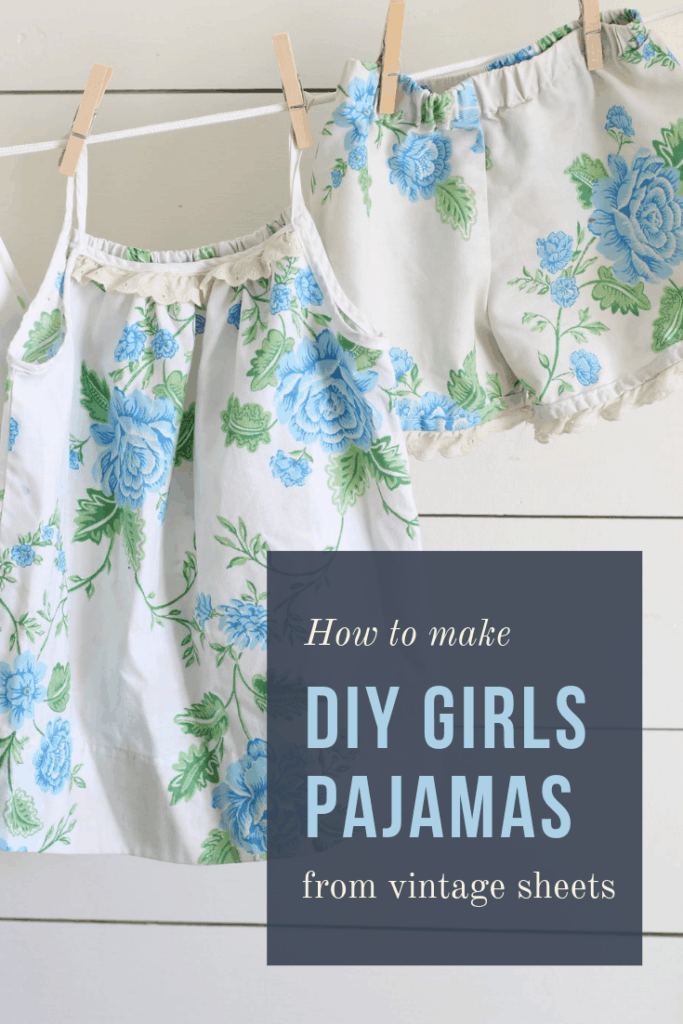
I first made these pajamas for my girls a few summers ago, when I came across some really pretty vintage sheets that I needed to find a use for. The faded florals were so pretty and airy, I thought they would be perfect for summer PJ sets. I never sew anything super complicated, so I knew I wanted to make cozy elastic shorts and a simple pillowcase style top. These super simple pajama sets can be whipped up in about an hour. All of these sheet sets were found at thrift stores for around $5 each.
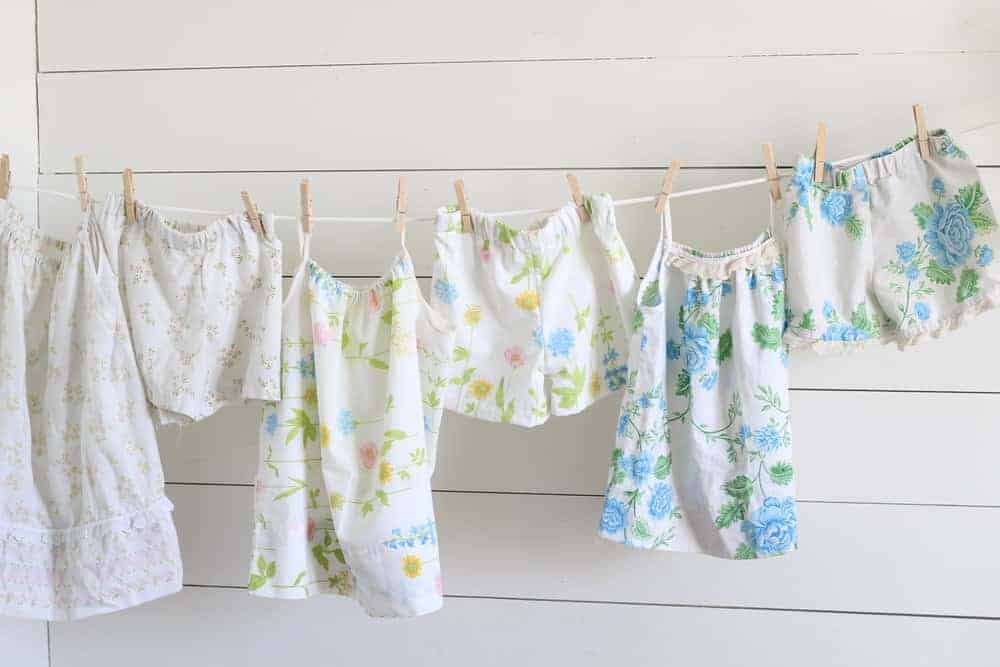
Table of Contents
- I first made these pajamas for my girls a few summers ago, when I came across some really pretty vintage sheets that I needed to find a use for. The faded florals were so pretty and airy, I thought they would be perfect for summer PJ sets. I never sew anything super complicated, so I knew I wanted to make cozy elastic shorts and a simple pillowcase style top. These super simple pajama sets can be whipped up in about an hour. All of these sheet sets were found at thrift stores for around $5 each.
- Easy Pajama Sets for Girls from Vintage Sheets
- How to Sew Girl’s Pajamas from Vintage Sheets Video
- Sewing the Shorts
- How to Sew Girl’s Pajamas from Vintage Sheets Recipe
Easy Pajama Sets for Girls from Vintage Sheets
I first made these pajamas for my girls a few summers ago, when I came across some really pretty vintage sheets that I needed to find a use for.
The faded florals were so pretty and airy, I thought they would be perfect for summer PJ sets.
I never sew anything super complicated, so I knew I wanted to make cozy elastic shorts and a simple pillowcase style top.
Anything that requires a pattern just seems too cumbersome for me. When I have time to sew, I usually only get a couple of hours, and I don’t like to walk away from anything unfinished. These super simple pajama sets can be whipped up in about an hour. Now I can handle that kind of time commitment.
All of these sheet sets were found at thrift stores for around $5 each. I made two sets from each flat sheet and had plenty of fabric to spare.
How to Sew Girl’s Pajamas from Vintage Sheets Video
Girls Pajamas from Vintage Sheets Instructions
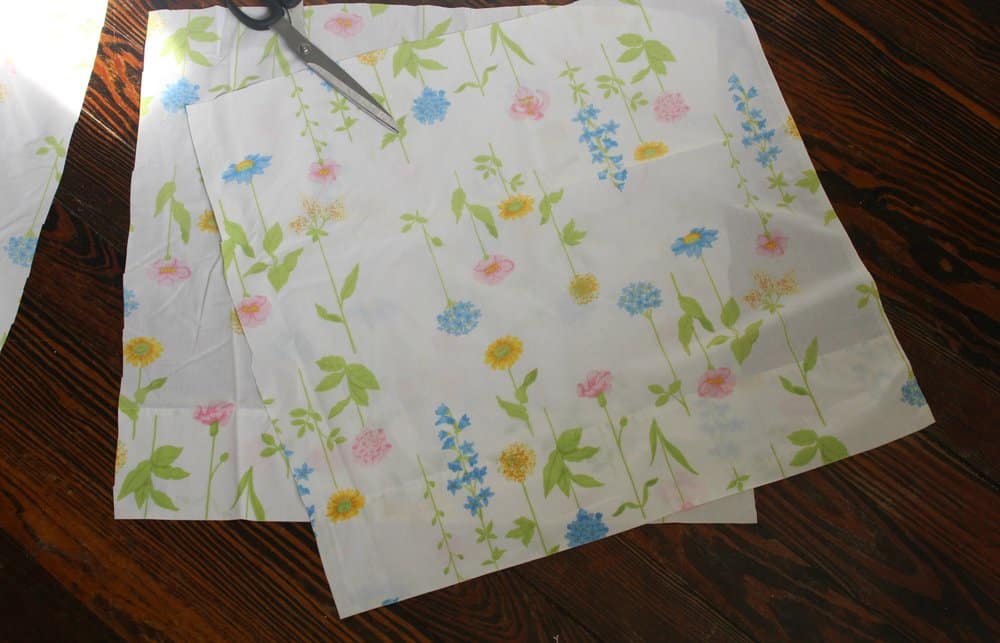
To begin, cut two top pieces from the measurements below, being sure to utilize the hem of the sheet when cutting. So, the long side will be along one of the outside hems of the sheet. (If this is confusing, watch the video tutorial.)
If you don’t utilize the sheets hemmed edge, you will need to add a couple of inches to the length dimension to allow for a seam.
Dimensions for the top:
2T-4T- 16″ wide by 15″ long
4T-6- 18″ wide by 17″ long
6-8- – 20″ wide by 19″ long
8-10- 22″ wide by 21″ long
Next, take a small piece of fabric or paper and cut out a 3″ by 4″ square and round off the bottom right corner by cutting it with your scissors, as I did below.
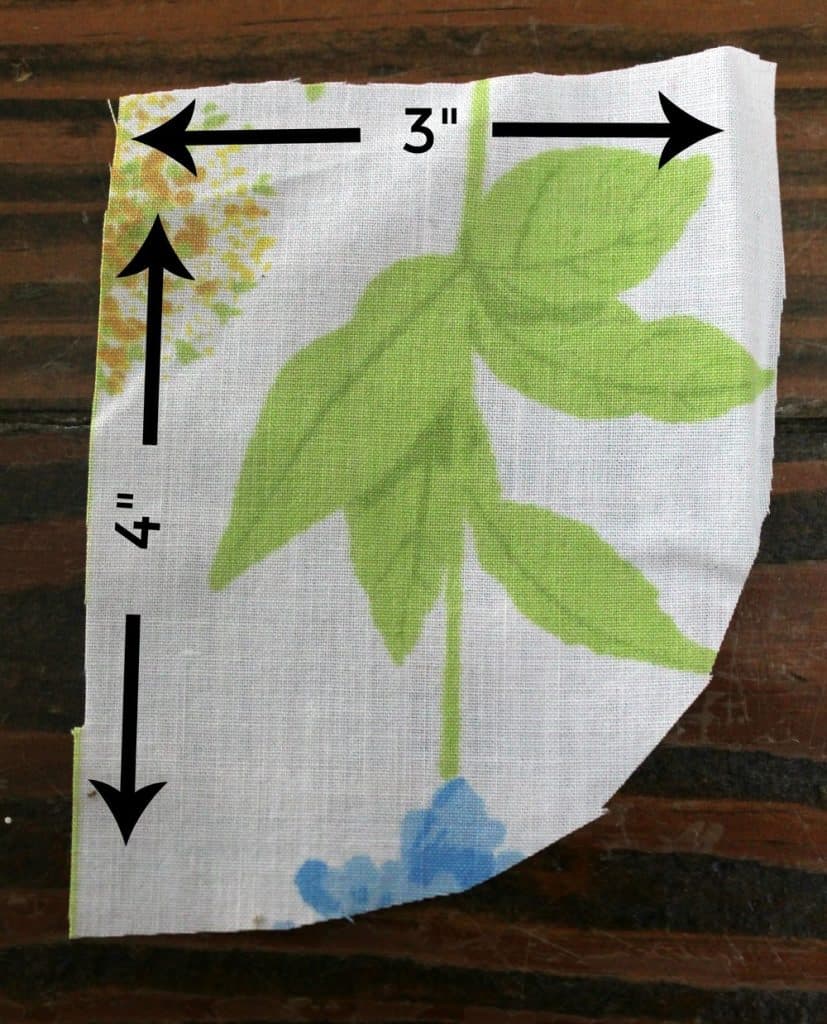
This will be the pattern piece you will use to create your armholes.
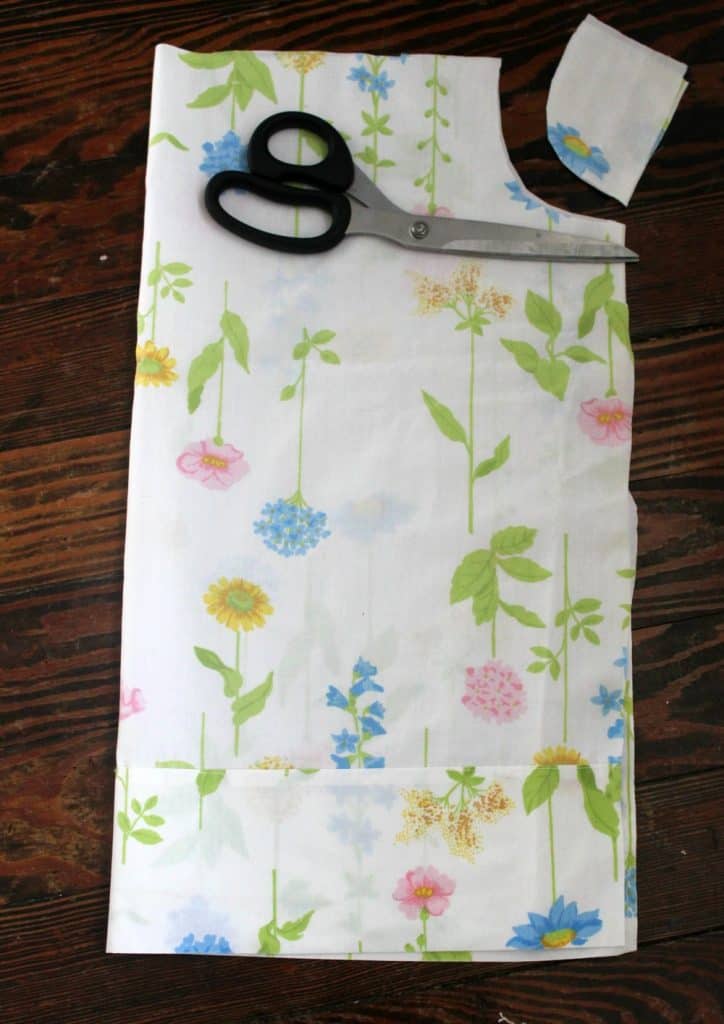
Fold each top piece in half (horizontally) and use your pattern to cut out notches for the armholes on the top side, opposite the fold, as I did below.
Next, line your two top pieces up, right sides together, and pin along the sides. Sew in place.
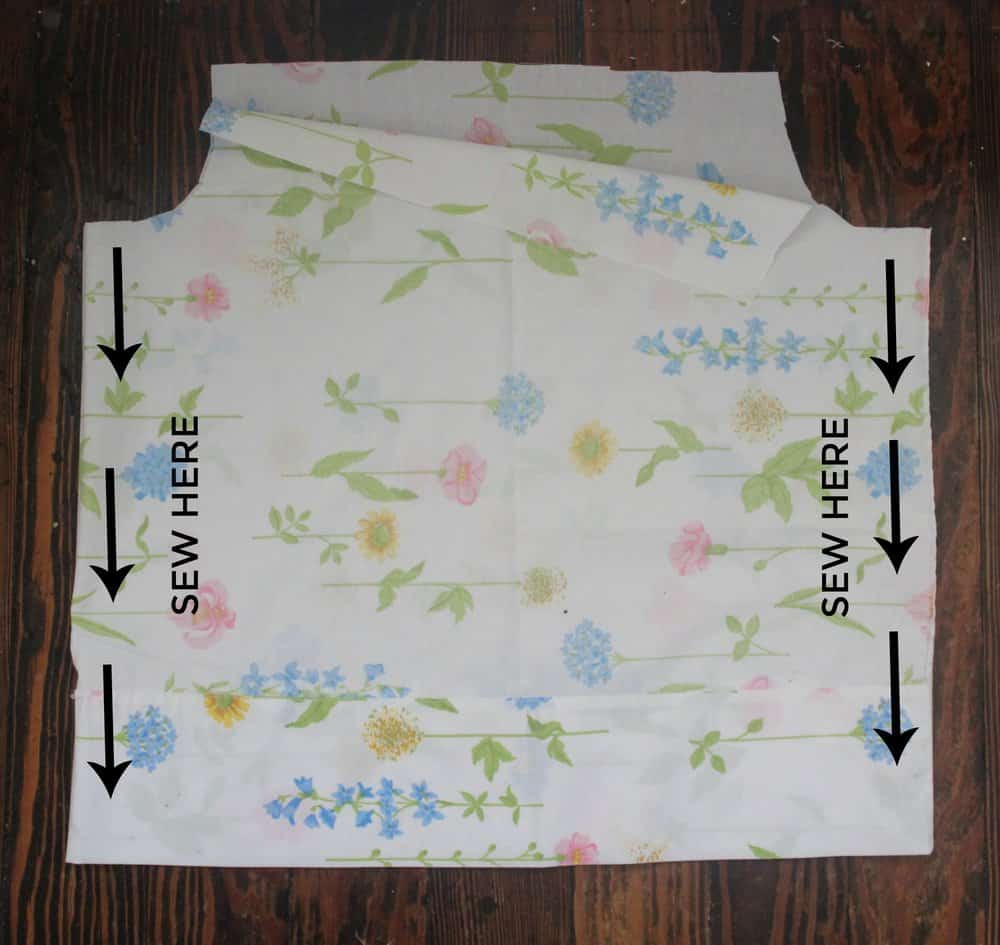
Press the top edge of your front shirt piece down 1/2″ and then another 1/2″, hiding the raw edge inside, to create the elastic casing. Sew in place.
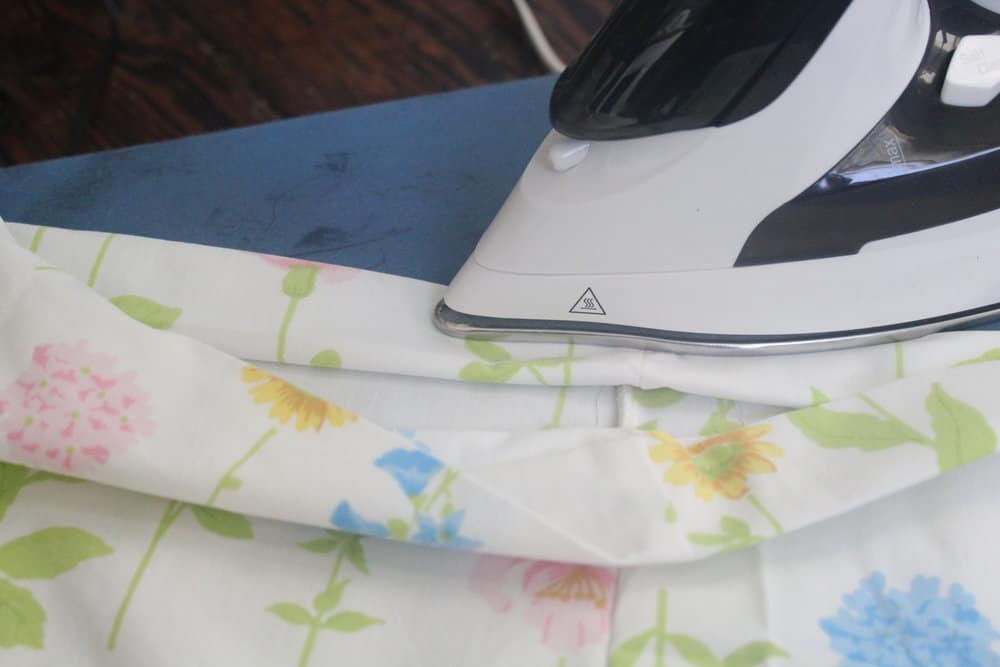
Add a safety pin to the end of a piece of 1/4″ elastic, using the measurements below.
Neck elastic length:
2T-4T- 5″
4T-6- 6″
6-8- 7″
8-10- 8″
Push the elastic through the casing of the front, and sew it in place on both sides of the casing.
Repeat for the back top piece.
For the straps, cut two pieces of double fold bias tape from the measurements below:
2T-4T- 15″
4T-6- 16″
6-8- 17″
8-10- 18″
For this step, I used 1/4″ bias tape, which is really skinny. You could also use 1/2″ bias tape for thicker straps. I like the skinny straps, but they are a little harder to work with.
If you like a pop of color, this is a super fun way to do it. They sell bias tape in just about every shade imaginable. I like the vintage feel of neutrals, but I also think it would be fun to use blue, pink or green for the straps. So many possibilities!
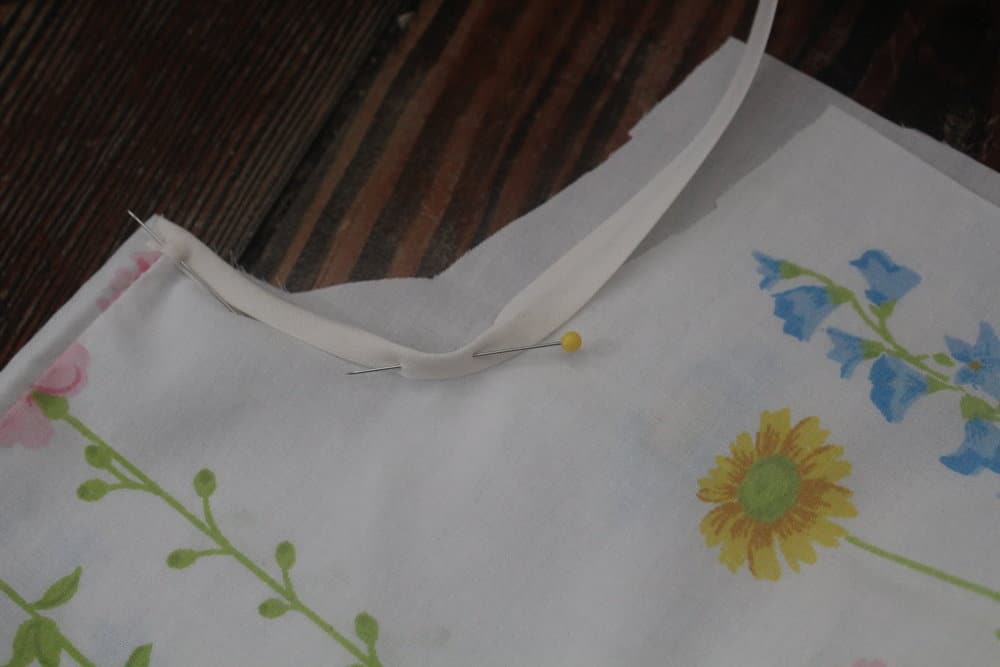
Starting at the side seam of the top, fold the bias tape in half, and sandwich the raw edge of the top inside. Pin it in place. Next, Pin the other side of the strap in place at the seam, overlapping the first. (Again, I think the video is helpful in showing what I mean here.)
Sew all the way around the strap.
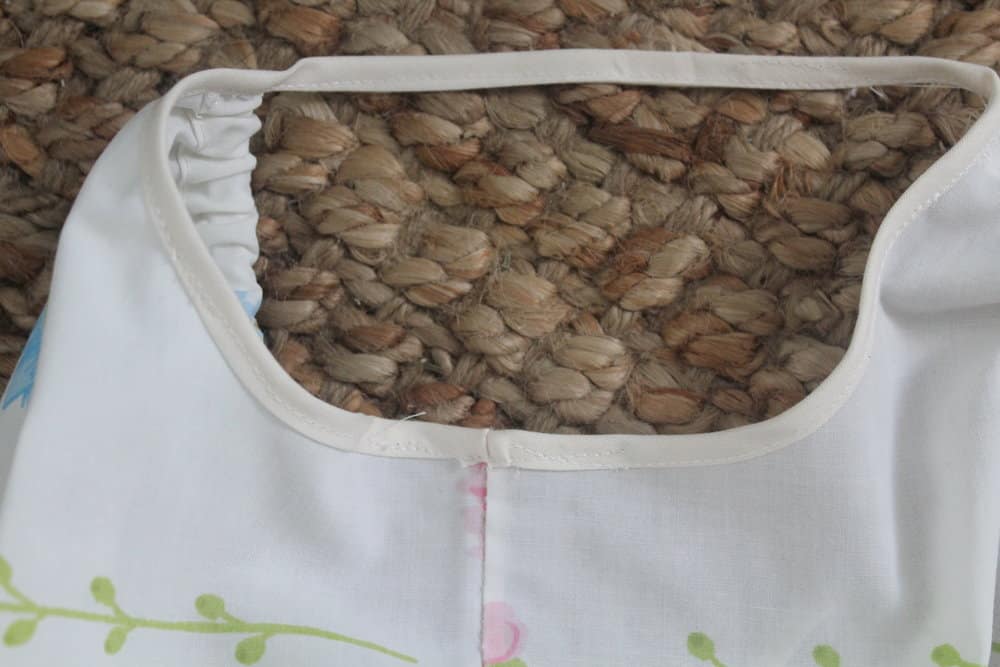
Now, go ahead and add all the fun little trims your heart desires. I love the look of eyelet, pop pom trim, and lace. Just search vintage trims on Etsy and behold all the possibilities.
Sewing the Shorts
Next, it is time to make the shorts.
I already confessed that I am not a pattern user. Anytime I am making things for my kids, I go to their closet and pull out a dress or pants that currently fit them and steal measurements from there.
I measure the length of the elastic in a waistband, the length of the hemlines, the width of the bodice and length of sleeves. No need to search the internet for standard measurements. Just go find all the info you need right in your child’s closet.
The same goes for the shape of shorts and tops.
I pulled a pair of pajama pants out my daughter’s drawer and used it for the pattern piece for the shorts. I simply folded it in half and cut around it, leaving room for the seams (about 3/4″ of an inch) and extra space at the top (about 3″) for the elastic waistband.
Cut four pieces (two for the front and two for the back). Make sure that you have two facing one way and two facing the other. So, cut your fabric right side up to cut two and then the wrong side up to cut the other two.
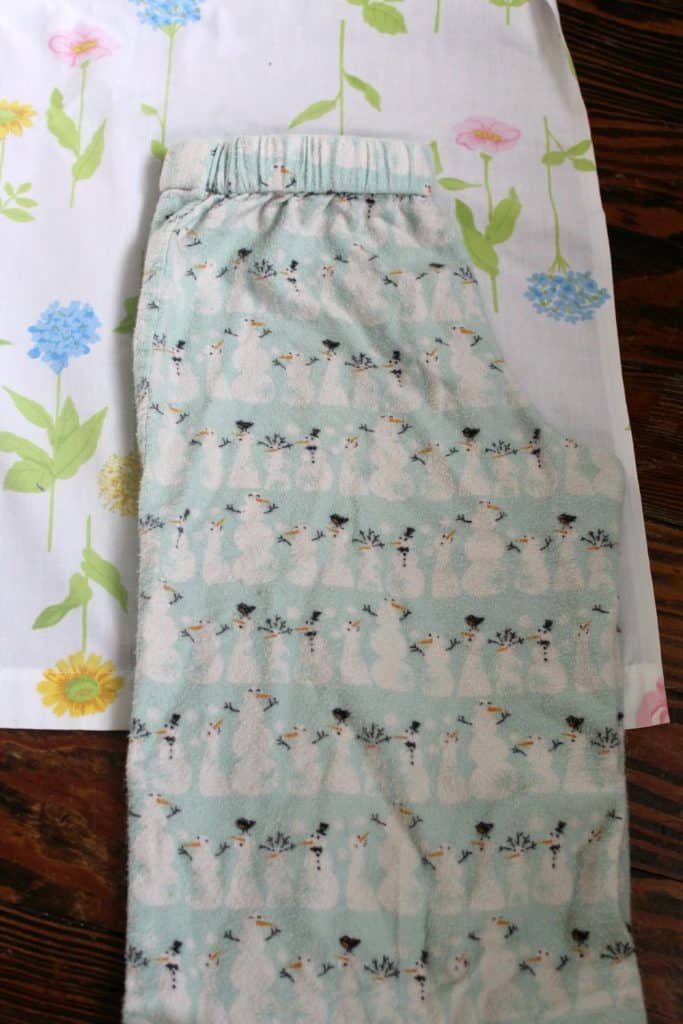
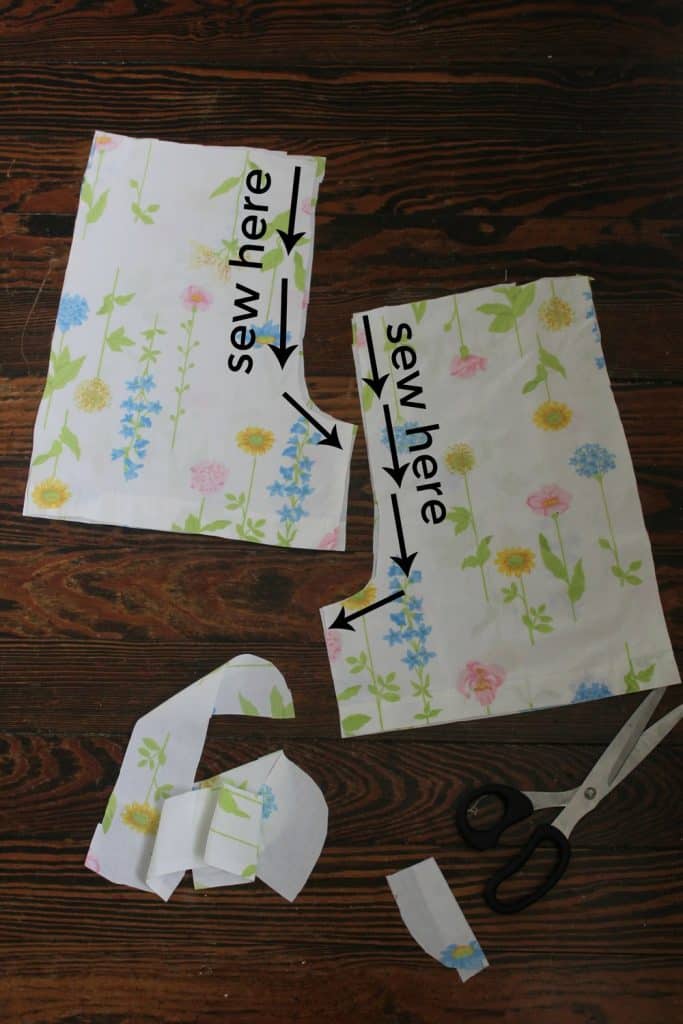
Pin and sew, with right sides together and a 1/2″ seam, down the center seem, as illustrated below.
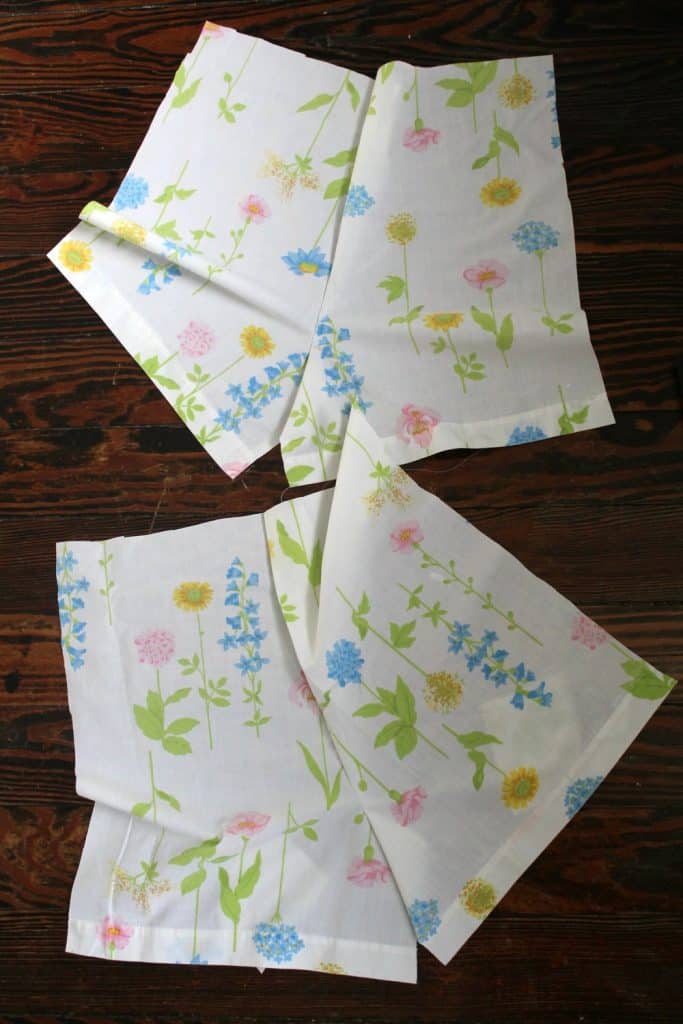
Now that you have a front and back piece, line them up right sides together, and sew down the sides with a 1/2″ seam.
After you have sewn the sides, sew around the crotch, making sure to line up the front center seam to the back center seam.
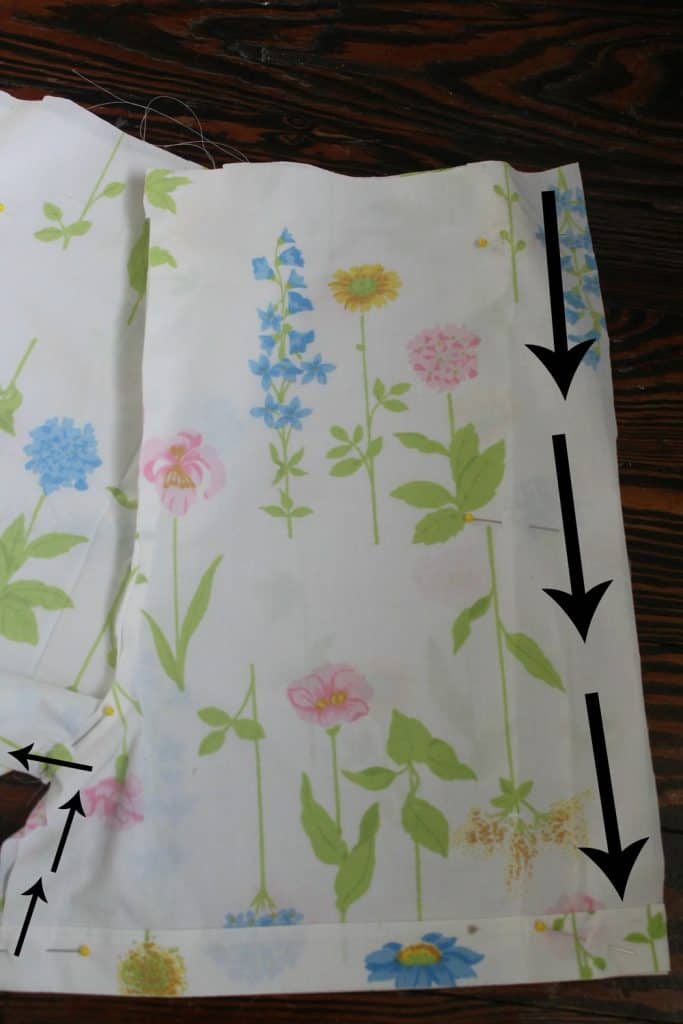
To make the waistband elastic casing, press the top down 1.5″ and then another 1.5″, hiding the raw edges inside.

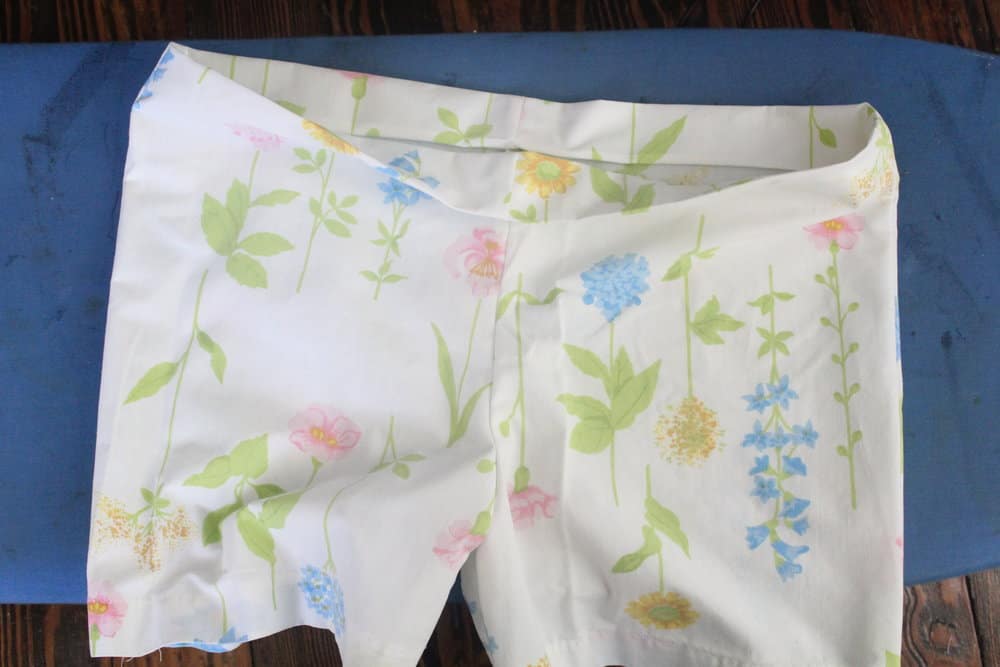
Sew the waistband almost all the way around, leaving a 1″ opening to push the elastic through.
Cut a piece of 1″ elastic from the dimensions below.
Waistband elastic length:
2T-4T- 22″
4T-6- 24″
6-8- 26″
8-10- 28″
Push the elastic all the way through until it meets up with the other end at the opening.
Overlap the ends, being careful that you don’t have them twisted, and sew the ends to each other.
I like to sew in more than one spot, so I can be sure they won’t separate and pull out the waistband.
Sew up the 1″ spot that you left open to pull the elastic through.
Add some more embellishments to the bottom of the shorts, if you want to get extra fancy.
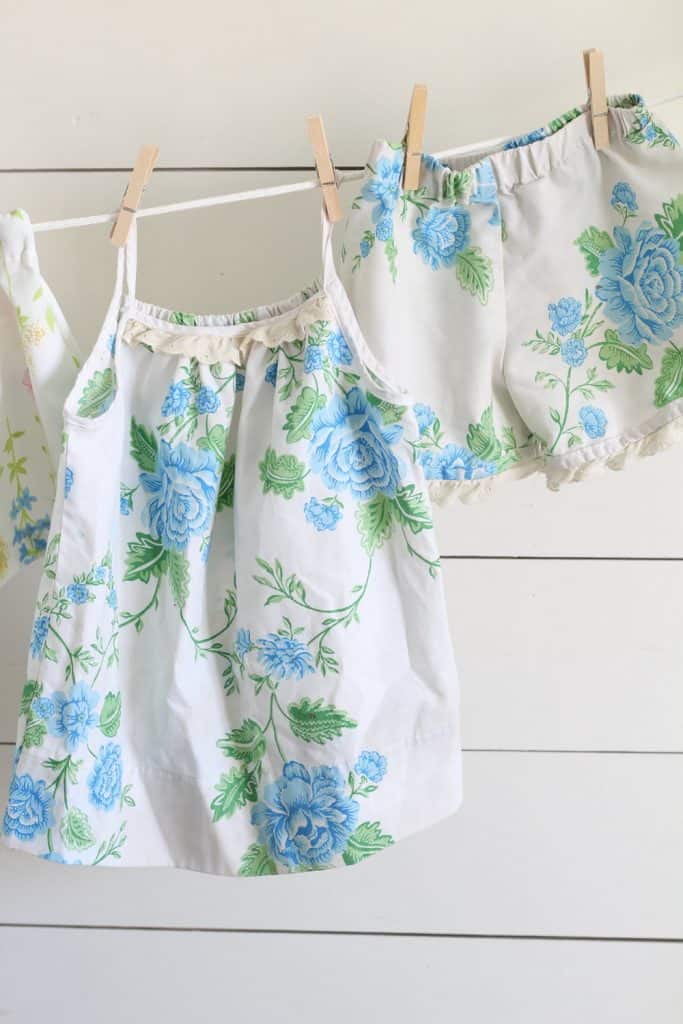
Find some more vintage sheets and repeat repeat repeat.
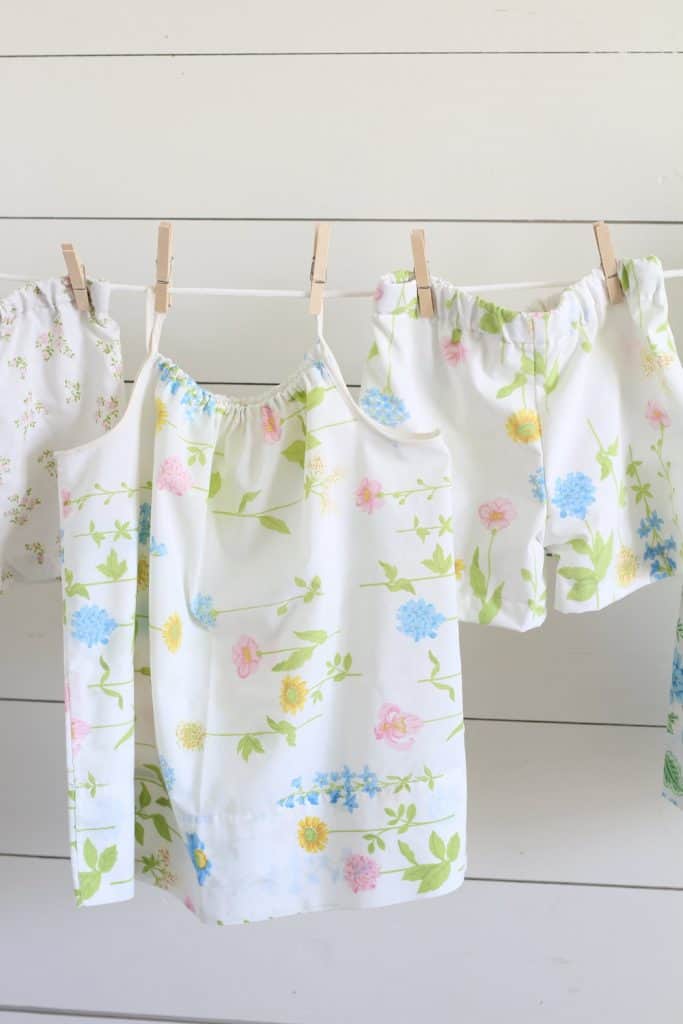
I wonder how many more years I will get to dress my girls in frilly vintage sheets pajama sets. Excuse me. I’m off to make 10 more sets before I lose my chance.
How to Sew Girl’s Pajamas from Vintage Sheets
Equipment
- Sewing machine
Ingredients
- vintage sheets
- fabric trim
Instructions
- Cut out Top pieces.
- Next, take a small piece of fabric or paper and cut out a 3″ by 4″ square and round off the bottom right corner by cutting it with your scissors, as I did below. This will be the pattern piece you will use to create your armholes.
- Fold each top piece in half (horizontally) and use your pattern to cut out notches for the armholes on the top side, opposite the fold, as I did below.
- Next, line your two top pieces up, right sides together, and pin along the sides. Sew in place
- Press the top edge of your front shirt piece down 1/2″ and then another 1/2″, hiding the raw edge inside, to create the elastic casing. Sew in place.
- Add a safety pin to the end of a piece of 1/4″ elastic, using the measurements below.
- Push the elastic through the casing of the front, and sew it in place on both sides of the casing. Repeat for the back top piece.
Make Straps
- For this step, I used 1/4″ bias tape, which is really skinny. You could also use 1/2″ bias tape for thicker straps. I like the skinny straps, but they are a little harder to work with.If you like a pop of color, this is a super fun way to do it. They sell bias tape in just about every shade imaginable. I like the vintage feel of neutrals, but I also think it would be fun to use blue, pink or green for the straps. So many possibilities!
- Starting at the side seam of the top, fold the bias tape in half, and sandwich the raw edge of the top inside. Pin it in place. Next, Pin the other side of the strap in place at the seam, overlapping the first. (Again, I think the video is helpful in showing what I mean here.)
Sew all the way around the strap. - Now, go ahead and add all the fun little trims your heart desires. I love the look of eyelet, pop pom trim, and lace. Just search vintage trims on Etsy and behold all the possibilities.
SEWING THE SHORTS
- Next, it is time to make the shorts. I already confessed that I am not a pattern user. Anytime I am making things for my kids, I go to their closet and pull out a dress or pants that currently fit them and steal measurements from there.
- I measure the length of the elastic in a waistband, the length of the hemlines, the width of the bodice and length of sleeves. No need to search the internet for standard measurements. Just go find all the info you need right in your child’s closet.
- The same goes for the shape of shorts and tops. I pulled a pair of pajama pants out my daughter’s drawer and used it for the pattern piece for the shorts. I simply folded it in half and cut around it, leaving room for the seams (about 3/4″ of an inch) and extra space at the top (about 3″) for the elastic waistband.
- Cut four pieces (two for the front and two for the back). Make sure that you have two facing one way and two facing the other. So, cut your fabric right side up to cut two and then the wrong side up to cut the other two.
- Now that you have a front and back piece, line them up right sides together, and sew down the sides with a 1/2″ seam. After you have sewn the sides, sew around the crotch, making sure to line up the front center seam to the back center seam.
- To make the waistband elastic casing, press the top down 1.5″ and then another 1.5″, hiding the raw edges inside.
- Sew the waistband almost all the way around, leaving a 1″ opening to push the elastic through.Cut a piece of 1″ elastic from the dimensions below.
- Push the elastic all the way through until it meets up with the other end at the opening. Overlap the ends, being careful that you don’t have them twisted, and sew the ends to each other. I like to sew in more than one spot, so I can be sure they won’t separate and pull out the waistband. Sew up the 1″ spot that you left open to pull the elastic through. Add some more embellishments to the bottom of the shorts, if you want to get extra fancy.
- Find some more vintage sheets and repeat repeat repeat.
Notes
- TOP: 16″ wide by 15″ long
- Neck elastic: 5″
- Straps: 15″ x2
- Waist elastic: 22″
- TOP: 18″ wide by 17″ long
- Neck elastic: 6″
- Straps: 16″ x2
- Waist elastic: 24″
- TOP: 20″ wide by 19″ long
- Neck elastic: 7″
- Straps: 17″ x2
- Waist elastic: 26″
- TOP: 8-10- 22″ wide by 21″ long
- Neck elastic: 8″
- Straps: 18″ x2
- Waist elastic: 28″
Nutrition information is automatically calculated, so should only be used as an approximation.




I love how cute these turned out! I’m pretty sure between my mom and my grandparents I’ve got one or more of these same vintage patterns. What a great idea!
I’m curious what brand of serger you use and if you like it? I’m thinking of getting my own!
I use a Brother!
Just what I was looking for. So close to the baby doll pjs we had when we were kids.
I love these pj’s. They are so sweet, and bring me back to my childhood. I will hope to go and make these soon for my three year old twins. Much love!
I am a beginner and want to sew these for me. How do I size up the top to fit my size? I can use the instructions to copy some of my existing shorts but I’m not sure how to do the top?
Just use a nice loose fitting T-shirt that you have to draft the shape. The main thing here is making sure it is wide enough, so they are comfy enough to wear as PJ’s.
Yes, indeed Lisa. Thank you for such clear instructions. I’m a sewer and of a certain age t I do have many of those beautiful sheets from the 60’s & the 80’s and never thought of using them to make pyjamas. I have 7 grand-daughters. Here comes new pj’s girls. They will be thrilled especially when I tell them they are vintage. I have a 16 years old who is simply in love with women’s clothes from the 60’s & 70’s. She fits in my clothes of those days. As they were of high quality, I had never gave them away hoping one day the style would return & one grand-child could have them.
She’s the envy of her 10th grade class. Here I leave to pull-out those perfect double bed sheets that never used because of bedding size changed to queen size.
Kind regards, Claudette [Canadian through and through and love American spirit
Hey Claudette! Thats so cool your granddaughter loves vintage. I was always interested in things like that as a teen also. I’m glad you found this tutorial helpful! 🙂
Well done
Thanks for writing this awesome article. I’m a long time reader but
I’ve never been compelled to leave a comment. I subscribed to your blog and shared this on my Facebook.
Thanks again for a great post!
Very cute!
Thank you!!
Thank you so much, Lisa for your concise, beautifully photographed instructions for the pajamas!
Off to watch the video, then go shopping. Well done! 🙂
Thank you so much! Your comment makes me so happy. 🙂