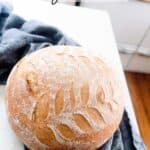
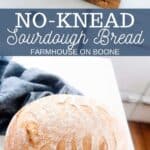

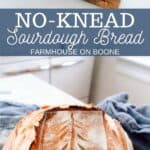
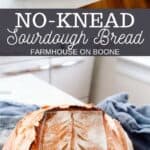


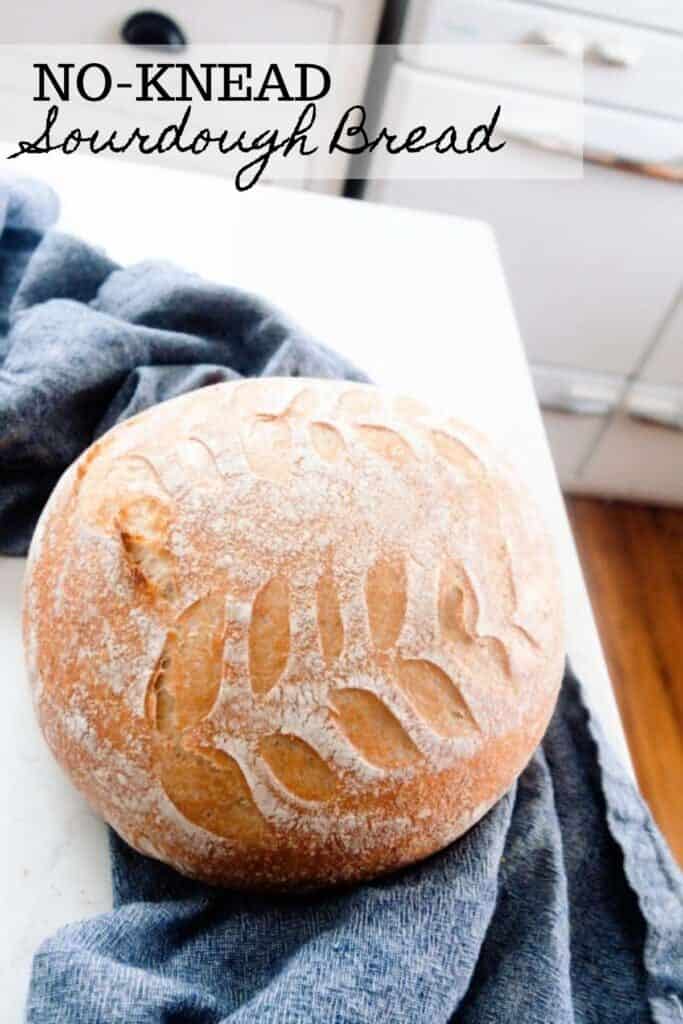
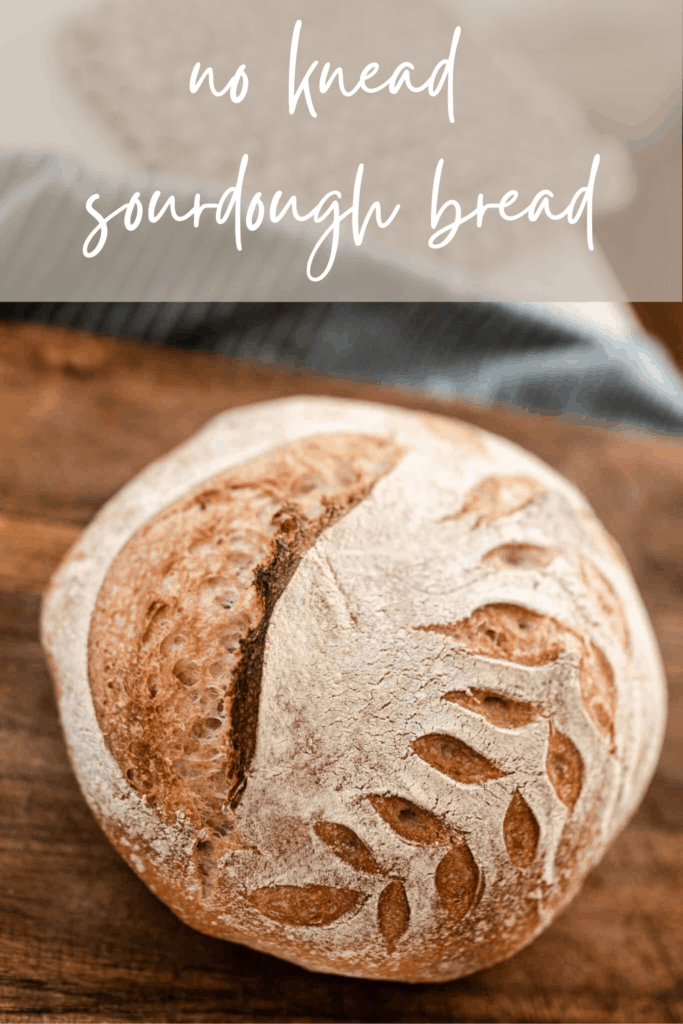
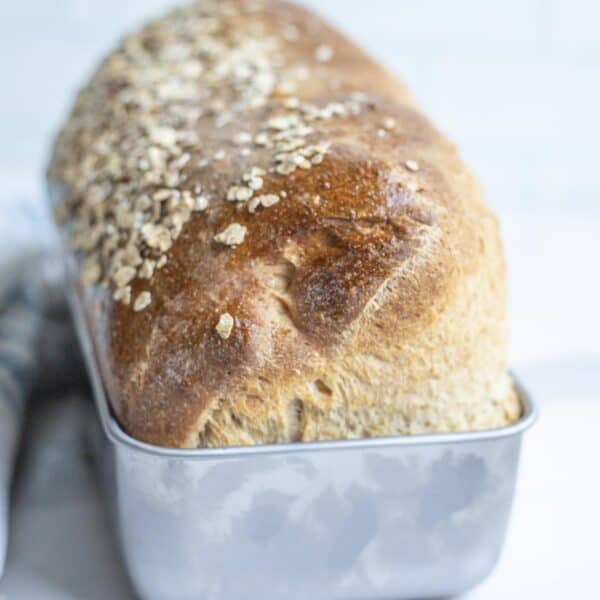
A crusty, no-knead, sourdough bread with a delightfully soft texture and deliciously tangy flavor. The dough is mixed one day and baked the next, giving it an elevated taste and texture.
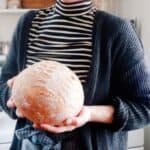
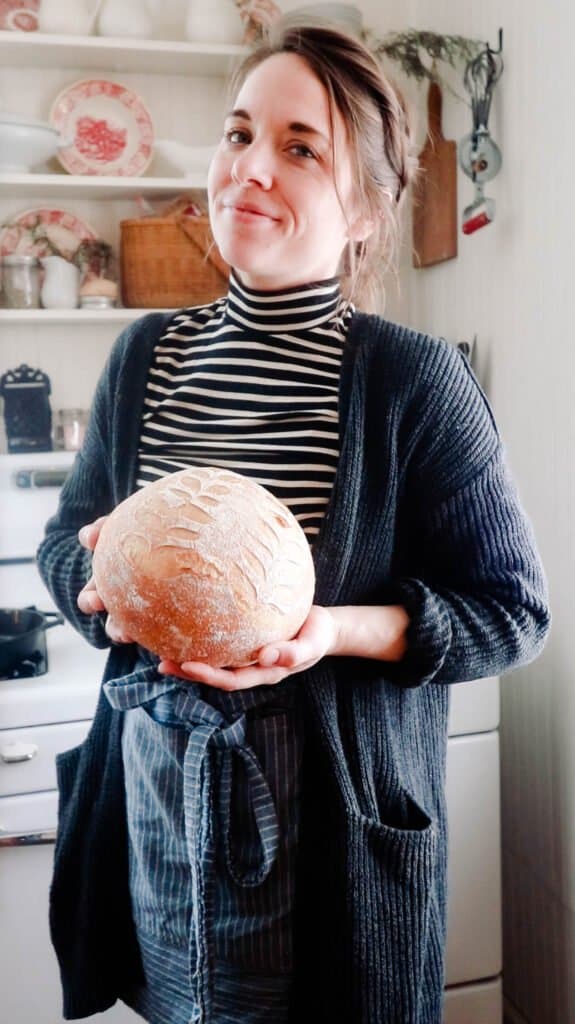
Crusty loaves of sourdough bread are an absolute staple in our house. This is an art I continue to work at mastering, but I also think of it as a hobby. I enjoy working on my sourdough recipes, fine tuning and perfecting them.
I’m hoping this will also become a passion for my children one day, as they reflect back on the memories of fresh bread and time spent in the kitchen. How fortunate to find a hobby kind of joy in a simple, everyday kind of task!
Learning makes me happy, and learning how to make the perfect loaf and mastering beautiful designs can be incredibly satisfying. I continue to find that the extra special attention to detail makes all the difference, especially with sourdough.
See, sourdough can be fickle. Sometimes a loaf doesn’t turn out just right. Don’t get me wrong, we still eat it.
We might turn it into a breakfast Strata, stuffing, or cut it in half and make pizza bread, but we still eat it.
After experimenting for weeks to create the perfect, artisan-style, no-knead bread, I finally feel like I nailed it.
This process and recipe has given me consistently good loaves, so that’s why I’m excited to share it!
What is sourdough bread?
Sourdough bread is a fermented bread that uses natural wild yeast to rise, rather than relying on commercial yeast.
It is a healthier choice, plus many people who are sensitive to gluten (not celiac) can tolerate sourdough products, due to the fermentation of the grains.
Phytic acid (that is naturally present in wheat), which is an anti-nutrient that blocks absorption of the nutrients found in wheat, gets broken down during the fermentation process. This breakdown, in turn, makes the nutrients more available for your body to absorb.
How do you make a sourdough starter?
Creating a sourdough starter is actually pretty simple. It is the process of mixing water and flour together for multiple days until yeasts are captured and the flour bubbles. You can find the tutorial on how to make a sourdough starter here.
Is it necessary to knead sourdough?
Not necessarily. The act of kneading is supposed to help create gluten formation in the bread, which can then help create a good texture and air pockets in the bread. But no-knead sourdough bread uses other methods to develop the gluten.
How does no-knead sourdough work?
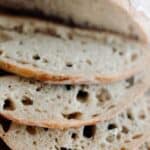
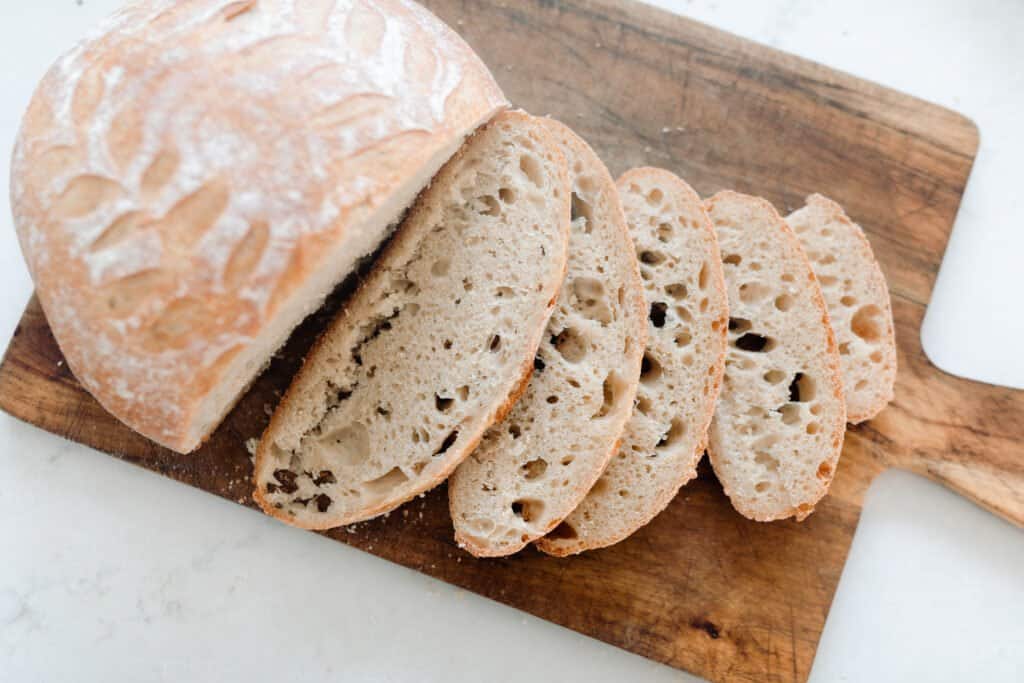
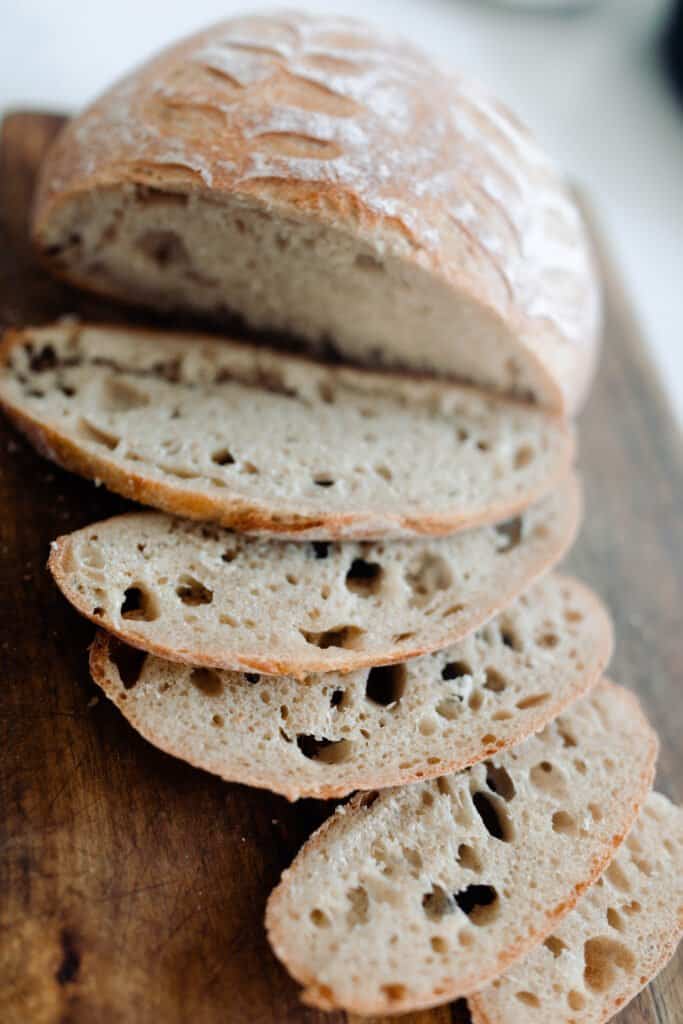
In no-knead versions, the gluten develops during the stretching and folding process, as well as during the bulk fermentation process, which helps create those glorious air pockets.
This post contains affiliate links, which means I make a small commission at no extra cost to you. See my full disclosure here.
Tips For Success:
- You will need an active sourdough starter to create a well-risen bread. Check out how to make a sourdough starter and how to care for one.
- Cover the dough with a damp towel, beeswax wrap, or plastic wrap to ensure that an unpleasant crust doesn’t develop.
- The amount of time it takes for your dough to double can be determined by many environmental factors, such as the temperature in your home, the maturity of your starter, and the hydration status of the loaf.
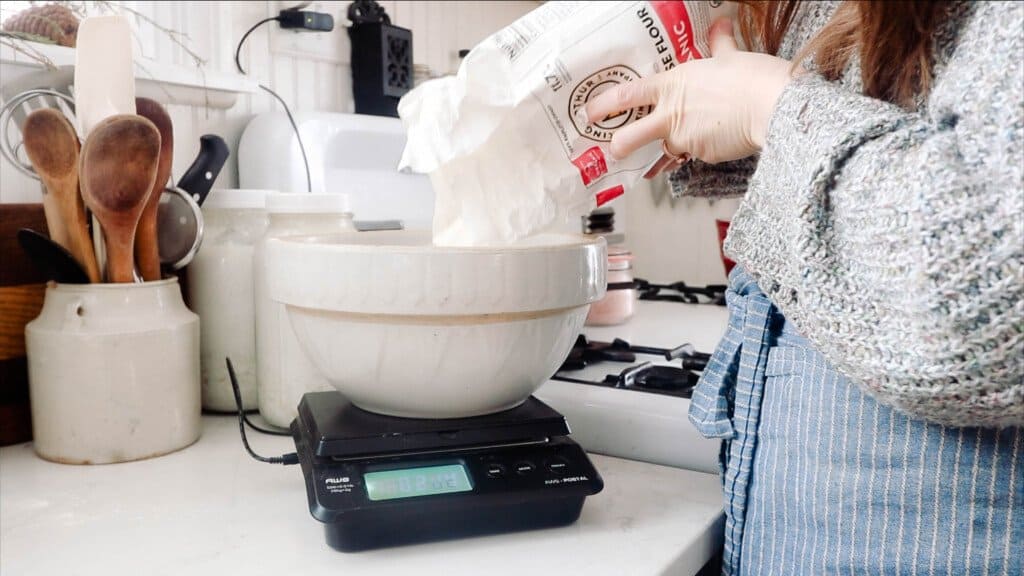
- The most accurate way to get the best loaves of bread each time is to measure your ingredients with a kitchen scale.
Tools you may need to make this recipe:
Large bowl
Kitchen scale
Banneton (optional)
How To Make No-Knead Sourdough Bread
Feed a sourdough starter 4-12 hours before starting the bread, ensuring it is active and bubbly.
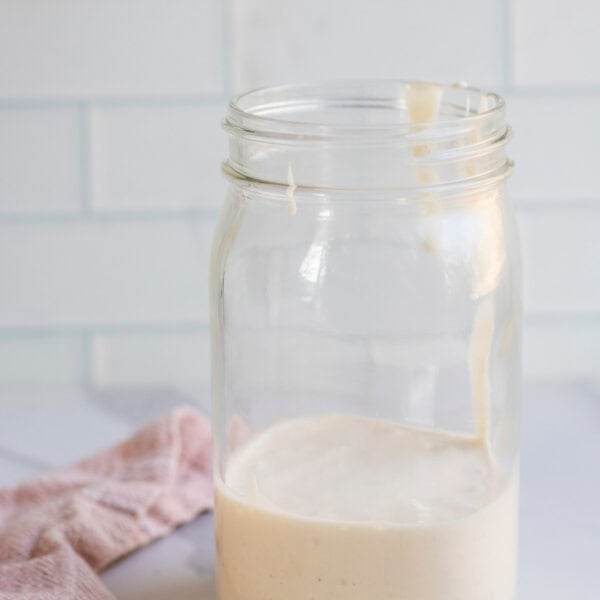
Combine warm water and flour. Allow to rest for 30 minutes for the water to hydrate the flour. This process is called autolyse.
Add sourdough starter. Dimple in with wet hand.
Sprinkle salt on top.
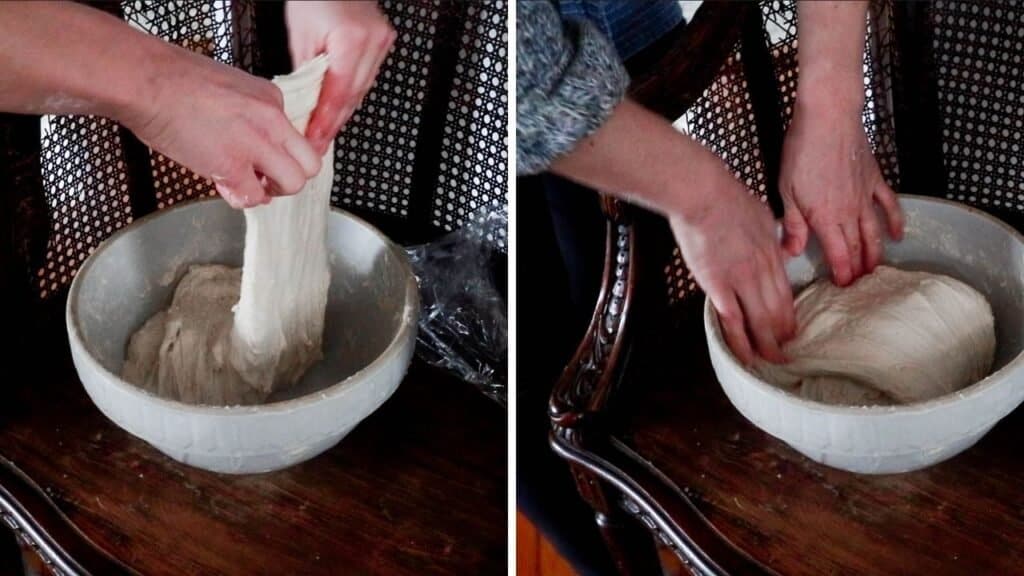
Mix the dough with your hands for about 5 minutes to bring the dough together. Cover with damp towel or plastic wrap while resting.
Cover with plastic wrap or damp towel and let rest for 30 minutes.
Stretch And Fold
To develop the gluten and obtain a nice rise, you will want to do 6 rounds of stretching and folding.
While the dough is in the bowl, grab the edge and the dough firmly and pull up, stretching it upwards. Then place the dough in your hands into the center. Turn the bowl about a quarter turn and do this stretch and fold again, and again one to two more times. This is considered one stretch and fold round. Repeat according to the directions below. Dip your hand in water if the dough is too sticky.
First 3 stretch and folds – every 15 minutes.
Last 3 stretch and folds – every 30 minutes.
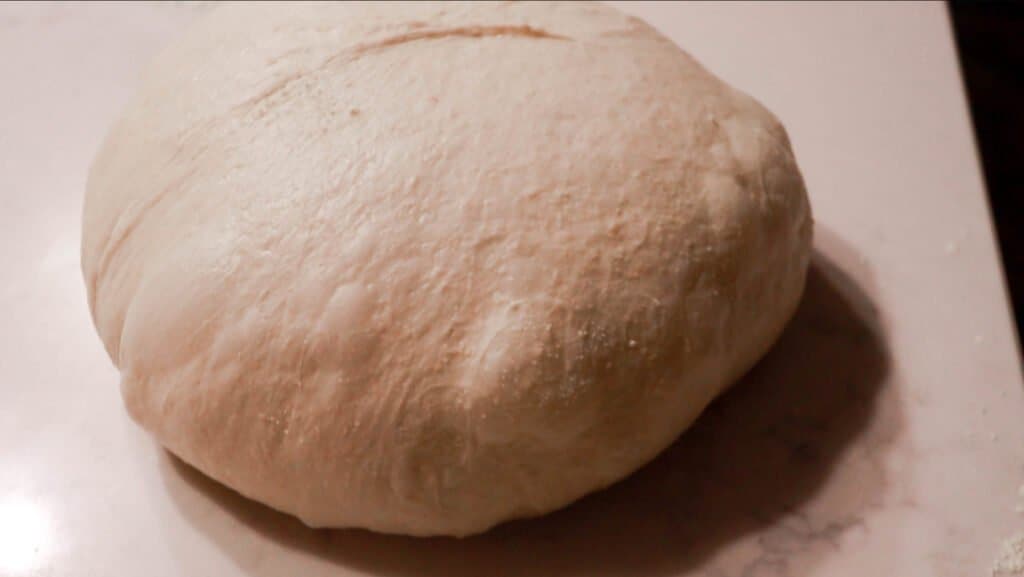
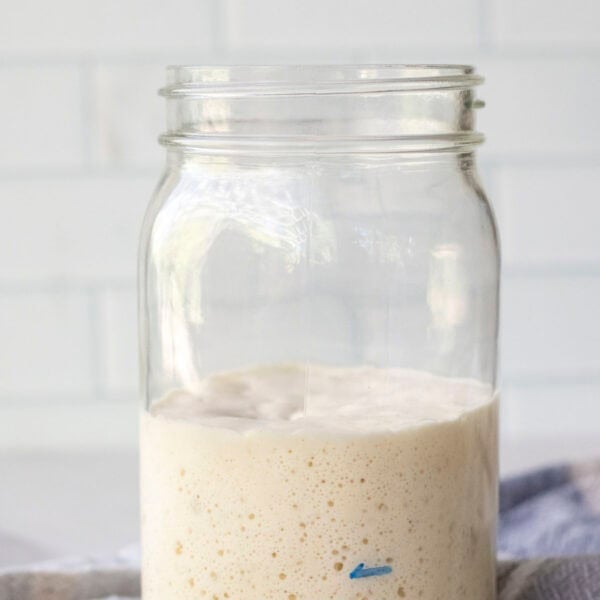
Cover with a wet towel or plastic wrap and allow the dough to bulk-ferment until doubled.
The timing for this will vary depending on temperature, hydration, and maturity of your starter. You could also let this step go longer for further health benefits. I do this in the morning and then let it go all day.
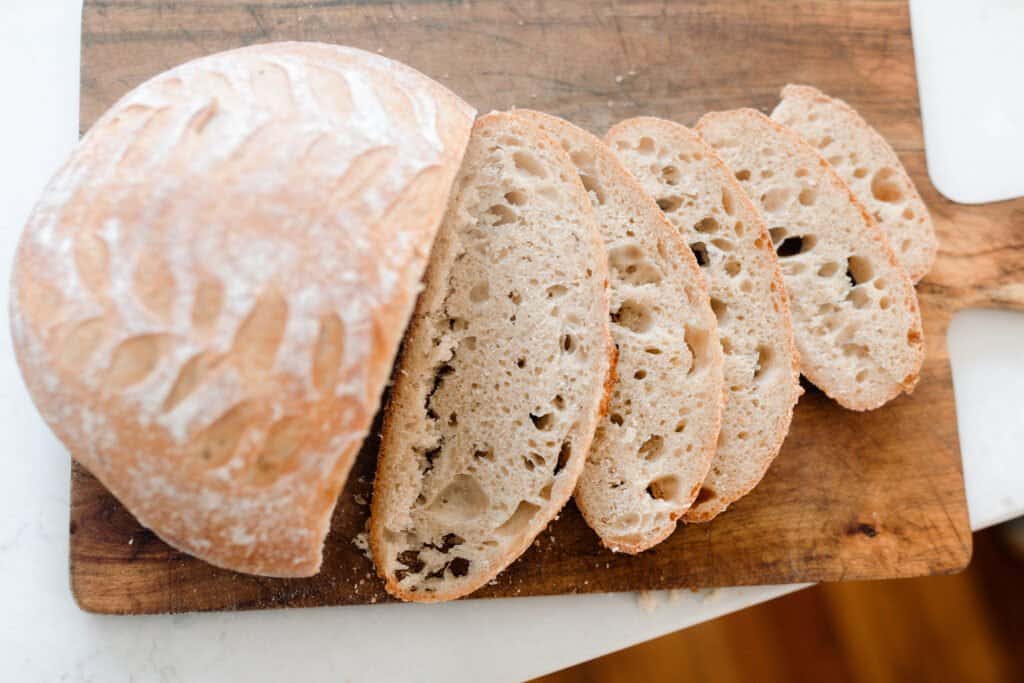
When it’s done, there will be bubbles all over the surface.
Split the dough in half down the middle with a dough scraper. Be really careful not to break any of those precious bubbles.
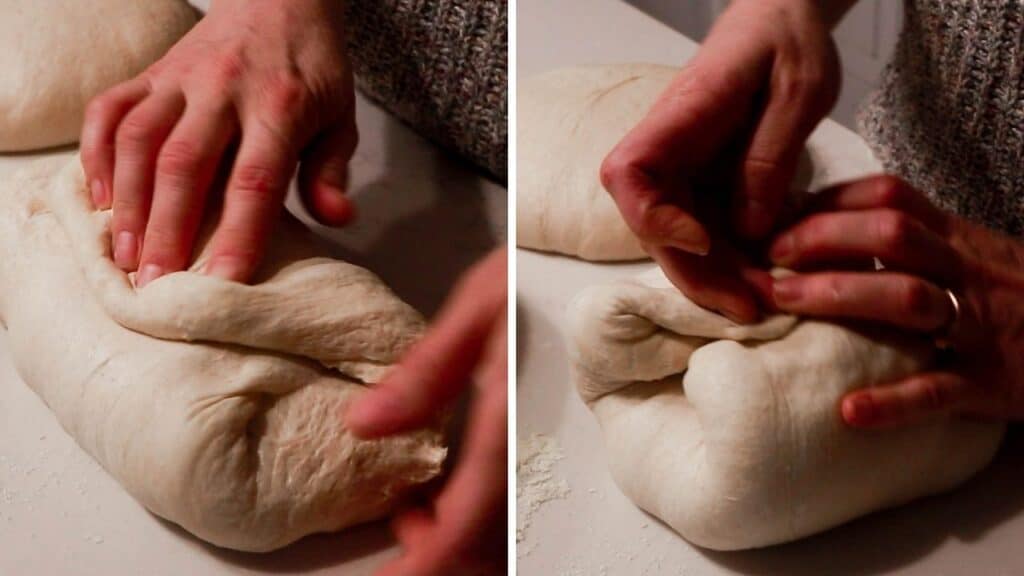
Shape into a ball by gently spinning it toward you.
Set out 15-20 minutes uncovered. This allows the surface to develop a skin, so that it doesn’t stick to the tea towel during the overnight rise.
Turn over and shape. I do this by folding the two sides over to meet in the middle, and then the other two sides.
Repeat with the other half of the dough. This recipe yields two loaves.
Transfer to flour banneton or bowl with tea towel, seam side up. Cover with plastic and proof 12-15 hours in refrigerator.
Bake
Preheat dutch oven to 500 degrees for 1 hour.
Remove dough from the fridge immediately before scoring and baking.
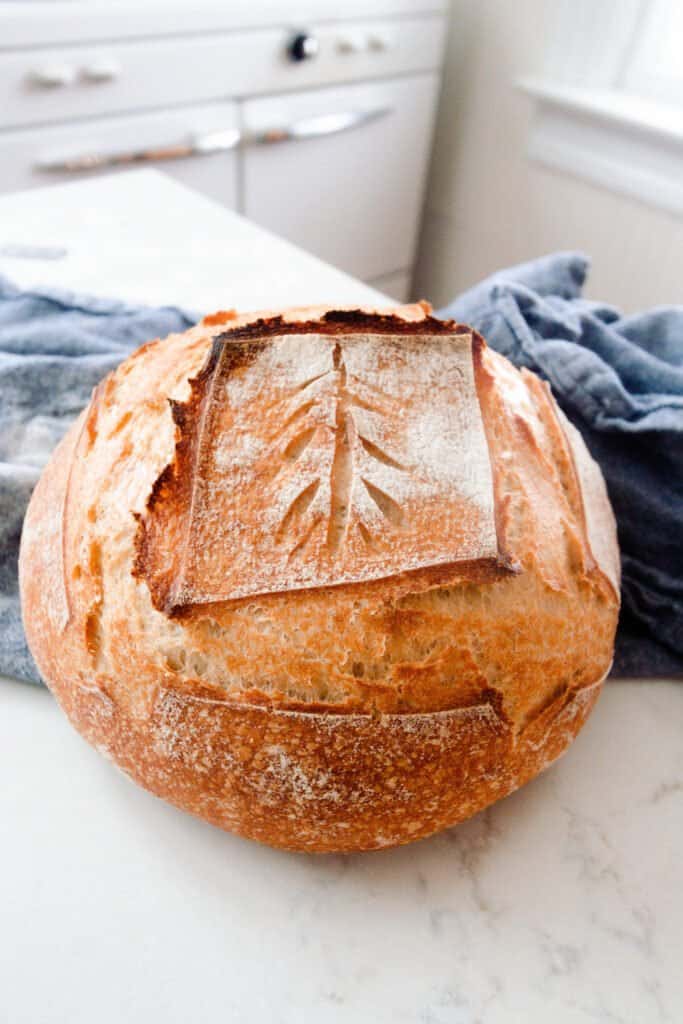
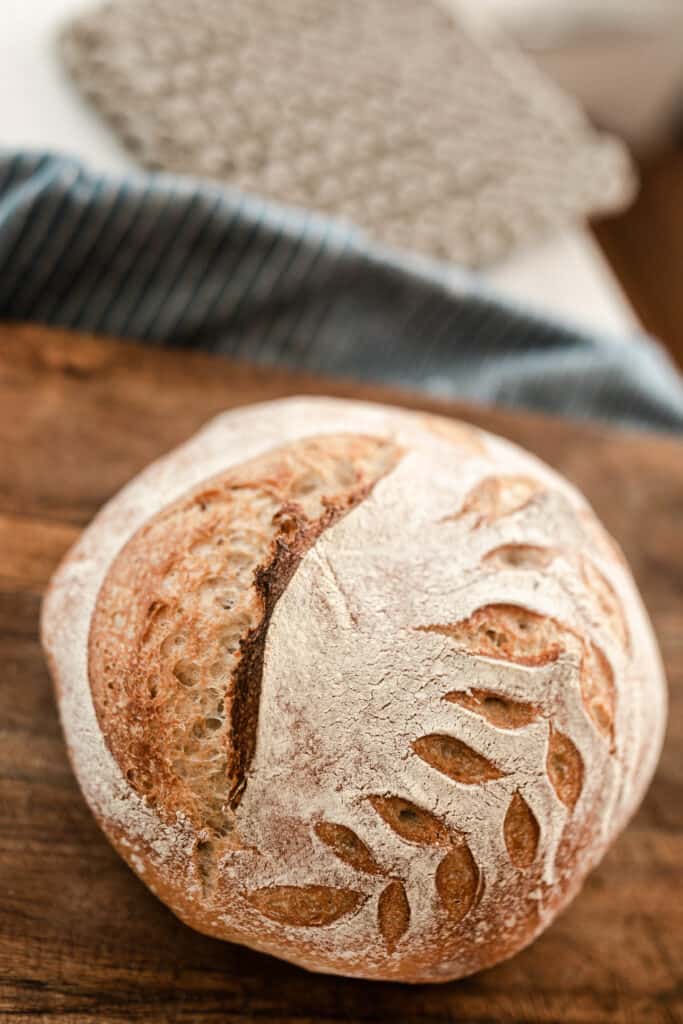
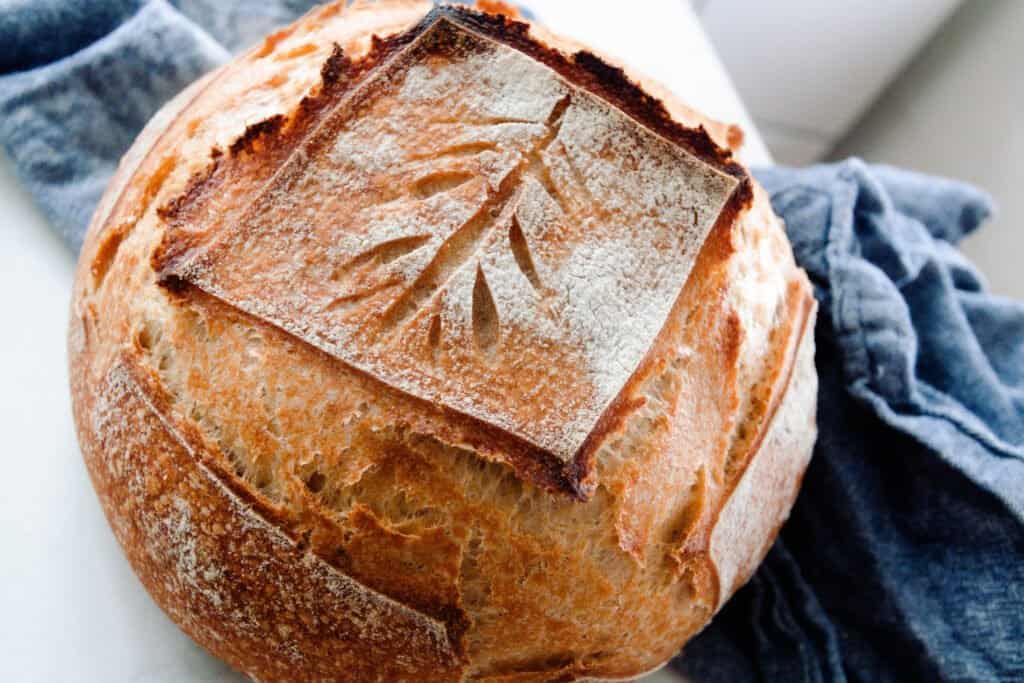
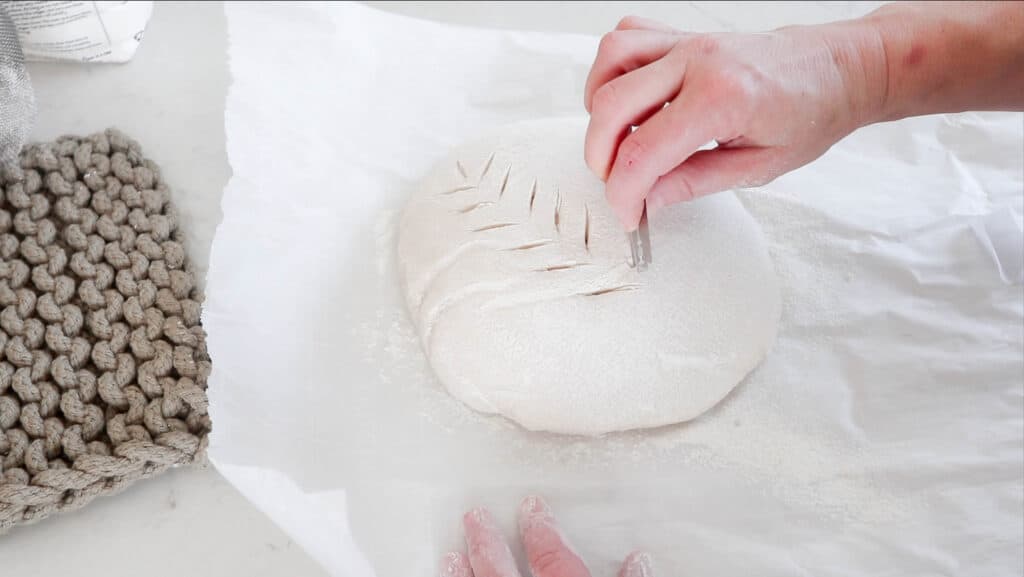
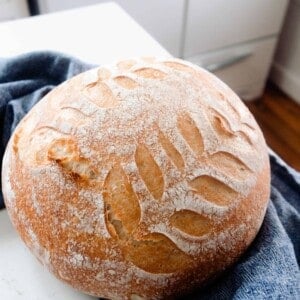
Dust with flour on top to make the scoring pattern stand out more.
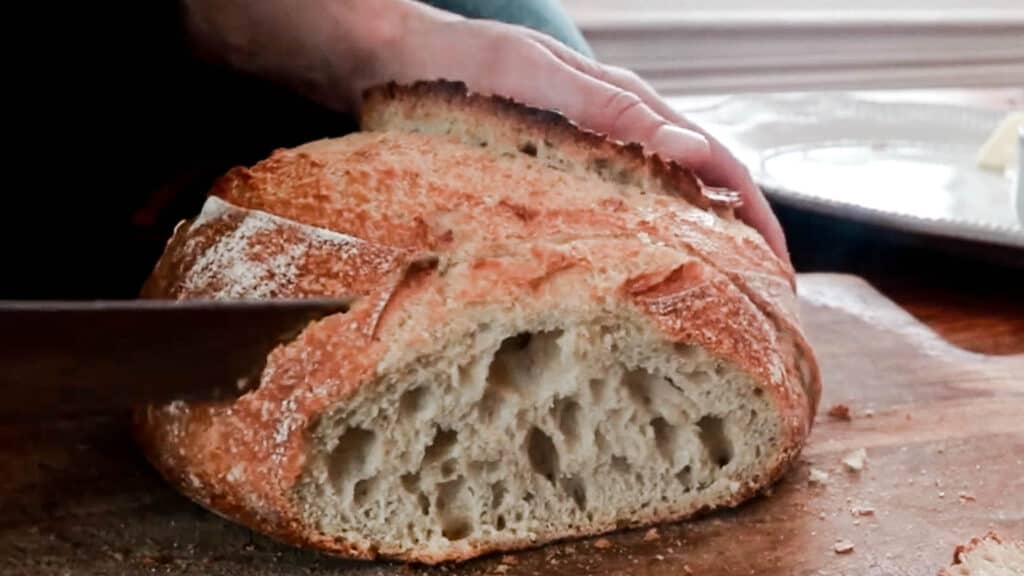
Score with a razor.
Add a little flour to the bottom of the dutch oven (or parchment paper) and transfer dough to it.
Bake for 20 minutes at 500 with lid on.
Take lid off, turn the oven temperature down to 475, and bake an additional 25 minutes or until browned.
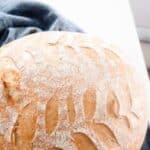
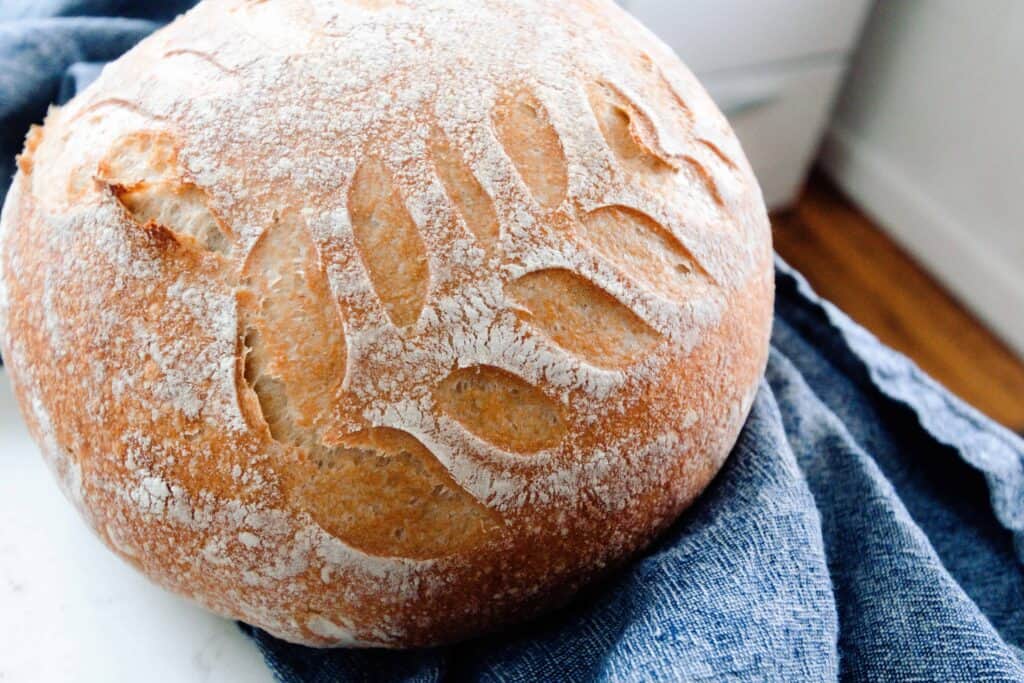
Tips for making your sourdough bread pretty
- Don’t skip the long rising time in the refrigerator. Bread dough takes forever to rise in the refrigerator, but this chilling process does make the final scoring pattern prettier. I’ve never had success with a beautiful scoring design when skipping this step.
- Dust a bit of flour over the surface before scoring. This will allow the design to stand out better.
- Use a razor. I know it’s tempting to just grab a sharp knife to score your bread, but proper bread scoring razors do yield a more beautiful result.
- Do an online image search for scoring patterns, and try your hand at a few tried and true designs before getting creative with your own.
- Practice, practice, practice. You will figure out just how deeply you need to cut, and how the design spreads during baking, by trying over and over again. The good news is you’re just going to eat it no matter what. We’ve eaten many an ugly loaf of bread, and they all tasted great.
Bakers Timeline For No-Knead Sourdough Bread
8 am: Feed sourdough starter with flour and water.
12 pm: If sourdough starter is mature, then proceed to creating the dough.
Combine the warm water and flour. Rest for 30 minutes.
12:30-ish pm: Add in sourdough starter and dimple in with wet hand.
Sprinkle salt on top.
Mix the dough with your hands for about 5 minutes. Cover with damp towel or plastic wrap. Rest for 30 minutes.
1:00ish pm: Stretch and fold.
First 3 stretch and folds – every 15 minutes
Last 3 stretch and folds – every 30 minutes
Cover with a wet towel or plastic wrap and allow the dough to bulk ferment until doubled.
8:00pm (may be much sooner): Split the dough in half down the middle with a dough scraper.
Shape dough.
Sit out 15-20 minutes, uncovered.
Turn over and shape.
8:30pm: Transfer to flour banneton or bowl with tea towel and cover with plastic. Place in the refrigerator for 12-15 hours.
The Next Day
9:00am: Preheat dutch oven on 500 for 1 hour.
Take dough out of fridge, dust with flour, and score.
10:00am: Bake the sourdough bread and allow to cool.
Find More Delicious Sourdough Recipes:
- Homemade Sourdough Bagels
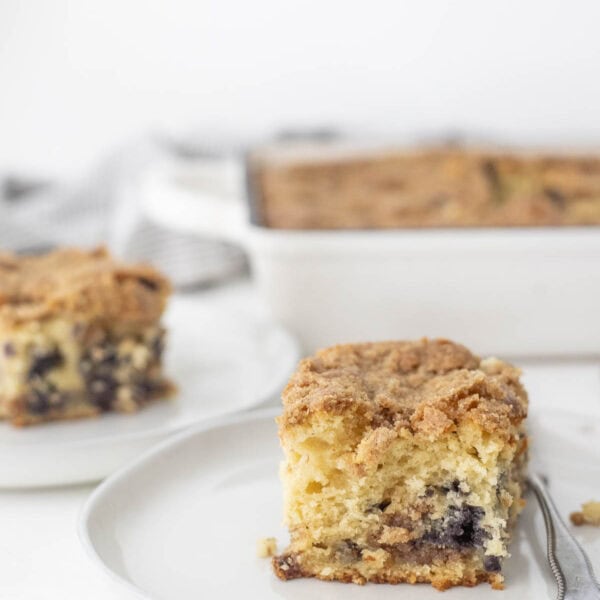
- Sourdough Coffee Cake
- Sourdough Chocolate Chip Cookies
- Einkorn Sourdough Bread
- Sourdough Chocolate Cake
If you try this recipe and love it, I would love if you could come back and give it 5 stars! Tag me on Instagram @farmhouseonboone
No-Knead Sourdough Bread
Ingredients
- 500 g unbleached all purpose
- 200 g freshly ground whole wheat
- 250 g bread flour, can omit and just add more to the unbleached all purpose
- 200 g mature starter, active and bubbly
- 650 g water
- 20 g salt
Instructions
- Feed a sourdough starter 4-12 hours before starting the bread, ensuring it is active and bubbly.
- Combine warm water and flour. Allow to rest for 30 minutes for the water to hydrate the flour.
- Add sourdough starter. Dimple in with wet hand.
- Sprinkle salt on top.
- Mix the dough with your hands for about 5 minutes to bring the dough together. Cover with damp towel or plastic wrap while resting.
- Cover with plastic wrap or damp towel and let rest for 30 minutes.
STRETCH AND FOLD
- First 3 stretch and folds – every 15 minutes.
- Last 3 stretch and folds – every 30 minutes.
- Cover with a wet towel or plastic wrap and allow the dough to bulk ferment until doubled.
- Split the dough in half down the middle with a dough scraper. Be really careful not to break any of those precious bubbles.
- Shape into a ball by gently spinning it toward you.
- Set out 15-20 minutes uncovered.
- Turn over and shape.
- Transfer to flour banneton or bowl with tea towel. Cover with plastic and proof 12-15 hours in refrigerator.
Bake
- Preheat dutch oven on 500 for 1 hour.
- Remove dough from the fridge immediately before scoring and baking.
- Dust with flour on top to make the scoring pattern stand out more.
- Score with a razor.
- Add a little flour to the bottom of the dutch oven (or parchment paper) and transfer dough to it.
- Bake for 20 minutes at 500 with lid on.
- Take lid off, turn the oven temperature down to 475 and bake an additional 25 minutes or until browned.
Notes
- Make sure your starter is very active and bubbly.
- Depending on temperature, hydration and maturity of starter will determine the amount of time it takes for it to double in size.
- To increase the health benefits you could allow the bread to ferment longer. I start the bread in the morning and then let it ferment all day.
Nutrition
Nutrition information is automatically calculated, so should only be used as an approximation.


I have created a new starter!! Woohoo! Now…. I downloaded your sourdough ebook and this recipe is different than the one on YouTube. Which is the one to do? I’m confused. To stretch and turn. To not. To add starter to water and then flour or after…. I’m having a moment. Sorry. I’m just really struggling and tried the recipe here you posted in February. Fail! So… maybe another video on this recipe. Slowed down and step by step? Idk.
Hi Trixie! In one of her YouTube videos she mentions that if her blog posts and her videos are offering different info it’s because she’s able to update her blogposts with the most current/accurate info, whereas one can’t really update a video without creating a new one. So, when there is conflicting information, go with what her blog posts say. 😊
With that said, though, watching her video on the No-Knead Bread, combined with reading this blog post, gave me the most comprehensive information for making my two loaves each time.
Can you use only fresh ground flour and get the same results? Also you didn’t answer the question about how long to stretch and fold the dough, could you? Thanks
Siobhan
Would appreciate it if you put the recipe on the top of page, had problems finding it with all the adds. thanks for the recipe, I have a post surgical hand right now and cannot knead dough.
I’ve been making no-knead sourdough for several months now. I’ve only been making one loaf at a time but I use the same 200 grams of starter with 390 grams of flour, 265 grams of water and 10 grams of salt. I feed my starter in the morning. Then I make by dough around supper time. I don’t touch it again until the morning. I dump the dough onto a well floured board, sprinkle the top generously with flour and then flatten it out and fold in into the center by grabbing the edges and stretching them out and folding in on itself around the outside…roughly 6 or 8 folds. Then I shape it into a ball and let it rest for one hour before baking…comes out perfect every time.
What temp and how long do you bake it? Thank you!
Will try this recipe for sure. Just made a loaf of sourdough bread today using the Dutch oven and despite it having lots of air pockets during the long fermentation process, it came out hard as a rock! I used freshly ground einkorn.
You may need to bake it at a lower temperature. Try baking it at 475 for the duration. Some ovens will be hotter or cooler etc.Usually a hard bread is a result of your oven being too hot or possibly over kneading.
Not over kneading I’m this case. Sorry, I mean over baking.
Einkorn absorbs water differently and has weaker gluten. Typically recipes for bread with other flours don’t work the same with einkorn. Here is an article that is worth reading, and also I have the einkorn cookbook mentioned in the article and find it very informative with good recipes.
https://www.kitchenstewardship.com/5-ways-einkorn-is-different-than-wheat-flour/
Can I use einkorn flour?
I don’t have a Dutch oven. Can you do this in a cast iron or bread pan and just leave uncovered? Thanks! I love your recipes!
Can I freeze this bread before or after baking?
It won’t be traditional to say the least. The lid helps capture steam to cook the bread a certain way.
I cover my bread with a metal bowl as I do not own a Dutch oven. Works great!
I find that I am deflating too many of the holes/bubbles when I cut the dough in half post stretch/fold and rise. Will it still turn out alright (and possibly better) if I cut the dough in half before the stretch and fold process begins so as not to deflate so many of them? Otherwise incredible recipe and bread!
Would like to know also..
You do not have to preheat your oven or your cast iron. You can put your loaves into a loaf pan or cast iron, cover them with a lid (I use 2 same size bread pans, 1 bottom, 1 lid) and then place into a COLD oven, and bring heat up to 500 degrees. This takes 25 minutes, depending on your oven. At that point, you can turn down the oven to 450 degrees, uncover your pan(s) and bake another 25-40 minutes depending on size of loaf. The loaves will be nice and brown. This works so well. Trust me, I have been baking bread this way for the past 5 years. Also, less dangerous, no burnt hands.
If you skip the preheating step, you do not get the same lift upon the beginning bread baking, nor the steam created to cook it correctly. Yes, it is bread, but not the same as what people are after when doing this process.
Hey Lisa, was wondering if there’s a specific reason why your measurements are in grams? not something I usually see in your recipes. I’m printing to try this recipe as it looks delicious! Thank you!
Hey Joanna! UI don’t normally do that, but I read several methods online and this seems to yield the most consistent result. Turns out they’re right! I’ve never had better sourdough bread. I just use my postal scale for this.
Hi Joanna. I think I have a problem with my starter. I used tap water and now it is not doubling in size when I feed it. I fed it again this morning using bottled water and I don’t notice a difference. Can you please help? Can it be salvaged?
Thanks!
I’m going to make this week but I’m going to lower the degrees in the preheating at 500, my old glass top Whirlpool oven can’t take 500/ I do envy your beautiful stove and oven ! 👍
Lisa could you please explain the “dimple” move? I’ve never heard of that!
I really wish I could get this recipe in cups instead of weight. I don’t have a scale and I want to make this bread now! 😫 looks amazing! Can’t wait to try my hand at the bread art
There’s a conversion table where you can convert the grams to cups, etc. Just put “conversion table grams to cups” in your search
engine on Google or which ever one you use. It is easy. You can make your bread!!!!
Yes, what does it mean to dimple?
Sprinkle over the top and then press your fingertips into the top of the dough.