Learn how to make delicious Dutch oven sourdough bread that will rival your favorite bakery. Perfect for sandwiches or lathered in butter and dipped in soup, this no knead recipe will quickly become your go-to.
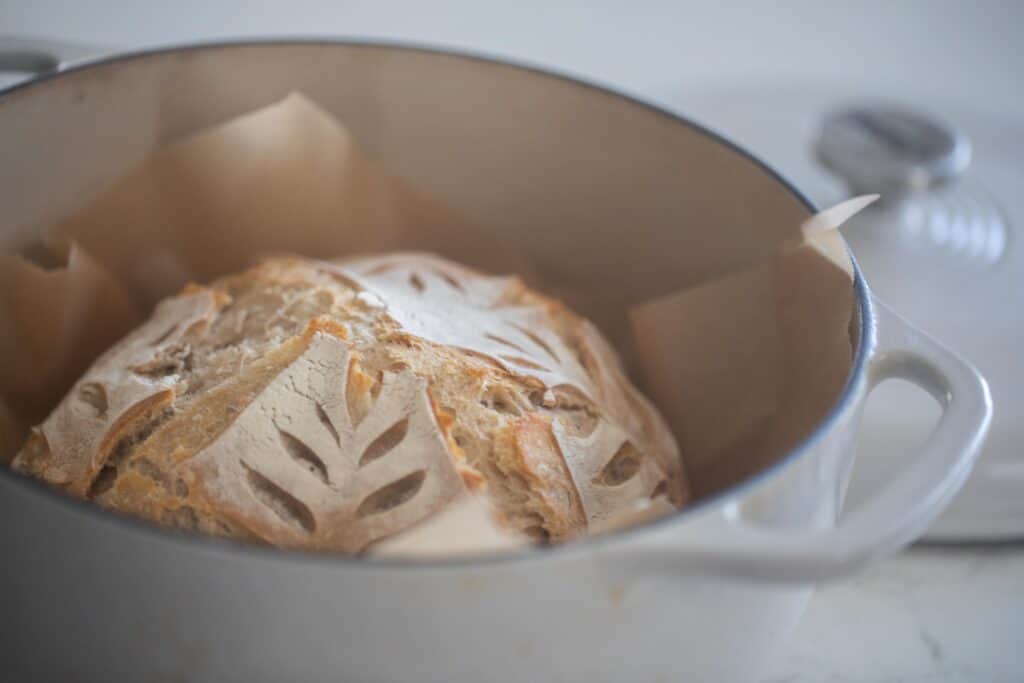
When I started baking sourdough bread, I simply adjusted my sandwich bread recipe I had been using with commercial yeast. I used a loaf pan like I did with my yeast loaves. It was delicious and exactly what I needed at the time.
Then, I decided to try my hand at an artisan sourdough loaf. Thankfully, I had a Dutch oven that I had been using for other things, like soups and roasts, that I could use.
I couldn’t believe what a difference the Dutch oven made. I ended up with the most beautiful crisp crust and had wonderful oven spring.
Of course, I still love a good sourdough sandwich loaf (this is my go-to recipe for that). But there is truly nothing like Dutch oven sourdough bread.
It has that signature chewiness and delightful, robust flavor. Once you start making your sourdough in a Dutch oven, you won’t be looking back.

Why You’ll Love This Recipe
Flavor – Now that I’ve been baking sourdough bread for almost 10 years, there is no way I could go back to traditional yeast bread. There is just so much more flavor in a sourdough loaf. It makes yeast bread taste bland once you get used to it.
Easier to Digest – Thanks to the fermentation process of sourdough, the grains tend to be easier to digest, even for people with gluten sensativities (not celiac).
It also helps to make the nutrients in the grains more bio-available, meaning it is easier for your body to absorb all the good stuff.
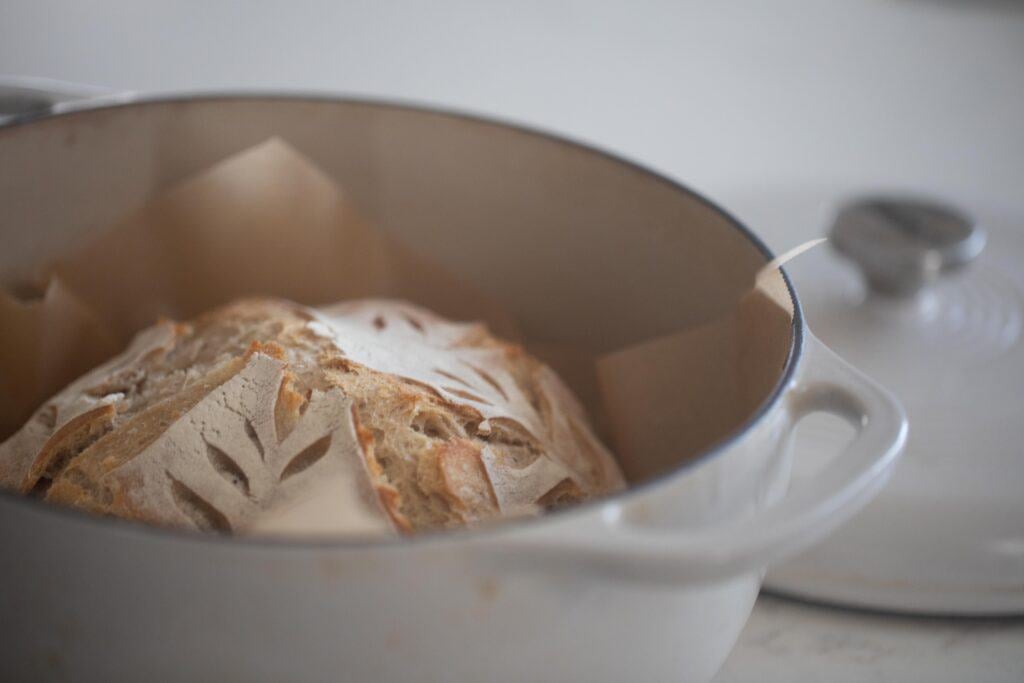
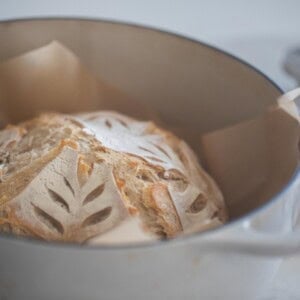
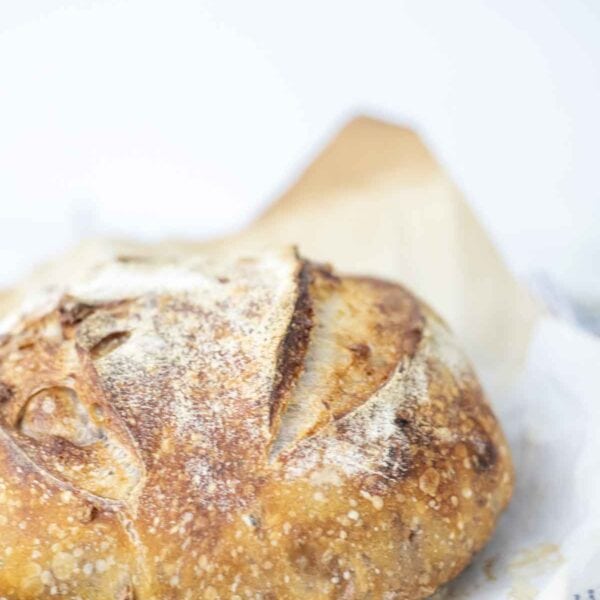
Beautiful as it is Delicious – Baking a sourdough boule in a Dutch oven will give you a beautiful golden brown crust and the perfect ear (this is what is created with good oven spring thanks to the expansion score). This is a loaf you’ll want to give as gifts and bring to holiday dinners year after year.
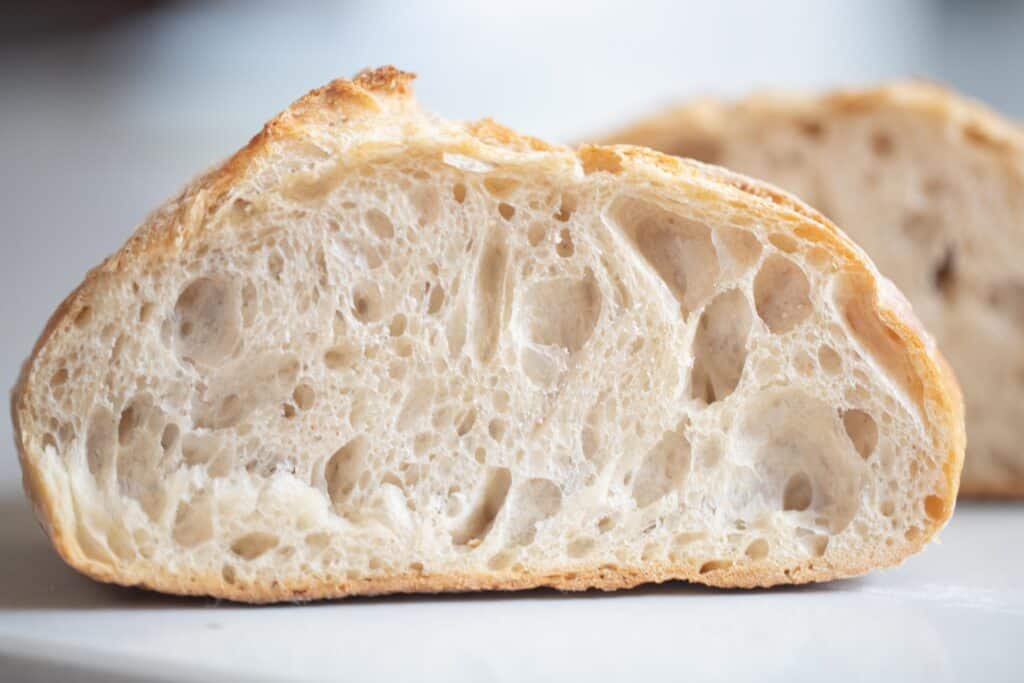
What is sourdough bread?
Sourdough bread uses wild yeast as the rising agent. This wild yeast is formed from fermenting water and flour.
It is known for being easier on the body to digest. Thanks to the fermentation process, gluten and phytic acid are broken down. That means that some people who are sensative to gluten (not celiac) may be able to enjoy sourdough bread without any issue.
The break down of phytic acid, an anti-nutrient found in wheat, allows the nutrients in the wheat to be more bio-available to the body as well.
While it carries these health benefits, it is also much more flavorful than bread made with commercial yeast.
This post contains affiliate links, which means I make a small commission at no extra cost to you. See my full disclosure here.
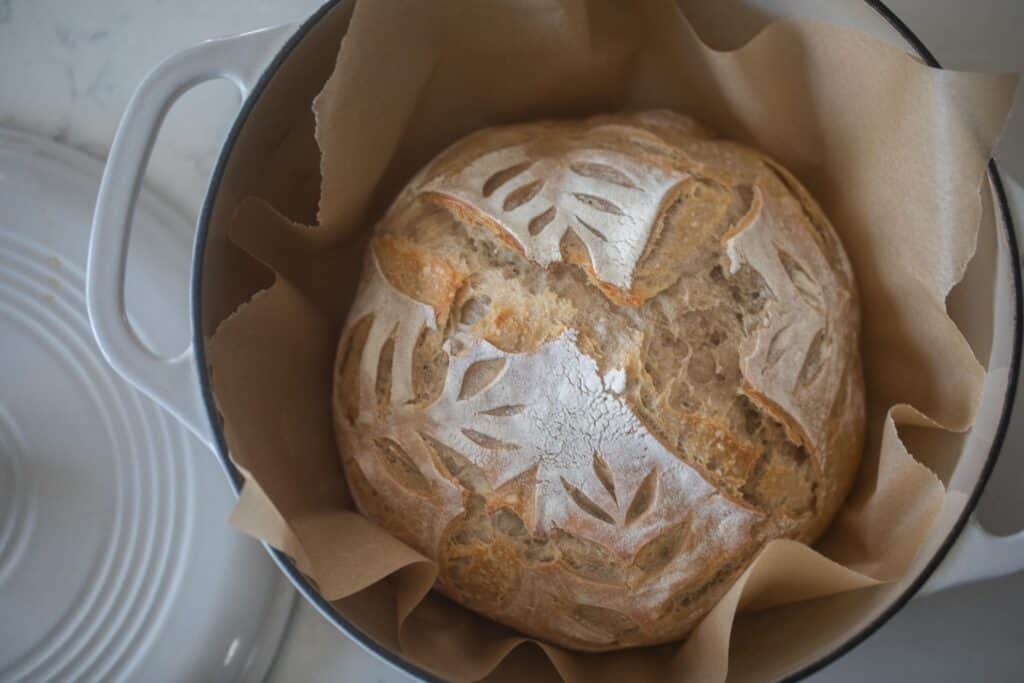
What is a Dutch Oven?
A Dutch oven is a heavy duty pot and lid, typically made of cast iron. There are varying sizes and types, including regular uncoated or enamel coated.
While some Dutch ovens are not cheap, investing in a good quality one will pay off. In my experience, cast iron lasts a really long time. So, once you invest, you get a lifelong kitchen tool that you may even be able to pass down to the next generation.
If you are hoping to find a good Dutch oven at a cheaper price, auctions and Facebook Marketplace are great starting point to look for used ones. Of course, when buying used, you may need to re-season it to get rid of or prevent rust. Learn how to season cast iron here.
In addition to this sourdough recipe, Dutch ovens are great for making soups or roasts. I honestly use mine multiple times a week.
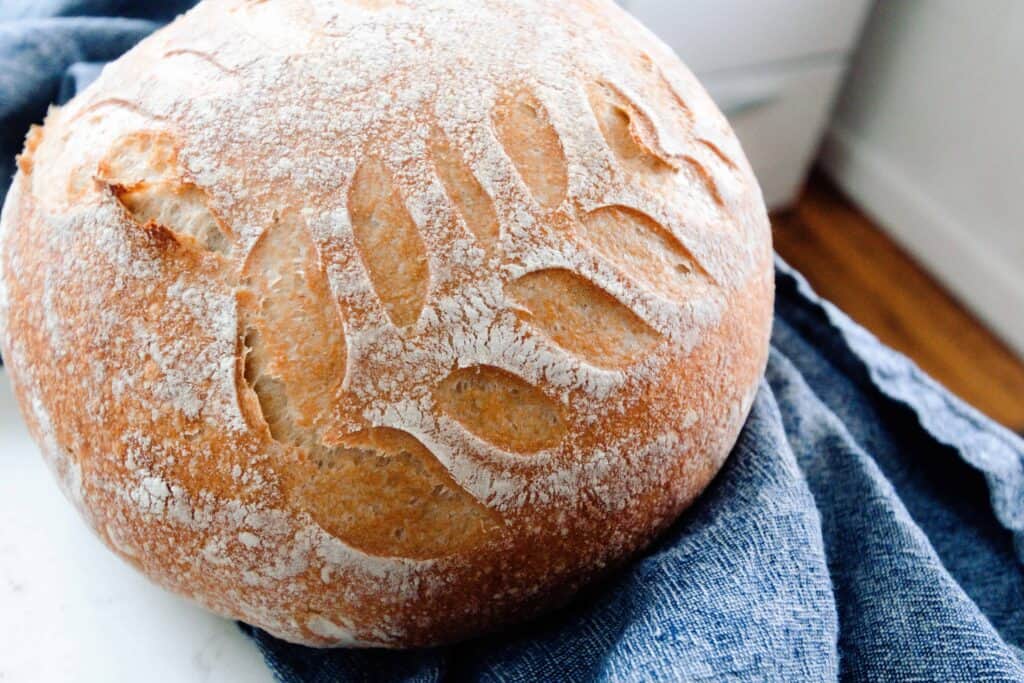
Why is a Dutch Oven Used for Sourdough Bread?
If you are new to sourdough baking, you may be wondering why Dutch ovens are so commonly used.
The short answer is that they will give you the best results if you are looking for a crusty loaf with a nice airy, open crumb.
Here are a few reasons why:
- Cast iron is capable of holding heat super well.
This gives you an even bake on your bread. - Cast iron can handle the high temperatures required for sourdough bread.
As you’ve probably noticed, most sourdough bread recipes require a high heat for baking. I usually bake at 500℉ for the first half of the bake. - A Dutch oven includes a lid, which allows steam to form inside.
Steam is the key to a perfect sourdough loaf with an airy crumb and crispy crust. When the lid is on the Dutch oven, water inside the dough vaporizes, creating steam. It’s steam that helps the inside of your loaf cook to perfection and gives you beautiful oven spring without the crust developing too soon and burning.
Although I believe a Dutch oven is the best way to make sourdough, it is possible to do it without one. Here are a few alternative ways to bake sourdough bread and create steam without a Dutch oven.
Tips
- Although it is difficult to do, let the bread completely cool before slicing into it. If you cut your bread too early, you may end up with a gummy loaf. Learn all about how to get the perfect slice of sourdough bread here.
- The time bulk fermentation takes will vary based on a number of factors, especially the temperature of your home. Ideally, your dough will double in size and have bubbles all over the surface.
- It is important to preheat your Dutch oven to create the steam needed for good oven spring. Do not skip this step!
- I typically do a refrigerated second rise after shaping. You can allow your dough to sit out at room temperature for the second rise for a couple of hours instead to speed things up (like I do in my same day sourdough bread recipe here). However, it is a good idea to allow the dough at least an hour in the fridge to make scoring a bit easier.
- You need an active starter for this recipe. Learn how to make a sourdough starter here and how to maintain it here.
Tools You May Need
Dutch Oven – I use a 6 quart Dutch oven, and I have found it to work great for varying shapes of sourdough. Be sure to check with the manufacturer before using an enameled Dutch oven at the high heat it takes to bake sourdough. Not all are recommended for this.
Banneton (optional) – although it is great to proof in a banneton basket, it is not required. A bowl with a floured tea towel works just fine!
Bread Lame – A razor blade will work just fine as well. However, a sharp knife is not the best choice when creating the expansion score or any design. An expansion score is a deep score that allows the bread to expand.
Kitchen Scale – Weighing your ingredients is much more accurate than using volume.
Ingredients
All purpose flour
Bread flour – You can also just use more all purpose flour here if you prefer.
Whole wheat flour – This can be freshly milled or store bought.
Water
Sourdough starter, bubbly and active - Feed your starter 4 to 12 hours before starting your loaf to ensure it is at its peak. The time it takes your starter to be ready will vary depending on the maturity of the starter and the temperature in your home.
Salt
How to Make Dutch Oven Sourdough Bread
Feed a sourdough starter 4-12 hours before starting this recipe. Ideally, the starter will have doubled in size and has bubbles all over.
To make sure it is ready, you can always perform a float test. This is where you take a small amount of starter and put it in a glass of water. If it floats, it is ready.
Mix Ingredients and Autolyse
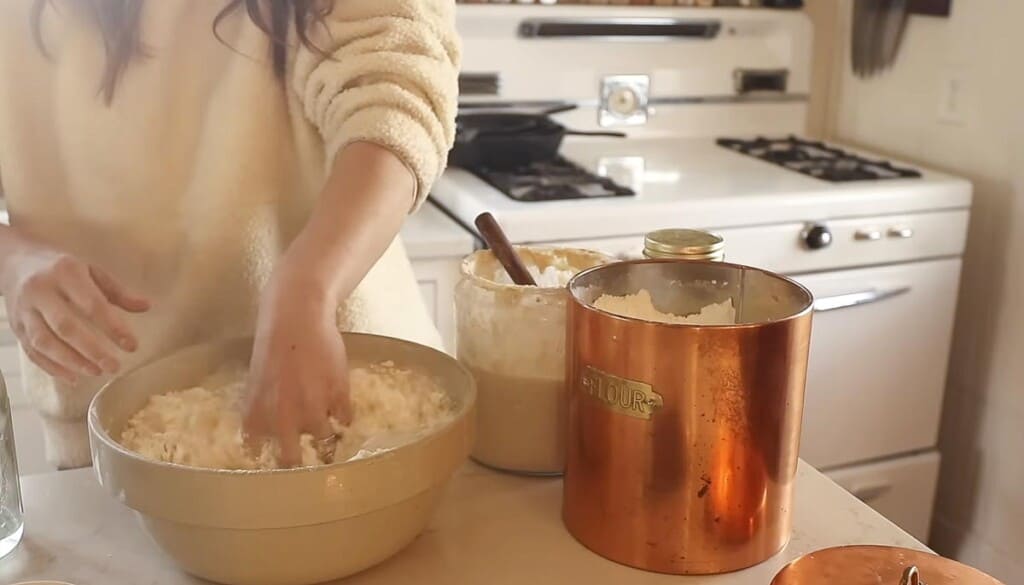
Once your starter is ready, mix together warm water and all the flour. You can use a dough whisk for this. However, I prefer to just use my hands.
Let the dough rest for 30 minutes. This allows the water to hydrate the flour, a process called autolyse.
Dimple in the sourdough starter. If the dough is sticking to your hand, wet your hands.
Sprinkle salt on top. Mix everything together well. Cover the dough with a damp kitchen towel or plastic wrap. Let it rest for another 30 minutes.
Stretch And Fold
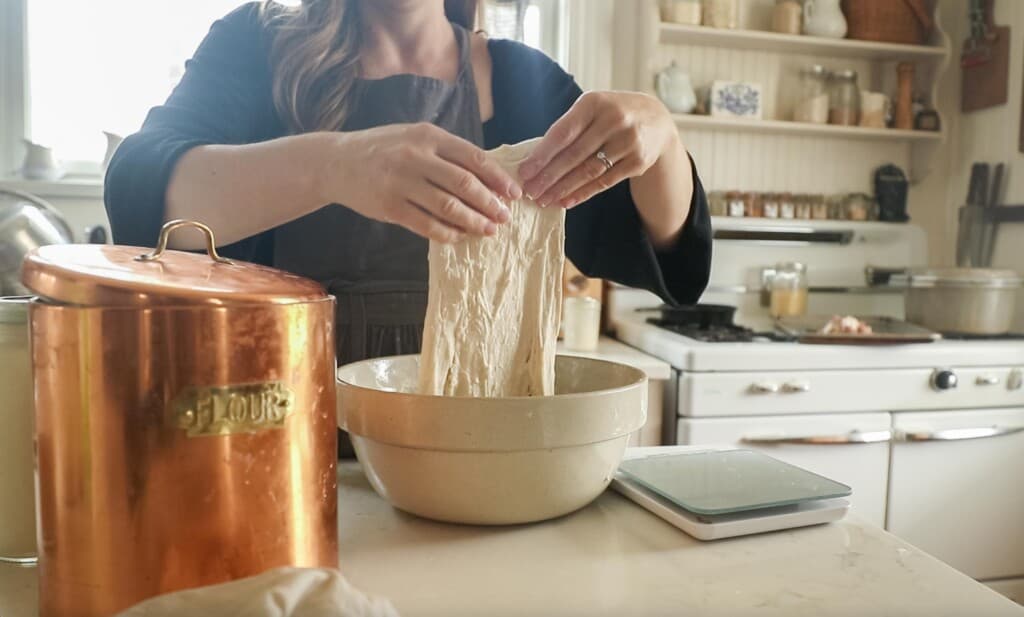
I typically aim for 6 rounds of stretching and folding in order to get good gluten development for a nice rise.
To perform a stretch and fold, grab the edge of the dough firmly and stretch it upwards. Place the dough in your hands back into the center of the dough in the bowl. Turn the bowl about a quarter turn and do this stretch and fold again, and again one to two more times. This is considered one stretch and fold round.
Repeat according to the directions below.
First 3 stretch and folds – every 15 minutes.
Last 3 stretch and folds – every 30 minutes.
Bulk Ferment
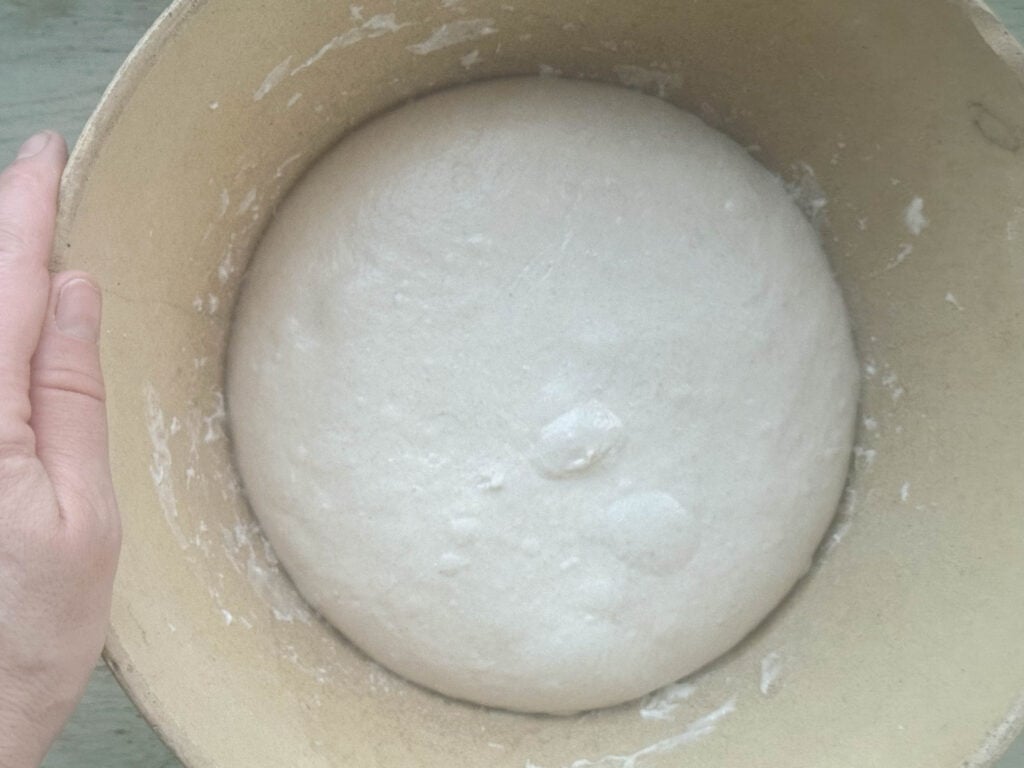
Cover with a wet towel or plastic wrap and allow the dough to bulk-ferment until doubled. The time this takes will depend on many factors, including the maturity of your starter, humidity, and temperature.
Along with doubling in size, there should be bubbles on the surface of your dough. Using a glass bowl can help you easily see once your dough is ready. Be careful not to overproof. this will cause your dough to turn into a wet, sloppy mess.
Shape
Place your dough on a floured work surface. Shape into a ball by gently spinning it toward you and creating surface tension.
Set the dough ball out uncovered for 15 to 20 minutes so it can develop a skin. This helps prevent the dough from sticking to the tea towel during the overnight rise.
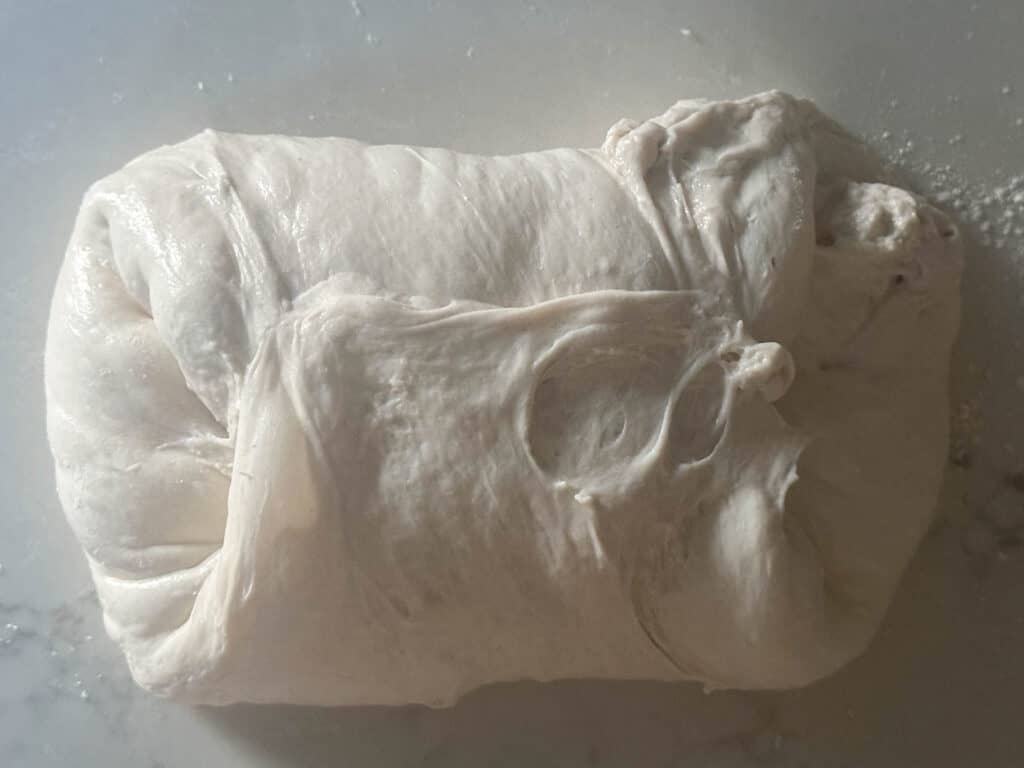
Turn over and shape again. I do this by folding the two sides over to meet in the middle, and then the other two sides.
Carefully transfer the dough to a floured banneton or bowl lined with a tea towel. I find a bench scraper to be helpful in transferring this dough without disturbing it too much.
The dough should be seam side up or smooth side down. Cover with plastic wrap and proof for 12 to 15 hours in the refrigerator.
Bake
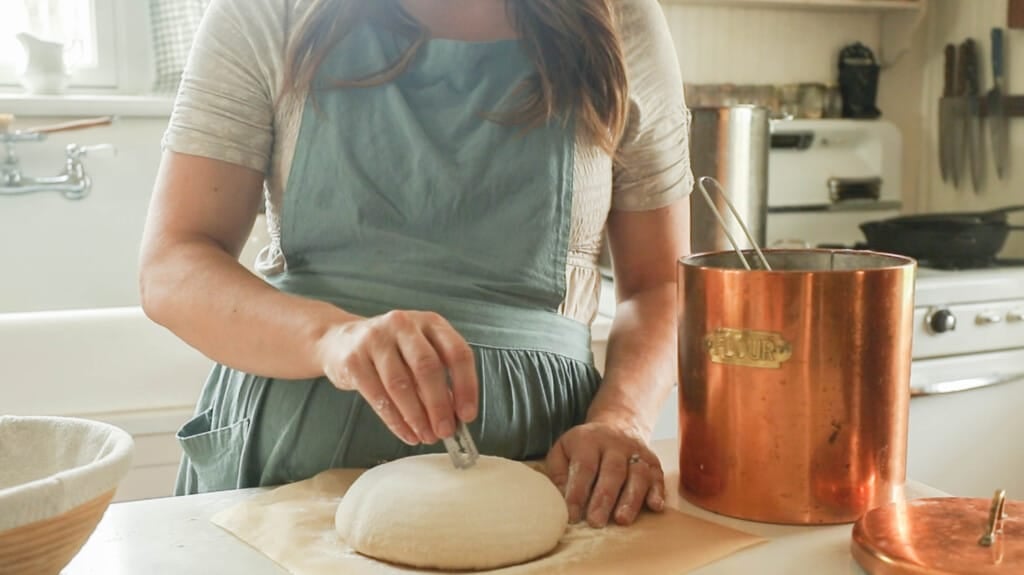
Preheat a cast iron dutch oven to 500 degrees for 1 hour. This is an important step. The hot Dutch oven is what helps create the steam once you add in your dough and enclose it with the lid. Preheating will give you a much better oven spring and overall better final product.
Just before the hour is up, remove the dough from the fridge. Dust it with a little flour and score with a razor blade or scoring lame.
Add a little flour to the bottom of the dutch oven (or use a piece of parchment paper) and transfer the dough to the preheated dutch oven.
Bake for 20 minutes at 500 F with the lid on.
Carefully remove the lid, turn the oven temperature down to 475 F, and bake an additional 25 minutes or until browned.
How to Store Sourdough Bread
Store bread in a paper or cloth bread bag, bread box, beeswax wrap, or even a plastic bag. Keep it on the counter and avoid putting it in the fridge.
Storing the bread in the fridge will actually make the bread dry out faster. Properly stored, sourdough should last around 5 to 7 days, but is best consumed within 3 days of baking.
Learn more about how to store sourdough for ultimate freshness here.
FAQ
Yes! A Dutch oven is able to distribute heat evenly and can withstand the high temperatures of sourdough baking. It also creates the perfect environment of steam thanks to its tight fitting lid.
It’s not necessary, but I do use it. Some parchment papers are not recommended for use above a certain temperature. So, be sure to check to see what your brand suggests. You can also just dust the bottom of your Dutch oven with a little flour to avoid sticking.
Burnt bottoms are a common problem with sourdough loaves. Use a baking sheet or baking stone to put under your Dutch oven to avoid this.
Baker’s Timeline:
This can be started or made at any time. Here is an example of how you could fit this into your schedule.
Feed sourdough starter with flour and water.
Combine the warm water and flour. Rest for 30 minutes. (May be later if starter is not ready.)
Add in sourdough starter and dimple in with wet hand.
Sprinkle salt on top.
Mix the dough with your hands for about 5 minutes. Cover with damp towel or plastic wrap. Rest for 30 minutes.
Stretch and fold.
First 3 stretch and folds – every 15 minutes
Last 3 stretch and folds – every 30 minutes
Cover with a wet towel or plastic wrap and allow the dough to bulk ferment until doubled.
Shape dough.
Sit out 15-20 minutes, uncovered.
Turn over and shape.
Transfer to floured banneton or bowl with tea towel and cover with plastic. Place in the refrigerator for 12-15 hours.
Preheat dutch oven on 500 F for 1 hour.
Take dough out of fridge, dust with flour, and score.
Bake the sourdough bread and allow to cool before slicing.
More Sourdough Bread Recipes
- High Hydration Sourdough Bread
- Seeded Sourdough Bread
- Sourdough Brown Bread
- Small Batch Sourdough Bread
- Easy Sourdough Italian Bread
Self-Paced Online Course
Simple Sourdough
What’s in this course?
- Make your own robust starter
- Bake your first loaves of sourdough bread
- Understand sourdough better
- Expand your sourdough bread repertoire
- Download my Complete Recipe Book
If you try this recipe and love it, I would love if you could come back and give it 5 stars! Tag me on Instagram @farmhouseonboone
How to Bake Sourdough Bread in a Dutch Oven
Equipment
- 1 Large Bowl
- 1 Banneton Basket optional
- 1 Bread Lame or Razor Blade
Ingredients
- 325 grams water
- 250 grams all purpose flour
- 125 grams bread flour
- 100 grams whole wheat flour
- 100 grams sourdough starter, bubbly and active
- 10 grams salt
Instructions
- Feed a sourdough starter 4-12 hours before starting this recipe.
Mix Ingredients and Autolyse
- Once your starter is ready, mix together warm water and all the flour.
- Let the dough rest for 30 minutes.
- Dimple in the sourdough starter. If the dough is sticking to your hand, wet your hands.
- Sprinkle salt on top. Mix everything together well. Cover the dough with a damp kitchen towel or plastic wrap. Let it rest for another 30 minutes.
Stretch And Fold
- I typically aim for 6 rounds of stretching and folding in order to get good gluten development for a nice rise.
- To perform a stretch and fold, grab the edge of the dough firmly and stretch it upwards. Place the dough in your hands back into the center of the dough in the bowl. Turn the bowl about a quarter turn and do this stretch and fold again, and again one to two more times. This is considered one stretch and fold round.
- Repeat according to the directions below.
- First 3 stretch and folds – every 15 minutes.
- Last 3 stretch and folds – every 30 minutes.
Bulk Ferment
- Cover with a wet towel or plastic wrap and allow the dough to bulk-ferment until doubled.
- Along with doubling in size, there should be bubbles on the surface of your dough.
Shape
- Place your dough on a floured work surface. Shape into a ball by gently spinning it toward you and creating surface tension.
- Set the dough ball out uncovered for 15 to 20 minutes so it can develop a skin.
- Turn over and shape again. I do this by folding the two sides over to meet in the middle, and then the other two sides.
- Carefully transfer the dough to a floured banneton or bowl lined with a tea towel.
- The dough should be seam side up or smooth side down. Cover with plastic wrap and proof for 12 to 15 hours in the refrigerator.
Bake
- Preheat a cast iron dutch oven to 500 degrees for 1 hour.
- Just before the hour is up, remove the dough from the fridge. Dust it with a little flour and score with a razor blade or scoring lame.
- Add a little flour to the bottom of the dutch oven (or use a piece of parchment paper) and transfer the dough to the preheated dutch oven.
- Bake for 20 minutes at 500 F with the lid on.
- Carefully remove the lid, turn the oven temperature down to 475 F, and bake an additional 25 minutes or until browned.
Notes
- Although it is difficult to do, let the bread completely cool before slicing into it. If you cut your bread too early, you may end up with a gummy loaf.
- The time bulk fermentation takes will vary based on a number of factors, especially the temperature of your home. Ideally, your dough will double in size and have bubbles all over the surface.
- It is important to preheat your Dutch oven – WHY hot dutch oven
- I typically do a refrigerated second rise after shaping. You can allow your dough to sit out at room temperature for the second rise for a couple of hours instead to speed things up. However, it is a good idea to allow the dough at least an hour in the fridge to make scoring a bit easier.
- If you find the bottom of your loaf of bread consistently gets too dark, try adding a baking sheet or baking stone under your Dutch oven.
- You need an active starter for this recipe.
Nutrition
Nutrition information is automatically calculated, so should only be used as an approximation.


Easy and forgiving – AKA doable!! I’m so excited to finally feel like I can do this!
Two days of work, fantastic rise and burnt after 15 minutes at 460F (and I have an independent oven thermometer. Arrrrgh. Have you checked your oven for accuracy? I could cry.
Yes, I have checked my oven and I also have people on my team who also make my recipes to test them.
Is it okay to only use unbleached all purpose flour?
Yes.
After two “failed” attempts with bread that didn’t get great rise when baking, this is the first recipe/method that has worked! Thank you for the instruction, both written and on video, as this helped immensely. It really is satisfying when you have a sourdough that not only tastes great, but looks amazing as well.
Thanks to this recipe I’ve made my best and most delicious loaf yet! With the best crumb and my first ever ear on my loaf, absolutely delicious. Thank you 💜
So pleased with how the loaf turned out!
Yes it was in a warm space. was 33 Celsius in Australia yesterday.
Put the dough in the fridge overnight and in the morning is even worse…flat dough
What a disaster
Recipe for disaster
I have used whole wheat starter.
Followed the instructions and the dough doesn’t rise enough.
What I am doing wrong?
Did you keep it in a warm space? You can try baking it. It will get some oven rise as well!