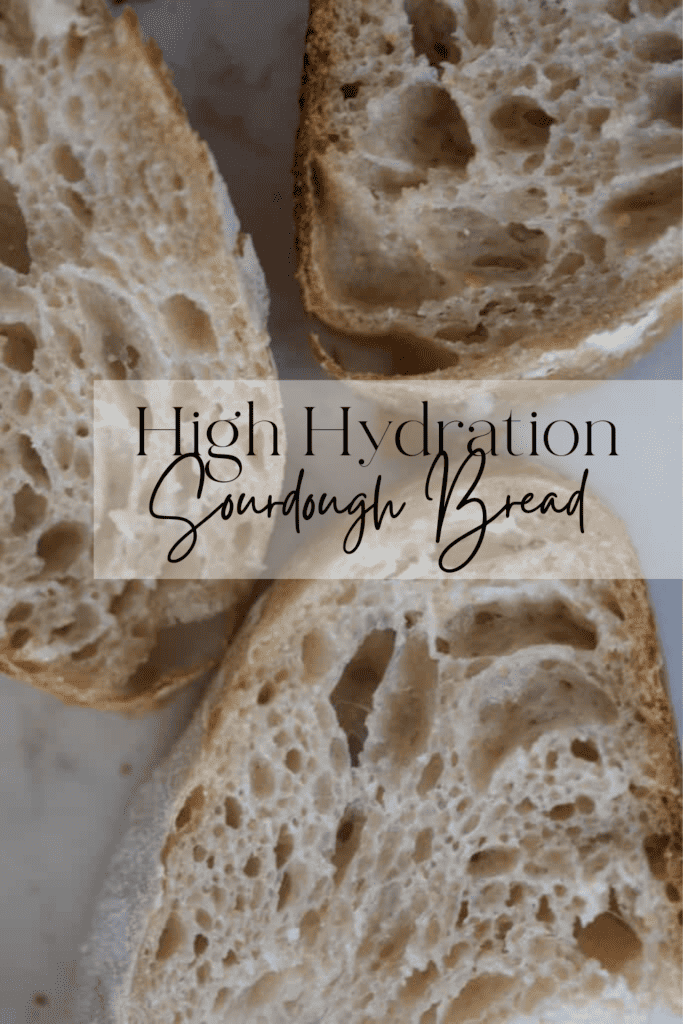
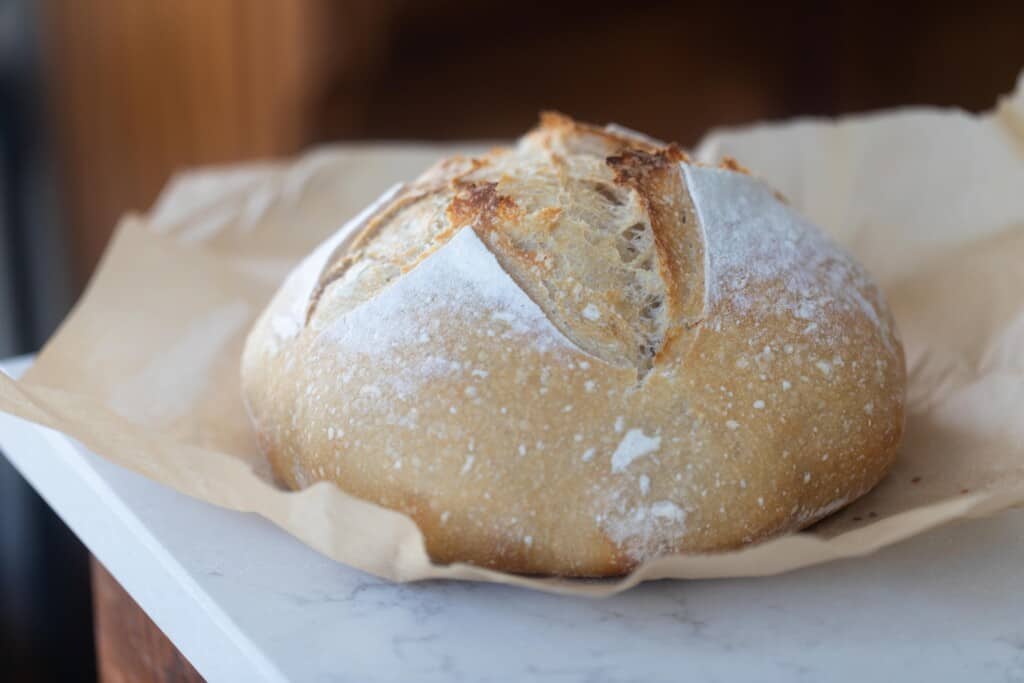
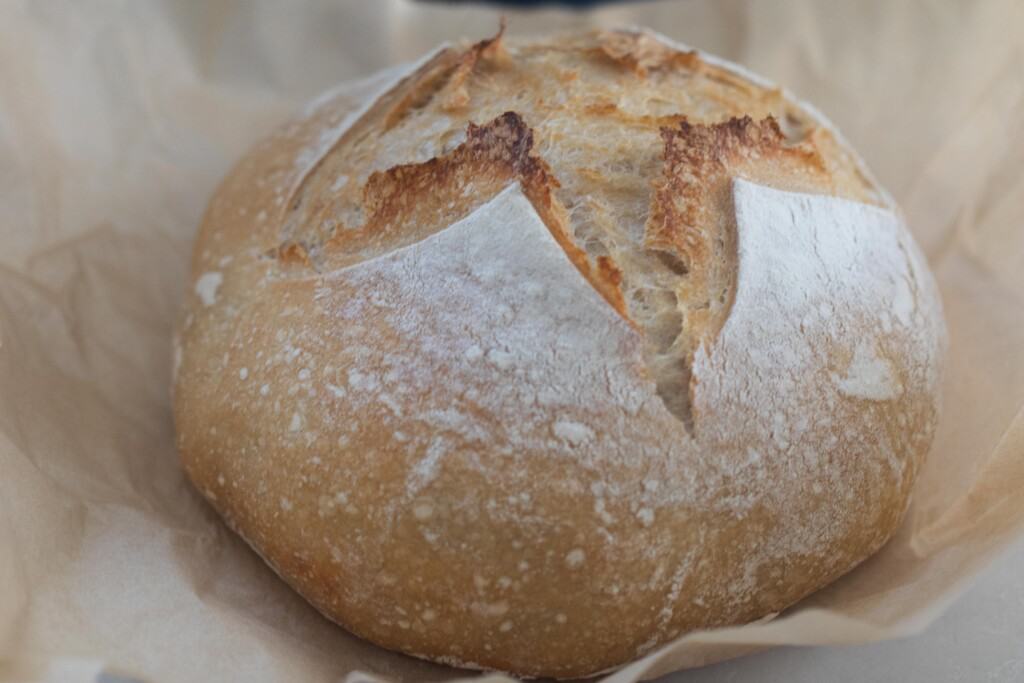
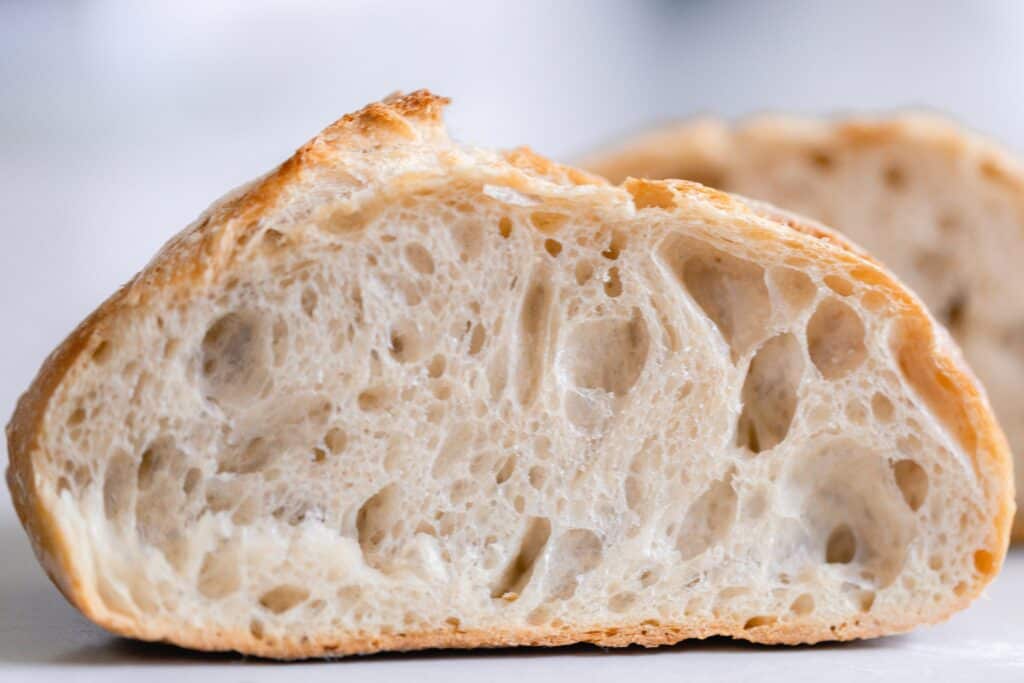
If you are ready to take your sourdough baking skills to the next level, this high hydration sourdough bread recipe is for you. With 84% hydration, this bread has a beautiful open crumb and the most perfect thin, crisp crust. You’ll be amazed what a little extra moisture can do for your sourdough loaf!
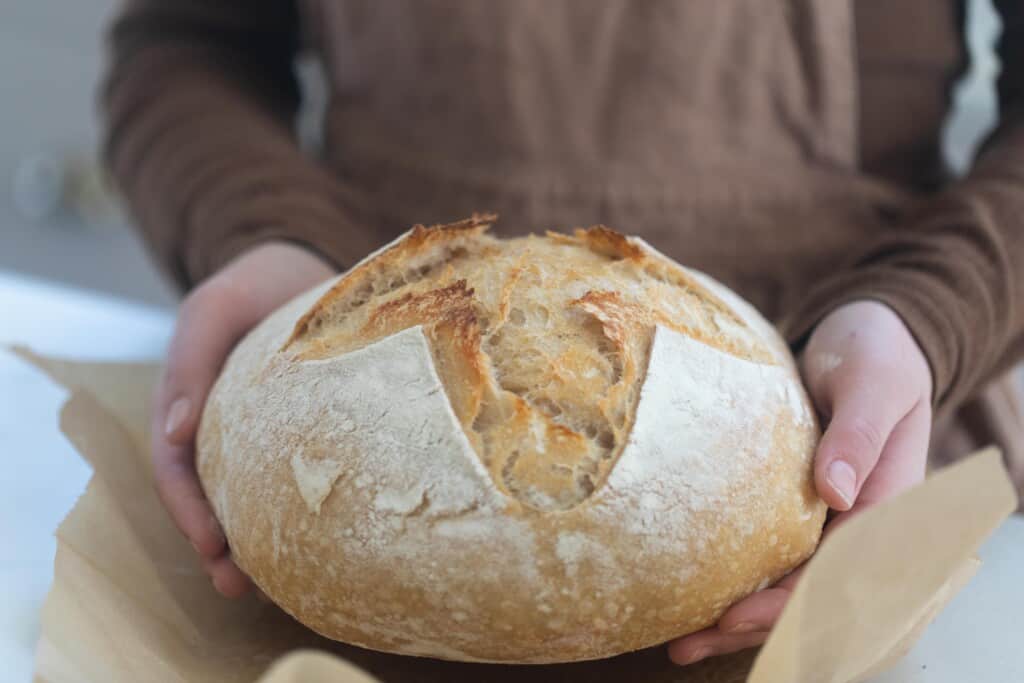
Table of Contents
- What is high hydration sourdough?
- Tips When Baking a High Hydration Recipe
- Ingredients
- Tools You May Need
- How to Make High Hydration Sourdough Bread
- FAQ
- How to Store a Finished Loaf
- Baker’s Timeline
- Want to learn more about sourdough?
- More Tips and Tricks for Your Sourdough Baking
- More Sourdough Bread Recipes to Try
- High Hydration Sourdough Loaf Recipe
If you’ve ever made any of my sourdough recipes or watched my videos, you’ve probably noticed I like to keep things simple. I believe that with a little practice, anyone can make delicious sourdough bread. After all, I was by no means an expert baker when I first got started.
Now that I’ve been baking sourdough bread weekly for a decade, I’ve gained a lot of confidence through experience. I can tell if my dough is right just by feel or when I should adjust proofing time for the seasons.
I enjoy challenging myself and creating sourdough versions of pretty much any recipe. Most importantly, I’m not afraid of a failed loaf, and you shouldn’t be either!
This recipe truly fits the bill of a challenge. Making a higher hydration dough is not for the faint of heart. A wetter dough is tougher to work with and can be more temperamental.
So if this is your first time making sourdough, you may want to start with my Beginner’s Sourdough Bread Recipe here, which is at 74% hydration.
But you also don’t have to be a seasoned sourdough connoisseur to try this recipe. This loaf is for anyone desiring a more airy crumb, full of those signature sourdough holes.
All you need to master this recipe is an understanding of hydration and a little practice. If the first loaf or two doesn’t turn out just right, that’s okay! You can always turn it into sourdough croutons, bread pudding, French toast casserole, or breadcrumbs.
What is high hydration sourdough?
Sourdough hydration refers to the water-flour ratio of a recipe and is represented by a percentage. In other words, it is all about how much moisture is in your dough.
Anything above 80% is considered high hydration. This recipe is 82%. My other recipes, such as my no-knead bread, typically fall into the 70% range.
This may sound complicated and intimidating, but it is actually very easy to calculate.
Simply take the grams of water and divide by the grams of flour in a recipe. Multiply that number by 100 and you get your hydration percentage.
Now, don’t forget, a sourdough starter is made up of flour and water also, so it must be included in your calculation for an accurate result.
So, how do you know how many grams of starter to associate with flour and how many to water?
100% Hydration Sourdough Starter
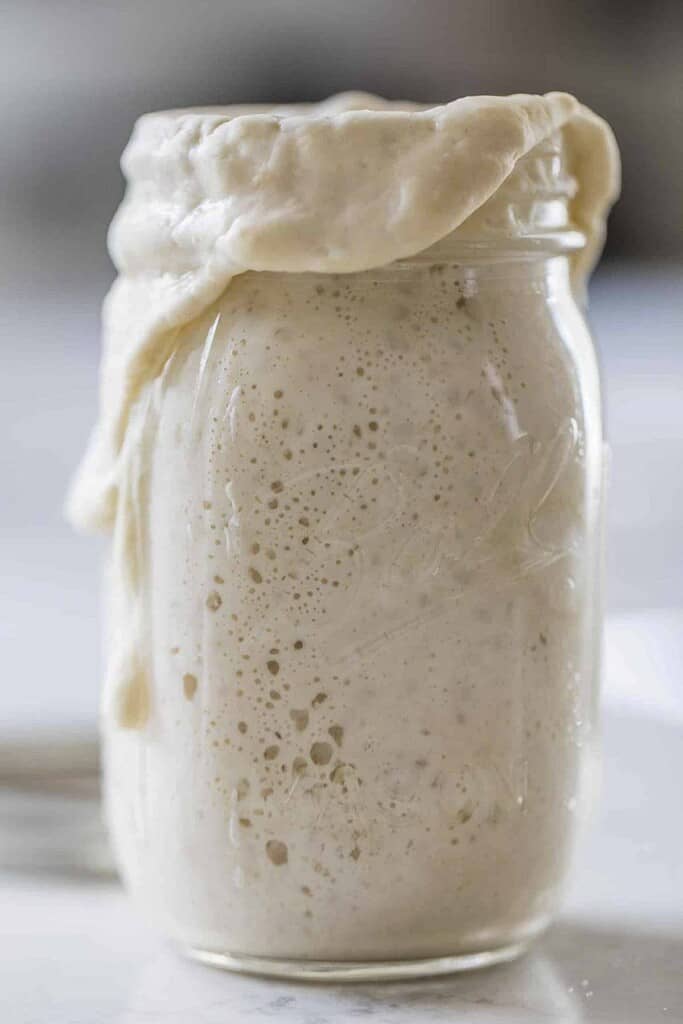
I use a 100% hydration sourdough starter. All that means is that I feed it equal parts flour and water. Sometimes you’ll see people refer to this as a 1:1:1 sourdough starter, meaning 1 part starter, 1 part flour, and 1 part water.
However, the sourdough starter does not have to be equal to the amount of water and flour added. So, a 1:2:2 sourdough starter would also be 100% hydration because it is still fed equal parts water and flour.
How to Calculate Hydration
Remember when you asked yourself when you would ever need to use math in real life?
Well, the time has come!
Yes, baking can sometimes require quite a bit of math. Of course, as a homeschool mom, I love this. There is always a lesson to be learned, even when baking bread.
To start, divide the grams of sourdough starter called for in half and give half to the total flour count and half to the total water count. This is of course assuming the starter is at 100% hydration.
For example, this recipe calls for 390 grams of water and 475 grams of flour. With 100 total grams of starter, add 50 to the flour and 50 to the water.
This gives you a total of 440 grams water and 525 flour.
440 divided by 525 multiplied by 100 is equal to 84%.
It’s that easy!
The Benefits of High Hydration
So, what is the benefit of all this math?
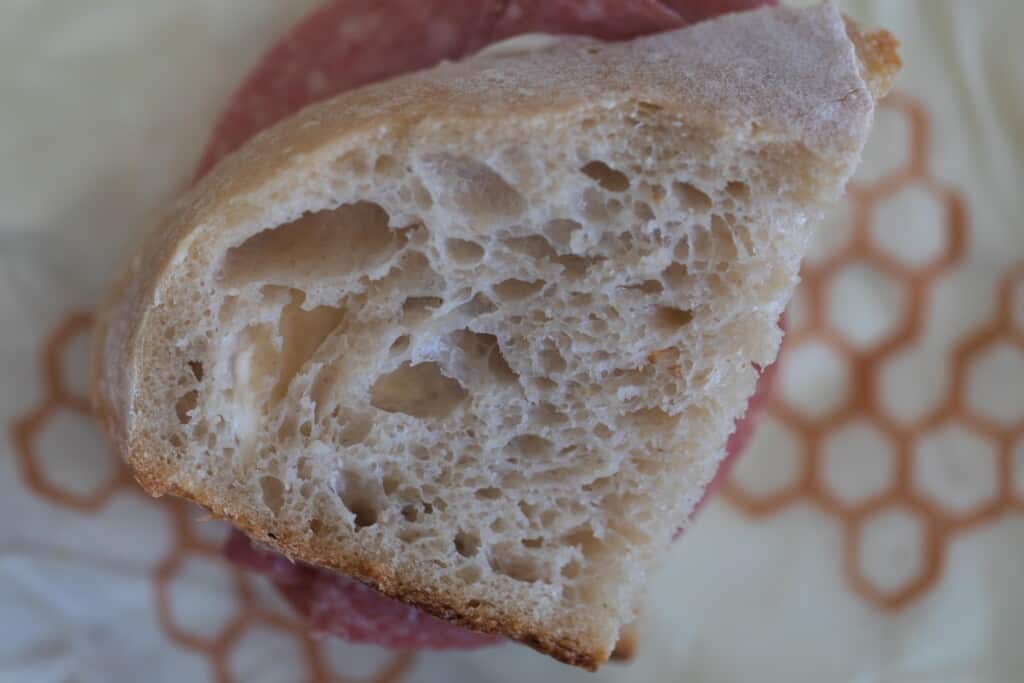
The main reason bakers choose high-hydration doughs is to generate a more open crumb. So, if you prefer a sourdough bread that is airy with all of those classic sourdough holes, trying a recipe with higher water content may be right for you.
In addition to an airy crumb, you also may end up with a thinner crust.
Higher hydration doesn’t necessarily mean better, though. It’s really a personal preference as to what hydration level is best for you. No matter the hydration level, it’s still sourdough. So, that means it will be delicious at 65%, 85%, or anything in between.
Tips When Baking a High Hydration Recipe
- Watch your dough closely during bulk fermentation. Higher hydration doughs tend to ferment faster. Over fermented dough will become sticky and unworkable. The amount of time it takes for your dough to proof depends on many factors, including the maturity of your starter and environment.
- Be gentle when dealing with high hydration dough after the bulk ferment and during shaping to make the crumb more open and even. Using a bench scraper can help move your dough more gently.
- You need an active starter for this recipe that is at 100% hydration, meaning it is fed equal parts water and flour. New to sourdough? Learn how to make your own sourdough starter here.
This post contains affiliate links, which means I make a small commission at no extra cost to you. See my full disclosure here.
Ingredients
Unbleached all purpose flour
Whole wheat flour
Bread flour – Typically, I would say you can easily replace the bread flour with more all purpose. In this recipe, though, the higher protein content of the bread flour helps balance the extra water.
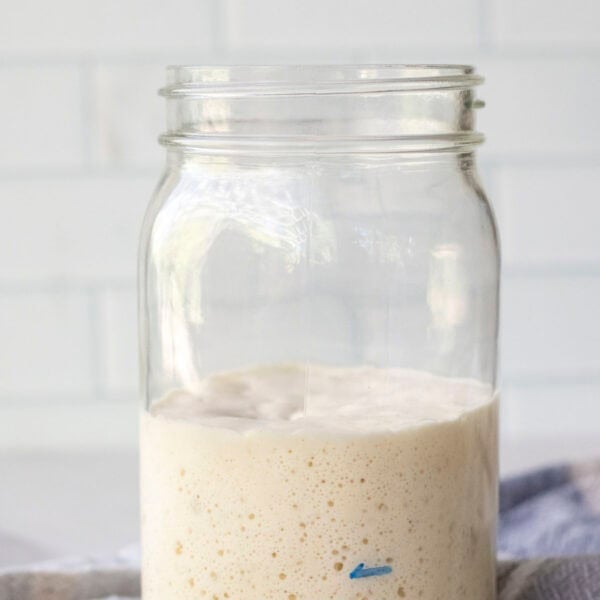
100% hydration active sourdough starter – This means your starter should be fed equal parts flour and water before making this recipe.
Water – Filtered water is ideal
Salt
Tools You May Need
Cast Iron Dutch Oven – Don’t have a Dutch oven? Learn how to bake bread without one here.
Banneton Basket – You can also use a basket or bowl with a tea towel. Make sure to flour the towel well so the dough does not stick.
Dough Whisk – Not a requirement, but I love mine.
Kitchen Scale – Weight measurements are key in this recipe to get good results.
Scoring Lame
How to Make High Hydration Sourdough Bread
Feed a sourdough starter 4-12 hours before making your bread. The time it takes a starter to double in size and become active and bubbly depends on factors such as temperature and the maturity of your starter.
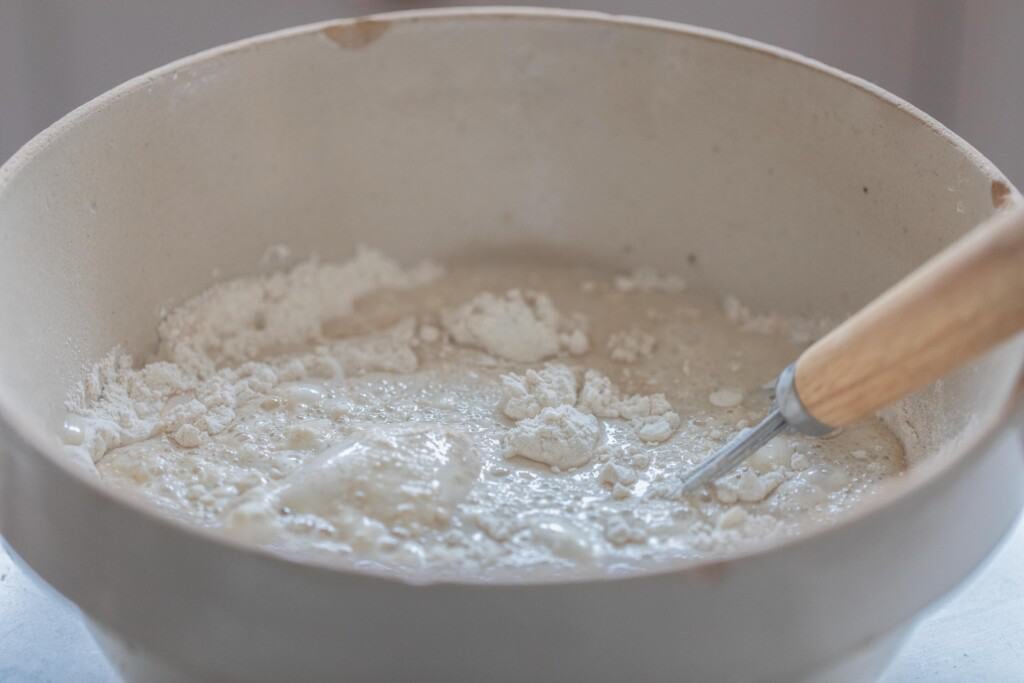
Combine the flour and warm water in a mixing bowl. I find using a dough whisk works best for this.
Allow this mixture to rest for 30 minutes. This is called autolyse, the process of hydrating the flour.
After the autolyse, add in the sourdough starter by dimpling it in with wet hands.
Sprinkle the top of the dough with salt.
Use your hands to mix the dough until it comes together. This takes about 5 minutes. Cover the dough with plastic wrap or a damp tea towel and allow another 30 minute rest.
Stretch And Fold
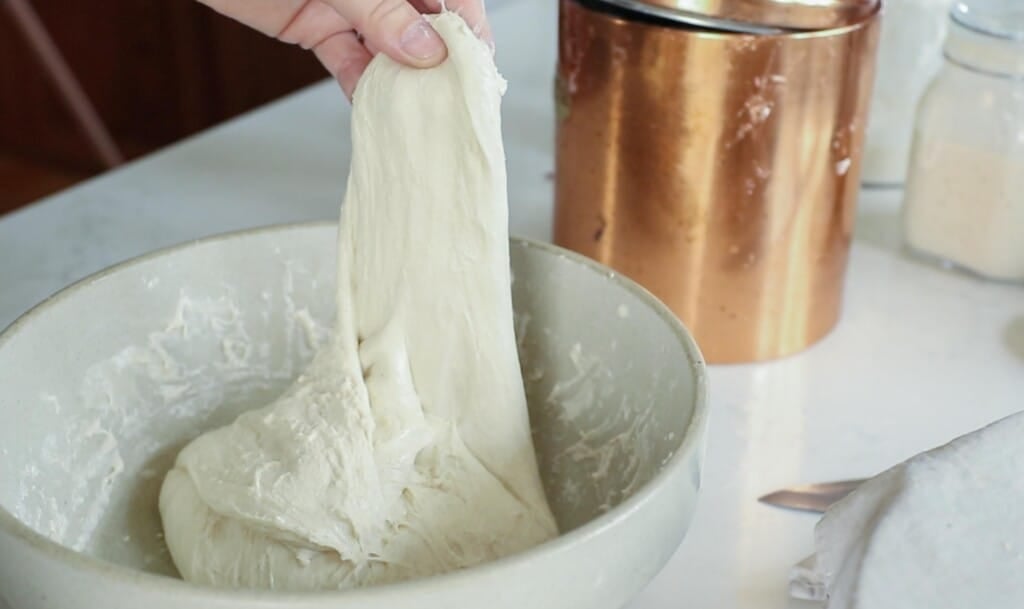
This is a no knead recipe. So, for gluten development, perform 6 rounds of stretch and folds.
With the dough in a large bowl, grab the edge of the dough and firmly pull up, stretching it upwards. Place the dough into the center of the dough ball. Give the bowl a quarter turn and do this same process again. Repeat this one to two times. This is considered one round of stretch and folds. Repeat according to the directions below.
First 3 stretch and folds – every 15 minutes.
Last 3 stretch and folds – every 30 minutes.
If your dough is sticking to your hands, dip your fingers in a little water before each stretch and fold.
Bulk Ferment
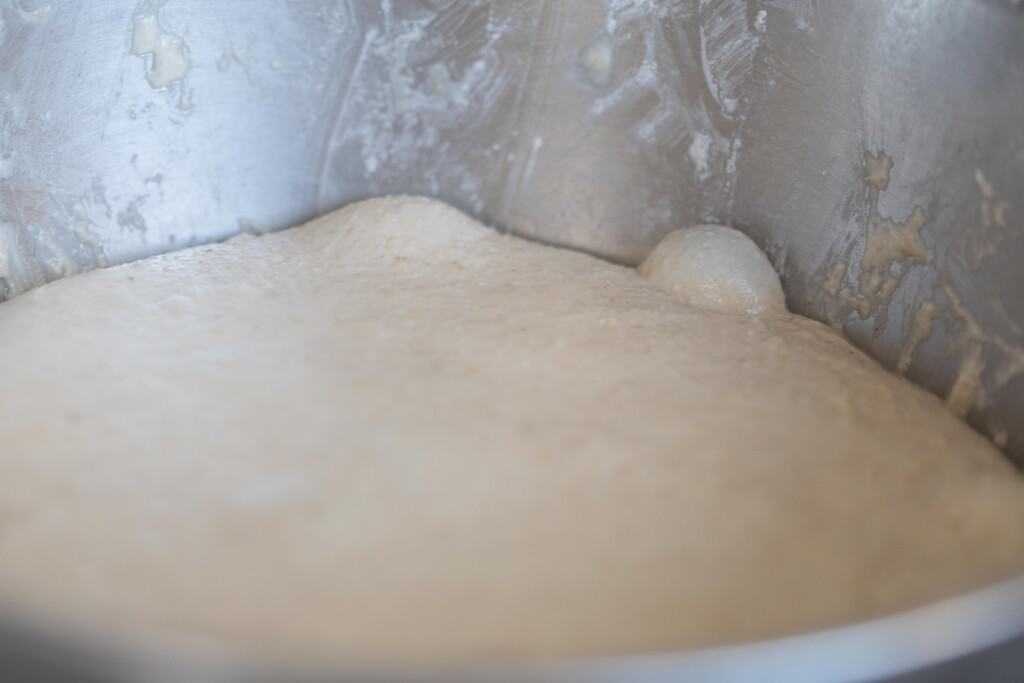
To ensure a beautiful rise and airy crumb, the dough will need to bulk ferment until doubled. To do this, cover the dough with a wet towel or plastic wrap to avoid a crust forming.
With a high hydration dough, this process may not take as long to ferment as other doughs. Keep an eye on it! The time will vary for everyone depending on temperature and maturity of the starter used.
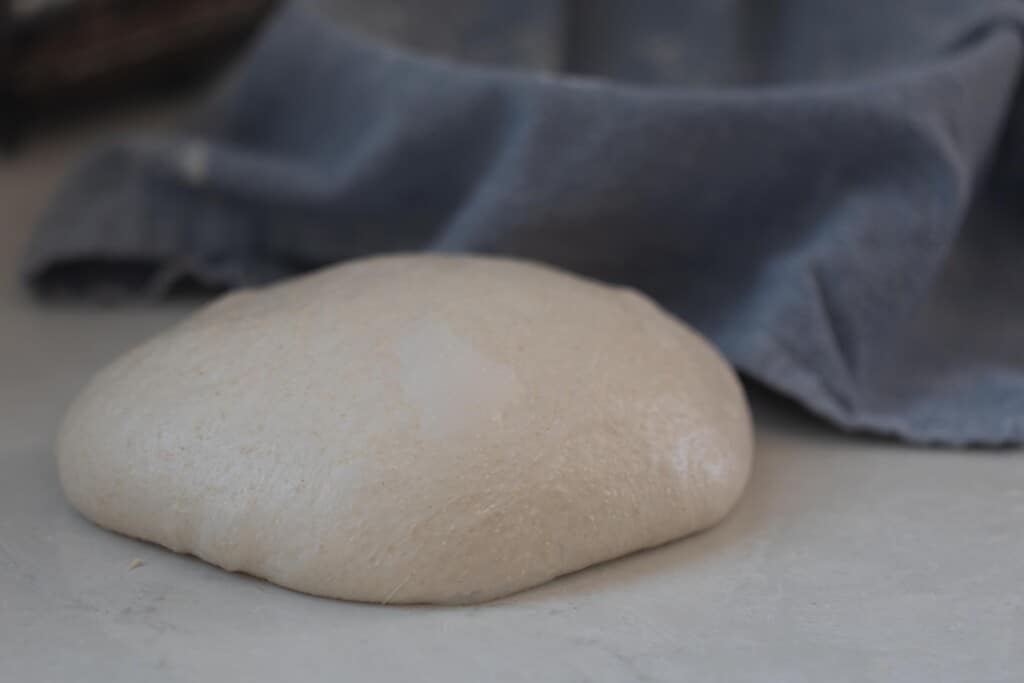
When your dough is done fermenting, it should have doubled in size and have bubbles all over the surface.
Over fermented dough will become a wet, sticky mess.
Shaping
Add a little bit of flour to a work surface.
Gently take your dough out of the bowl. Be extra careful with this type of dough!
Shape it into a ball by creating surface tension. To do this, gently spin it towards you.
Let it sit out 15-20 minutes uncovered. This time around, you want the dough to form a crust so it won’t stick to the banneton basket or tea towel during the overnight rise.
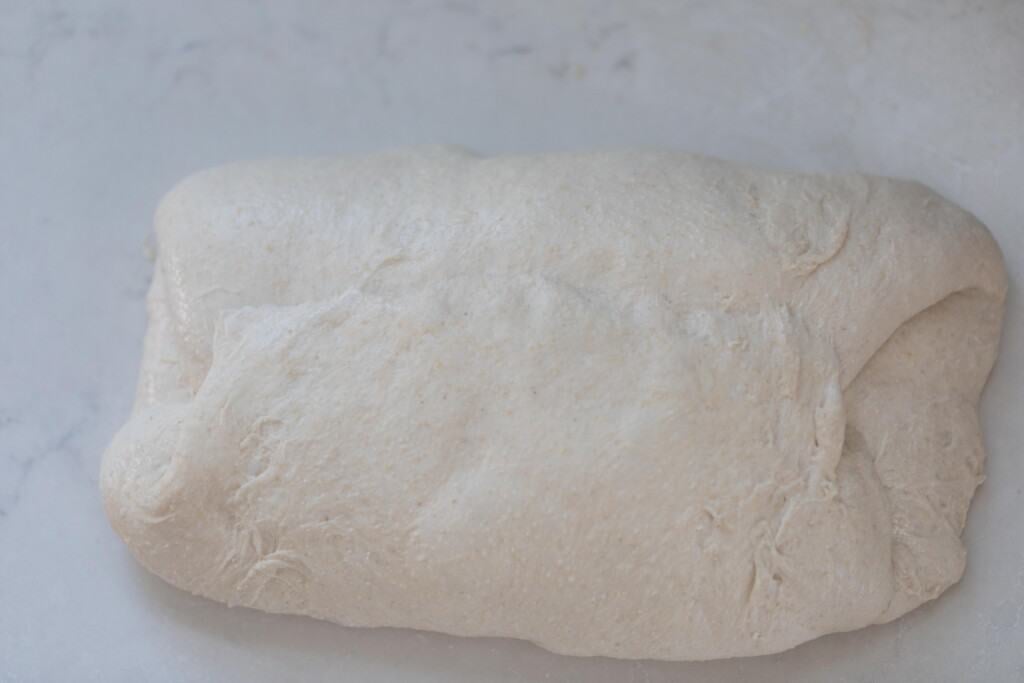
Turn over and shape. I do this by folding the two sides over to meet in the middle, and then the other two sides.
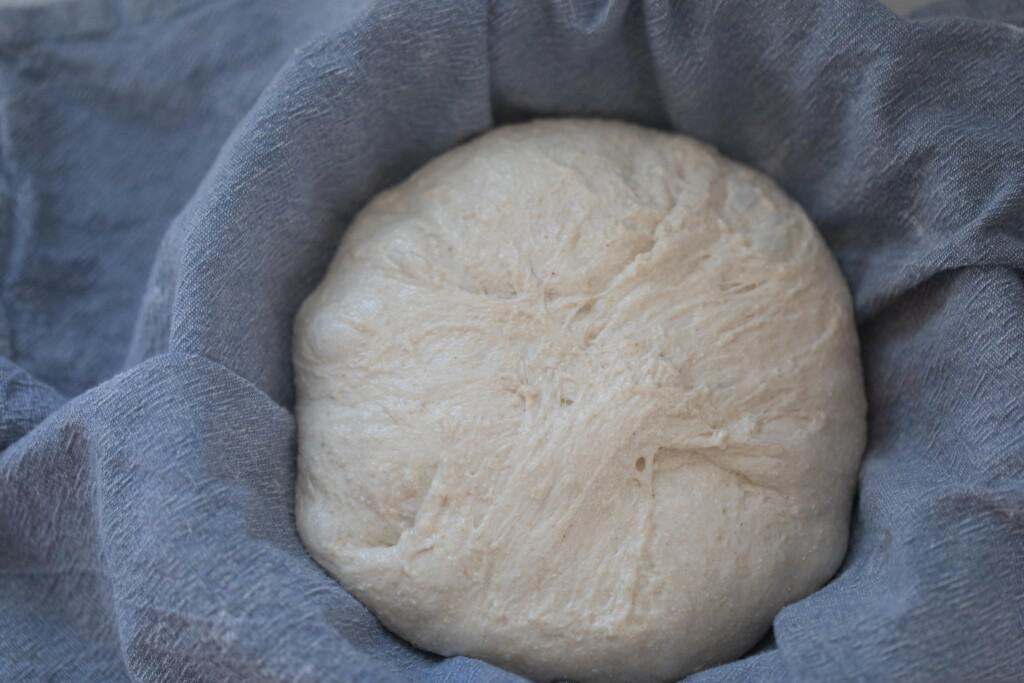
Transfer to a floured banneton or bowl with a tea towel, seam side up, smooth side down.
Cover with plastic and proof 12-15 hours in the refrigerator.
Scoring
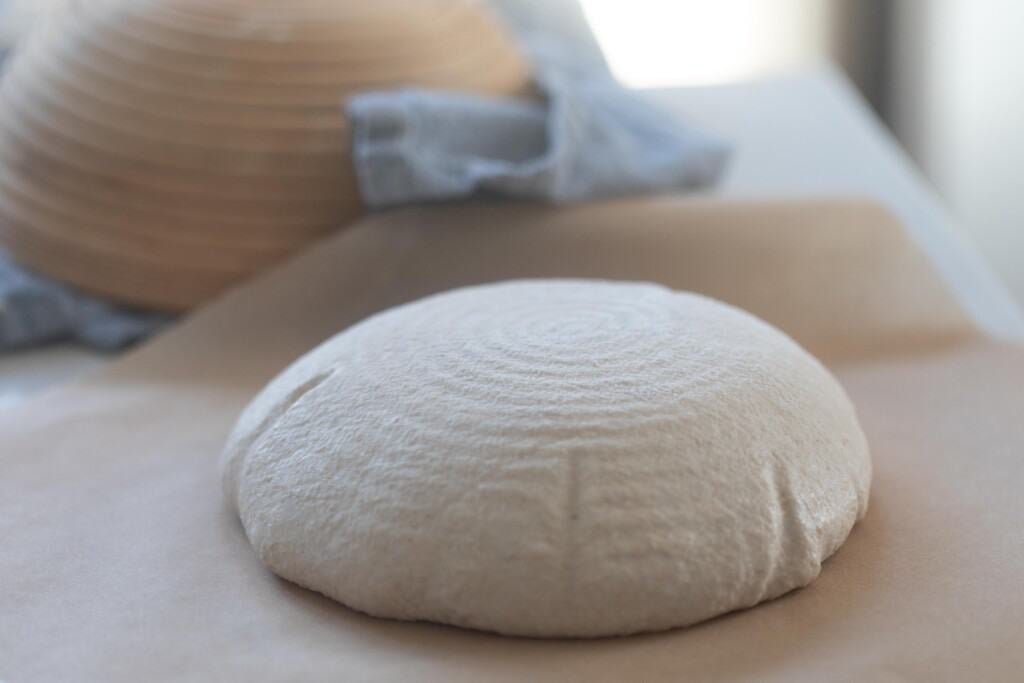
Before removing your bread from the fridge, preheat your oven to 500 degrees F. Place the Dutch oven inside and preheat for 1 hour.
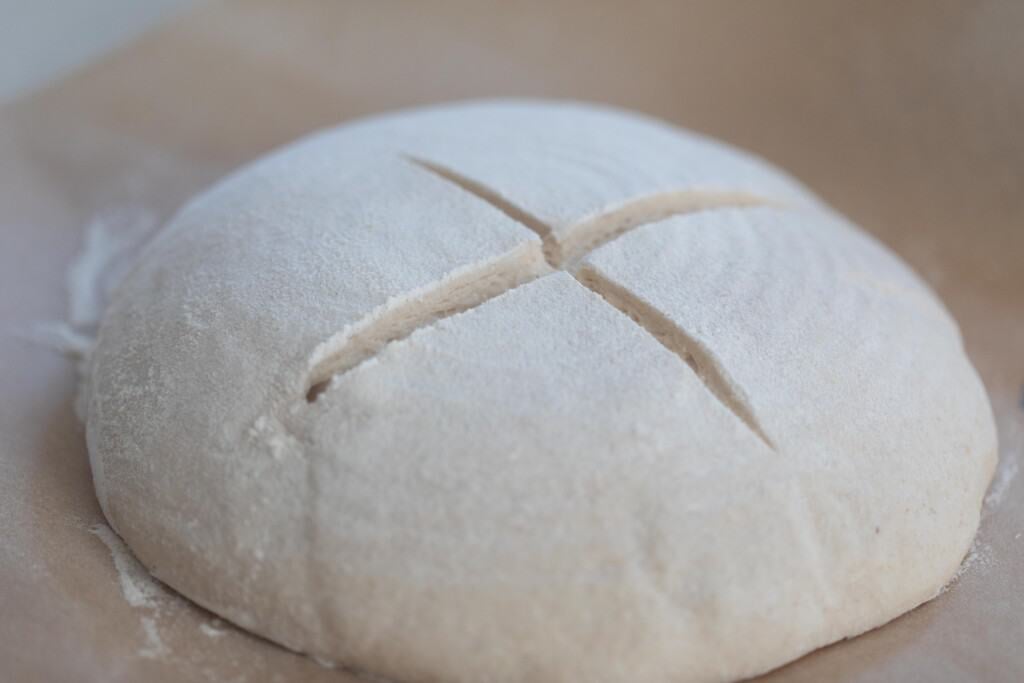
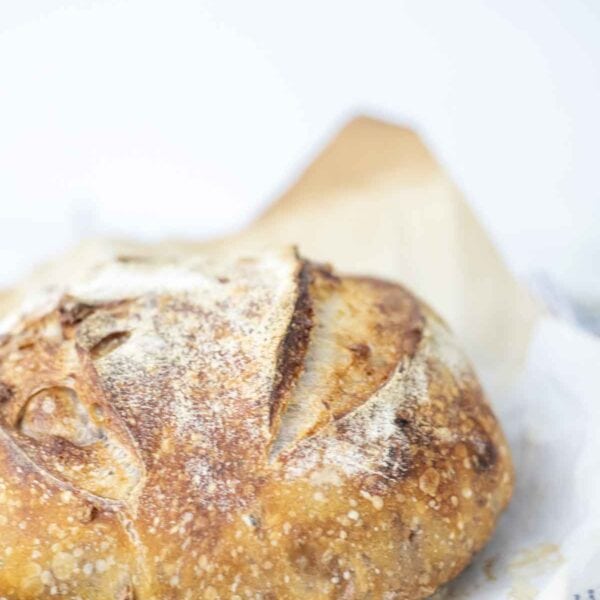
Right before this hour is up, remove your dough from the fridge. Dust the top with flour and score using a razor blade or scoring lame. If you are hoping to do some fun designs, check out my tips on scoring here.
Bake
Sprinkle the bottom of the Dutch oven with flour or use a piece of parchment paper. Transfer the dough to the Dutch oven.
Bake for 20 minutes at 500 F degrees with the lid on.
Take the lid off, turn the oven temperature down to 475 F, and bake an additional 25 minutes or until browned. To ensure your bread is done, use a kitchen thermometer to test the temperature. Sourdough should be around 205 F degrees.
Carefully take your finished loaf out of the oven. After cooling for a few minutes, take your bread out of the Dutch oven and place on a wire rack to finish cooling.
Allow your bread to cool completely before slicing into it, no matter how tempting it may be. If you want to get the perfect slice, find all my tips, tricks, and favorite tools here.
FAQ
What does high hydration do to sourdough?
Higher hydration sourdough bread is going to have a more open crumb. This is the main benefit of a higher water content. You may also notice your dough ferments faster.
Does higher hydration make more open crumb?
Yes! An open crumb is when you have more holes in your bread. So, if you tend to have trouble with your loaves being a bit too dense, a higher hydration dough may help.
Should sourdough starter be 100% hydration?
I always use 100% hydration for my sourdough starter, which is the most common hydration level. There are also liquid starters that use more water and stiff starters that use less.
What is the average sourdough hydration?
You can find sourdough recipes ranging from 60% to 90%. Most of my loaves are in the 70 to 75% range. Anything above 80% is considered high. While anything below 70% is a lower hydration dough.
How to Store a Finished Loaf
One of the benefits of making a higher hydration loaf is storage. Thanks to that extra moisture, it won’t dry out as fast, helping it to last longer!
Store your bread in a cool, dry place in a bread bag or bread box for 5 to 7 days. If you don’t have a bread bag or box, there are other ways you can store your sourdough bread for ultimate freshness. Check out my best storage tips here!
Baker’s Timeline
8 am: Feed sourdough starter with flour and water.
12 pm: If sourdough starter is mature, then proceed to creating the dough.
Combine the warm water and flour. Rest for 30 minutes.
12:30-ish pm: Add in sourdough starter and dimple in with wet hand.
Sprinkle salt on top.
Mix the dough with your hands for about 5 minutes. Cover with damp towel or plastic wrap. Rest for 30 minutes.
1:00ish pm: Stretch and fold.
First 3 stretch and folds – every 15 minutes
Last 3 stretch and folds – every 30 minutes
Cover with a wet towel or plastic wrap and allow the dough to bulk ferment until doubled.
8:00pm (may be much sooner, especially with high hydration dough): Shape dough.
Sit out 15-20 minutes, uncovered.
Turn over and shape.
8:30pm: Transfer to flour banneton or bowl with tea towel and cover with plastic. Place in the refrigerator for 12-15 hours.
The Next Day
9:00am: Preheat dutch oven on 500 for 1 hour.
Take dough out of fridge, dust with flour, and score.
10:00am: Bake the sourdough bread and allow to cool.
Want to learn more about sourdough?
I believe sourdough can be simple. You don’t have to stress about hydration levels to make beautiful bread for you and your family.
That’s why I created a course called Simple Sourdough.
You’ll learn everything from how to:
- Make your own starter that is robust enough to bake your bread.
- Bake your very first loaves of sourdough bread.
- Improve your understanding of sourdough and bake better loaves.
- Expand your repertoire with specialty loaves and a variety of flours.
Plus, you’ll have access to my Complete Recipe Book. It includes every recipe I’ve ever published using sourdough and is continuously updated.
It’s perfect for beginners and more seasoned bakers, alike. Learn more about Simple Sourdough here.
More Tips and Tricks for Your Sourdough Baking
- How To Store Sourdough Starter
- Can You Freeze Sourdough Starter
- Freezing Sourdough Bread Dough – A Complete Guide
- How To Freeze Sourdough Bread – The Best Way
- How To Cut Sourdough Bread for the Perfect Slice
More Sourdough Bread Recipes to Try
- Sourdough Brown Bread
- Seeded Sourdough Bread
- Honey Sourdough Bread
- Mini Sourdough Loaves
- Sourdough Brioche
If you try this recipe and love it, I would love if you gave it 5 stars! Also, tag me on Instagram @farmhouseonboone.
High Hydration Sourdough Loaf
Ingredients
- 250 grams unbleached all purpose
- 100 grams whole wheat flour
- 125 grams bread flour
- 100 grams sourdough starter, active and bubbly (100% hydration, fed with equal parts flour and water)
- 390 grams water
- 10 grams salt
Instructions
- Feed a sourdough starter 4-12 hours before making your bread. The time it takes a starter to double in size and become active and bubbly depends on factors such as temperature and the maturity of your starter.
- Combine the flour and warm water in a mixing bowl. I find using a dough whisk works best for this.
- Allow this mixture to rest for 30 minutes. This is called autolyse, the process of hydrating the flour.
- After the autolyse, add in the sourdough starter by dimpling it in with wet hands.
- Sprinkle the top of the dough with salt.
- Use your hands to mix the dough until it comes together. This takes about 5 minutes. Cover the dough with plastic wrap or a damp tea towel and allow another 30 minute rest.
Stretch And Fold
- This is a no knead recipe. So, for gluten development, perform 6 rounds of stretch and folds.
- With the dough in a large bowl, grab the edge of the dough and firmly pull up, stretching it upwards. Place the dough into the center of the dough ball. Give the bowl a quarter turn and do this same process again. Repeat this one to two times. This is considered one round of stretch and folds. Repeat according to the directions below.
- First 3 stretch and folds – every 15 minutes. Last 3 stretch and folds – every 30 minutes.
Bulk Ferment
- To ensure a beautiful rise and airy crumb, the dough will need to bulk ferment until doubled.
- To do this, cover the dough with a wet towel or plastic wrap to avoid a crust forming. This process may not take as long to ferment as other doughs. Keep an eye on it!
Shape
- Add a little bit of flour to a work surface.
- Gently take your dough out of the bowl. Be extra careful with a high hydration loaf!
- Shape it into a ball by creating surface tension. To do this, gently spin it towards you.
- Let it sit out 15-20 minutes uncovered. This time around, you want the dough to form a crust so it won't stick to the banneton basket or tea towel during the overnight rise.
- Turn over and shape. I do this by folding the two sides over to meet in the middle, and then the other two sides.
- Transfer to a floured banneton or bowl with a tea towel, seam side up, smooth side down. Cover with plastic and proof 12-15 hours in the refrigerator.
Score
- Before removing your bread from the fridge, preheat your oven to 500 degrees F. Place the Dutch oven inside and preheat for 1 hour.
- Right before this hour is up, remove your dough from the fridge. Dust the top with flour and score using a razor blade or scoring lame.
Bake
- Sprinkle the bottom of the Dutch oven with flour or use a piece of parchment paper. Transfer the dough to the Dutch oven.
- Bake for 20 minutes at 500 F degrees with the lid on.
- Take the lid off, turn the oven temperature down to 475 F, and bake an additional 25 minutes or until browned. To ensure your bread is done, use a kitchen thermometer to test the temperature. Sourdough should be around 205 F degrees.
- Carefully take your finished loaf out of the oven. After cooling for a few minutes, take your bread out of the Dutch oven and place on a wire rack to finish cooling.
- Allow your bread to cool completely before slicing into it.
Notes
Nutrition
Nutrition information is automatically calculated, so should only be used as an approximation.


I was skeptical when I put it in the oven whether it would turn out…but even with the high hydration, the loaf was more forgiving than I expected. The whole process felt a little touch-and-go however. It was very hard to know when it was fermented enough and then risen enough in the fridge. It doesn’t seem to double in size like my lower hydration breads. And the poke test doesn’t seem to work with how sticky the dough is. Add to that, that the dough thoroughly stuck to the tea towel despite following the directions and I thought it was for sure going to be a flop. It’s going to take some practice to get it right. My crust ended up way too browned even though I reduced the cooking time after removing the lid. I think next time I’ll leave the lid on closer to 30 minutes and just 10 minutes off or so. The crumb is open and airy…just what I was hoping for! Passable for a first attempt I suppose.
Absolutely delicious! One thing I’m noticing though, is that regardless of the hydration level of the recipe I’m using, my bread always tends to start getting overdone on the outside while remaining slightly wet on the inside, even when it reaches the proper temp. I think part of it is my oven—it only goes up to 500, but it tends to cook at 30 degrees less than what the oven shows. In other words, the highest temp is really around 470. Can anyone give me suggestions on how to adjust for this? I love this high hydration recipe because I prefer a more airy sourdough, but mine still turns out dense because of the baking issues. Thanks!
I had a very hard time handling this dough. I feel it needed many more stretches and folds than stated. The end result is delicious, but not visually pleasing at all.
Always go with your gut! Everyone’s dough is different due to the hydration of the starter and the environment. High Hydration dough is harder to work with.
Does it matter what kind of salt you use? I’ve been using table salt in my sourdough bread because I couldn’t taste enough salt when I was using sea salt. I just wanna make sure that I’m not hurting my fermentation process, oven spring or crumb by using table salt.
What if I am using freshly milled flour? Should I use 250 g of store bought all purpose flour (I don’t love to do that but if necessary for a good airy loaf I will try it), and then use my freshly milled hard white wheat flour for both the whole wheat and bread flour? I know that you use a flour mill too, but I’m having trouble finding in your recipes a freshly milled flour sourdough bread recipe. Thank you!
Amazing! I have been using your 70% hydration loaf and it is amazingly simple and always turns out wonderfully. (*Thanks for the hydration information you linked here: https://www.farmhouseonboone.com/sourdough-hydration-how-to-make-delicious-bread/#:~:text=Step%201%3A%20Calculate%20the%20amount,100%20grams%20to%20my%20water.
I tried the high hydration bread and it turned out EXACTLY as you described it! The proofing picture was a welcome addition, as I am used to the proof looking differently for the lower hydrations. Bread tastes amazing and has the larger holes one hopes for with a small soft crumb! Will bring this to the Holiday Open house and use for pull apart brie. 🙂
What is the purpose of mixing AP flour with bread flour? Why not use just bread flour with the higher protein / gluten content? Can you explain what the addition of AP flour does to the crust and crumb of the loaf? Thanks!