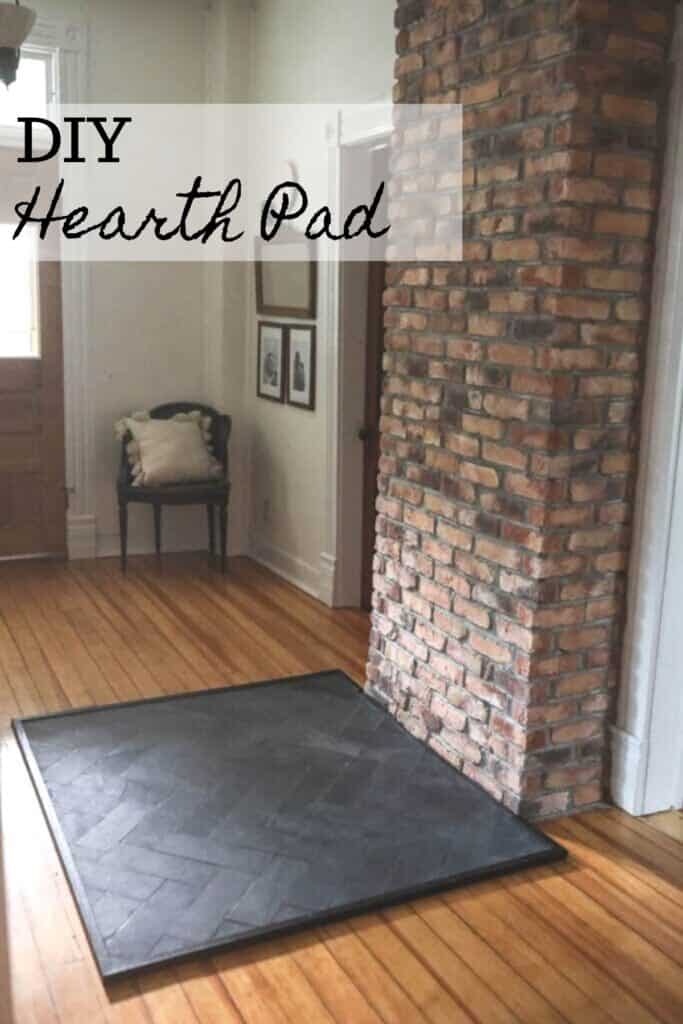
Learn how to make a slate herringbone hearth pad. This project was pretty straightforward and easy to complete, giving the wood stove a custom look.
I have a lot more detail to give on the chimney, wood stove, and how we are planning to heat the house with wood.
Because, well, it took a lot to be able to do so. It’s not as simple as just sticking a wood stove inside and calling it good.
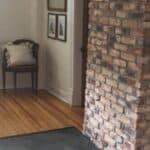
The wood stove was supposed to have been installed a few weeks ago, but when the fireplace guy came to install it, he put down a solid black ember pad. The stove we chose has feet, so it just needs 18 inches all around for ember protection. This way, if any embers were to fly out, they wouldn’t catch the wood floors on fire.
When he put the ember pad down, I just didn’t like it. There was no aesthetic appeal. It looked like a rubber mat. I had to start thinking of what we could do that not only looked pretty, but would simultaneously protect and maintain the beautiful wood floors.
My first thought was to cut through the wood floor and build the hearth flush with the wood, but I worried about causing irreversible damage to the floors. What if we, or the future homeowners, don’t want to heat the house with wood one day? We wanted to keep our future options open.
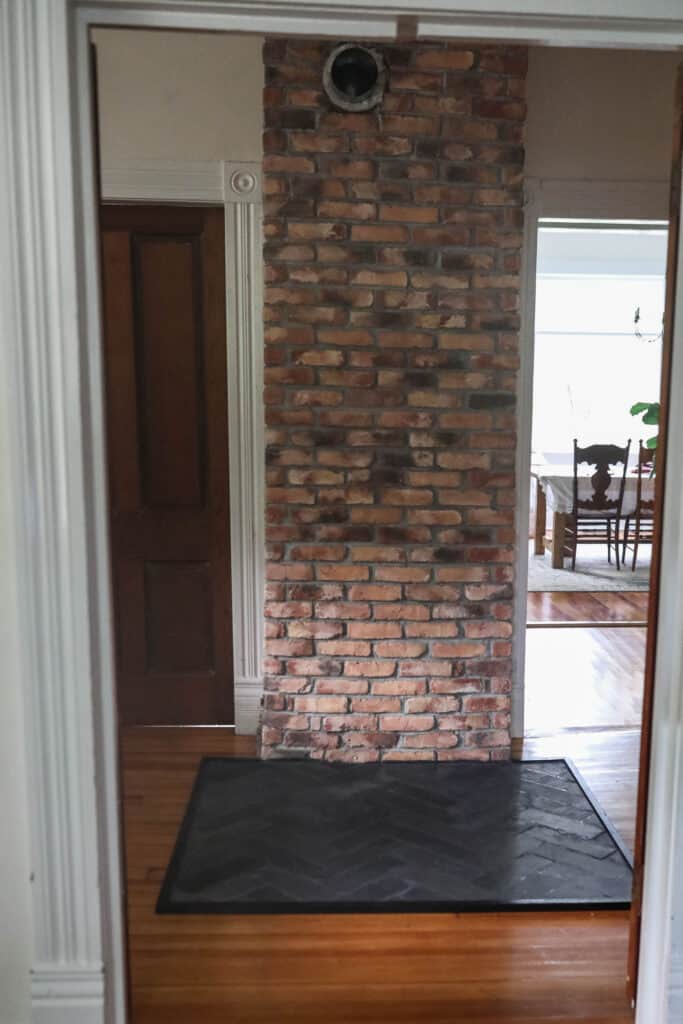
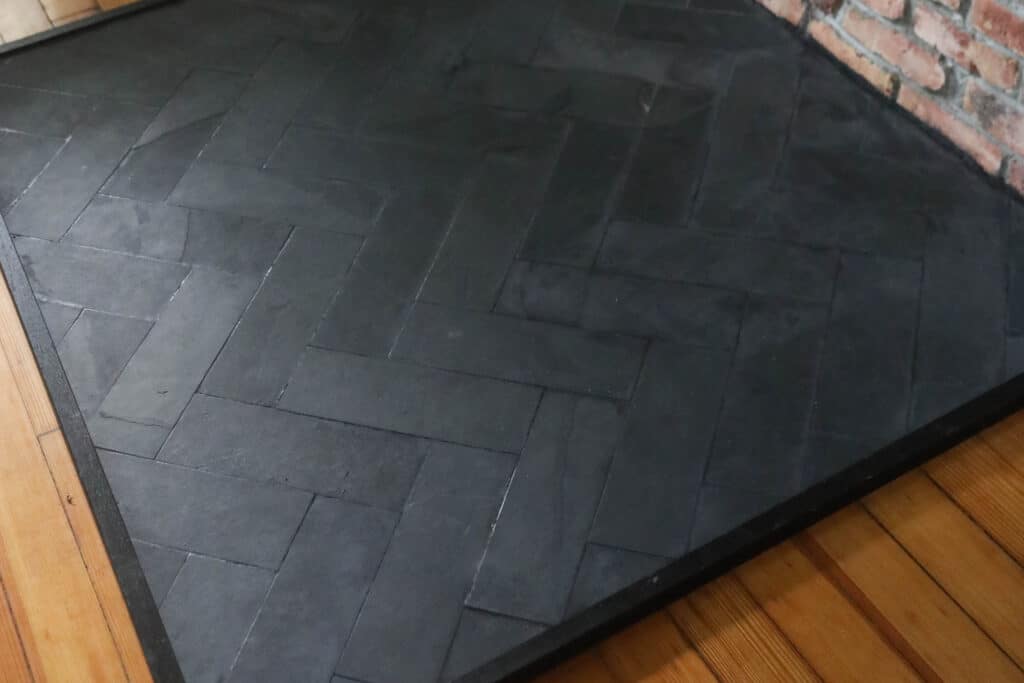
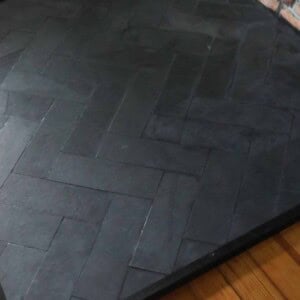
After all kinds of discussion and brainstorming, we finally landed on the idea of creating a somewhat floating, herringbone, slate hearth pad with a transitional piece around it.
It protects the floor without ruining it, fits the style of the home perfectly, and it’s just really pretty.
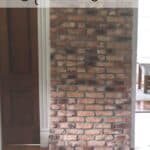
There are many ways you could go about making this, and there are many different materials, like brick or granite, that you could choose. However, since it sits in our entryway and two French doors would need to clear it, we needed something very low profile. This tile works perfectly for that.
Tips For Making A DIY Hearth Pad
How thick does a hearth pad need to be?
This could be directly related to code. Some places require a hearth pad to be as little as two inches thick, where others may require it to be four inches thick.
What is the best material to use for a hearth?
You could use a variety of materials: tile, stone, granite, marble, or brick. The type of material you use will be based on the type of fire you have.
Electric and gas stoves don’t burn as hot as wood burning stoves.
Can you use ceramic tiles for a hearth?
Yes. Tile has been used for a long time for hearth pads.
Does a hearth have to be raised?
No, it could be flush with the floor. Many people like raised hearths to add another layer of protection for kids. It simply gives a more defined area to be cautious around.
Do you need a hearth pad for a pellet stove?
Yes – just like gas and wood burning stoves, a pellet stove also needs a non-combustible floor protector.
This post contains affiliate links, which means I make a small commission at no extra cost to you. See my full disclosure here.

Tools and materials you will need:
Backer board
Grout
Thinset tile adhesive
Speed square
Adhesive
Grout floater
Drill
Trim
How To Make A Hearth Pad For A Wood Stove
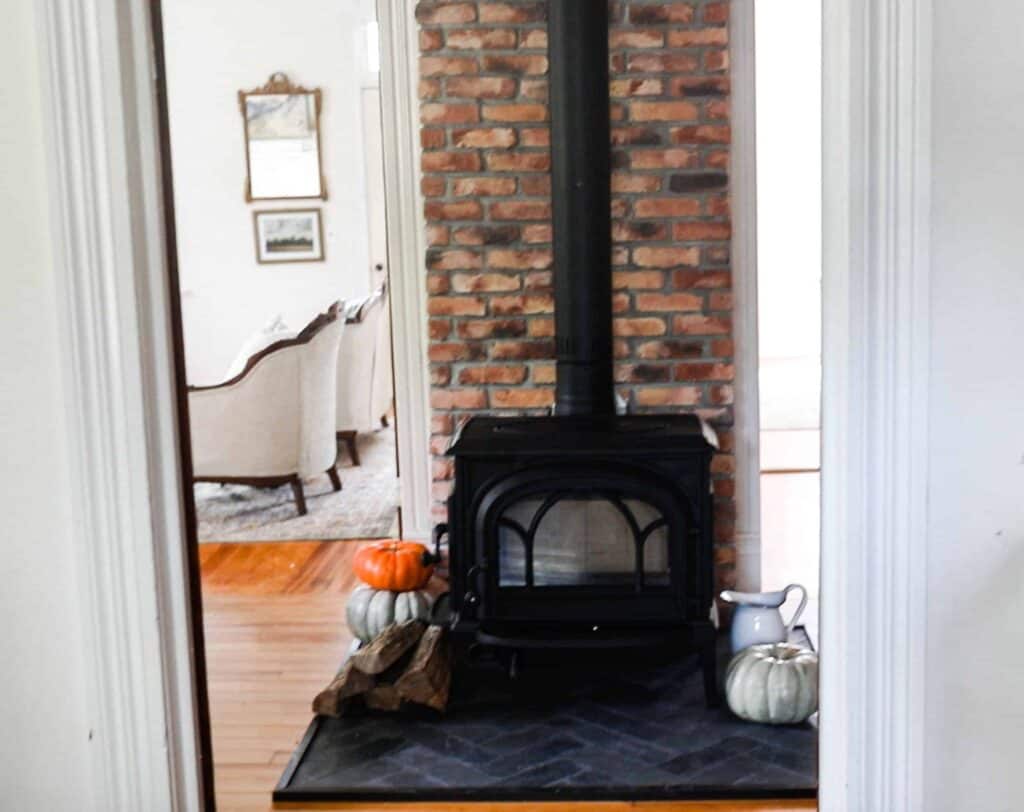
First, choose your tile. I selected some rectangular, black, slate tile in the 4″ by 12″ size.
Next, choose the pattern. I chose a herringbone pattern, which is perfect for beginners who have never done tile before. Just kidding, it’s not.
Determine the size of the pad. Ours needed to be 54 by 48 inches.
Cut the backer board to size. We ended up cutting off 6 inches from one side, making it 54 inches, and then we added one foot to the other side to make it 48 inches.
Start laying the tile:
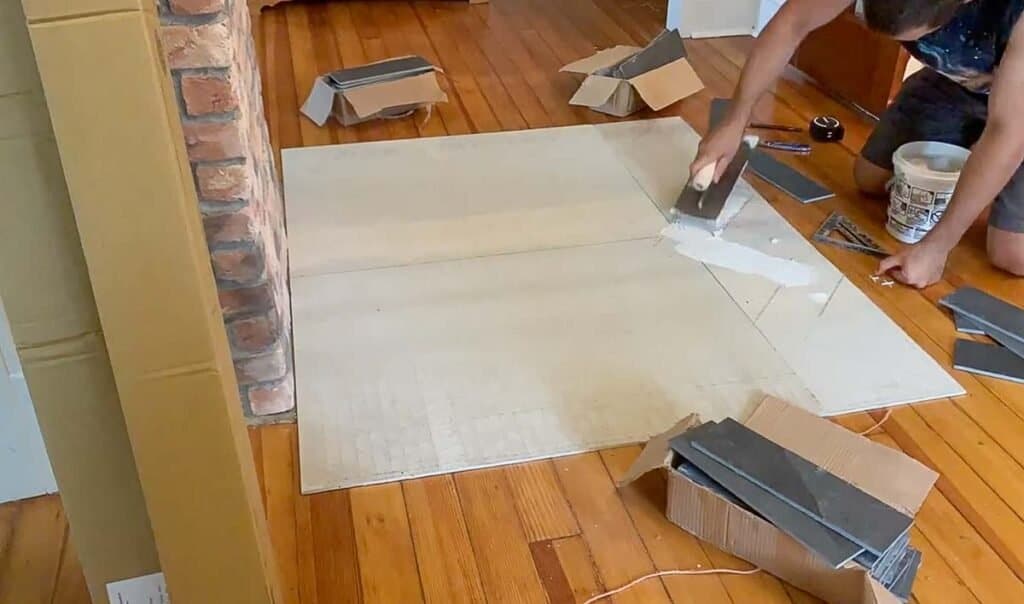
Find and mark the center of the board (which would also be the center of the chimney), drawing a line from the back to the front. We ended up moving ours over just slightly, so that way the whole tile could end up on the sides. It’s not something I really notice all that much.
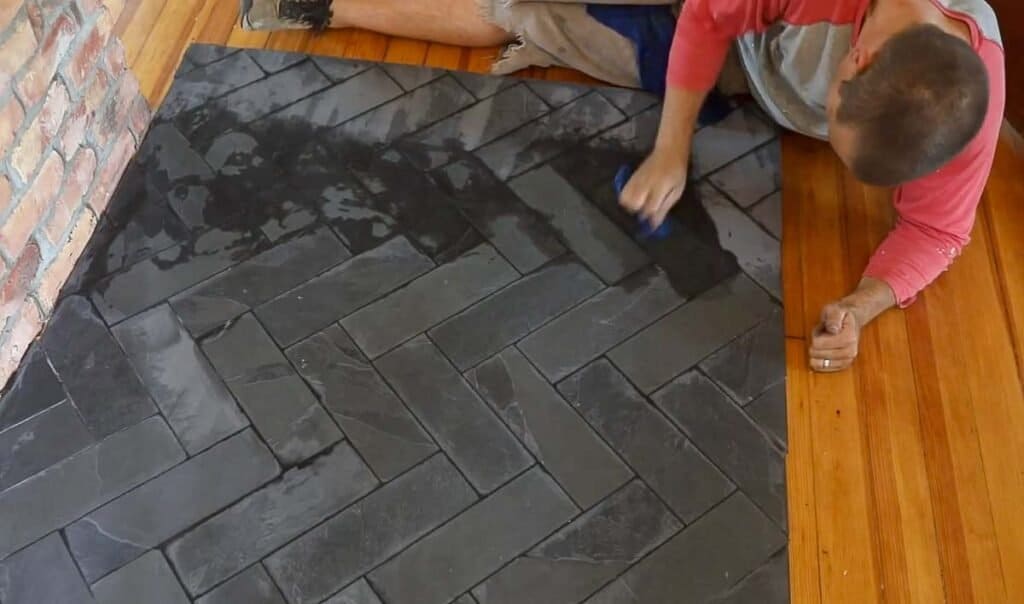
Start at the bottom and work your way up, laying the tile.
Since we’ve never done this before, we found it really helpful to trace the first row of tiles in the correct position, and then butter that space and lay the tiles.
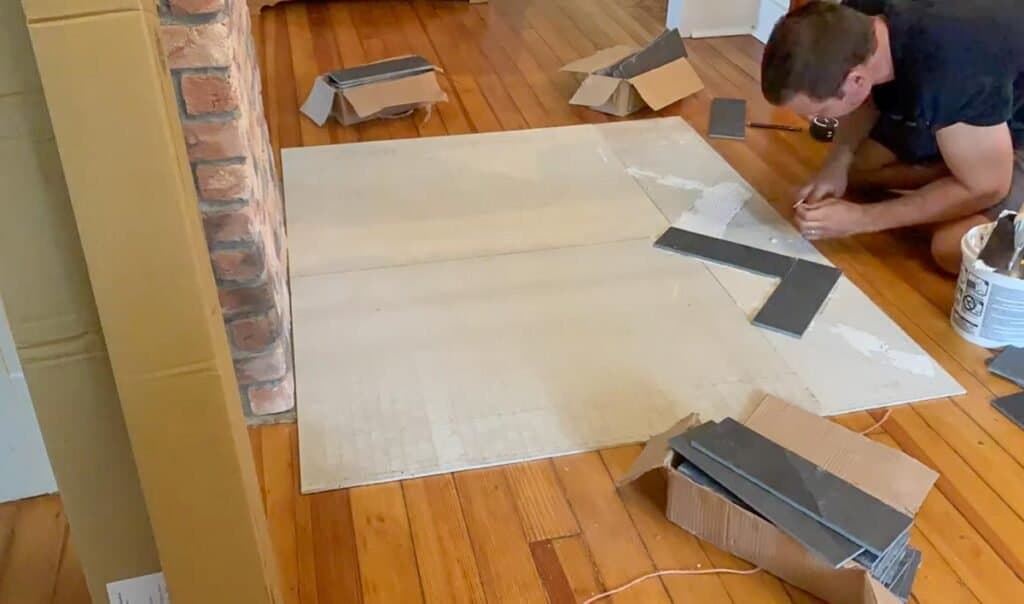
Set the tile at a 45-degree angle, using a speed square, with one corner touching the center line.
Add mortar to the backing board and to the tile using a trowel, then lay the tile in place, making sure it stays at the 45-degree angle.
Place the next tile under the bottom right corner of the first tile, using spacers. We used 1/8″ spacers, because I wanted a really small grout line.
Continue spreading mortar and placing tiles with spacers. Ninety percent of this project was super simple. The hard part comes with having to make all of the small edge cuts.
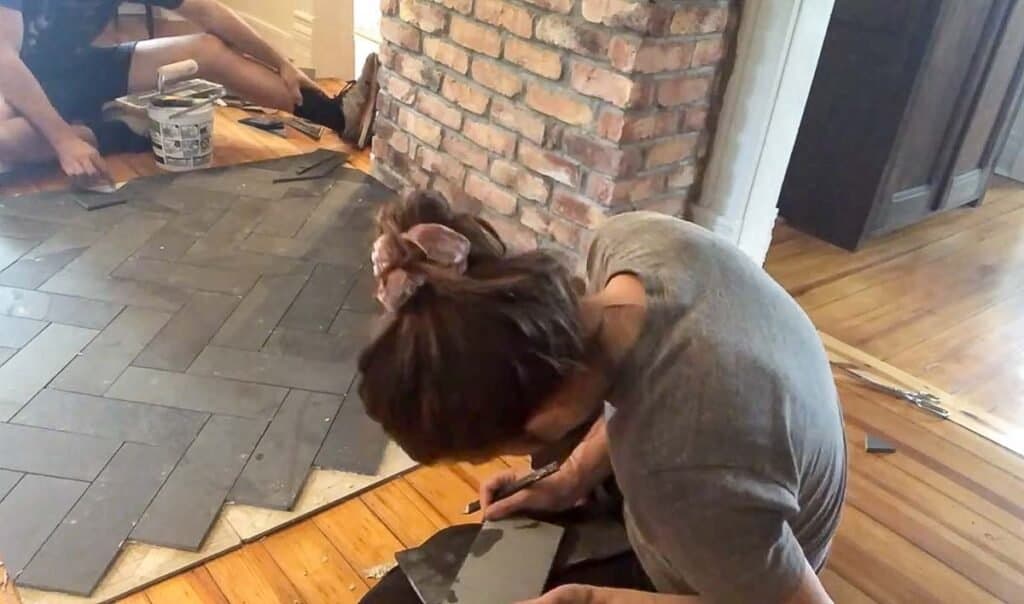
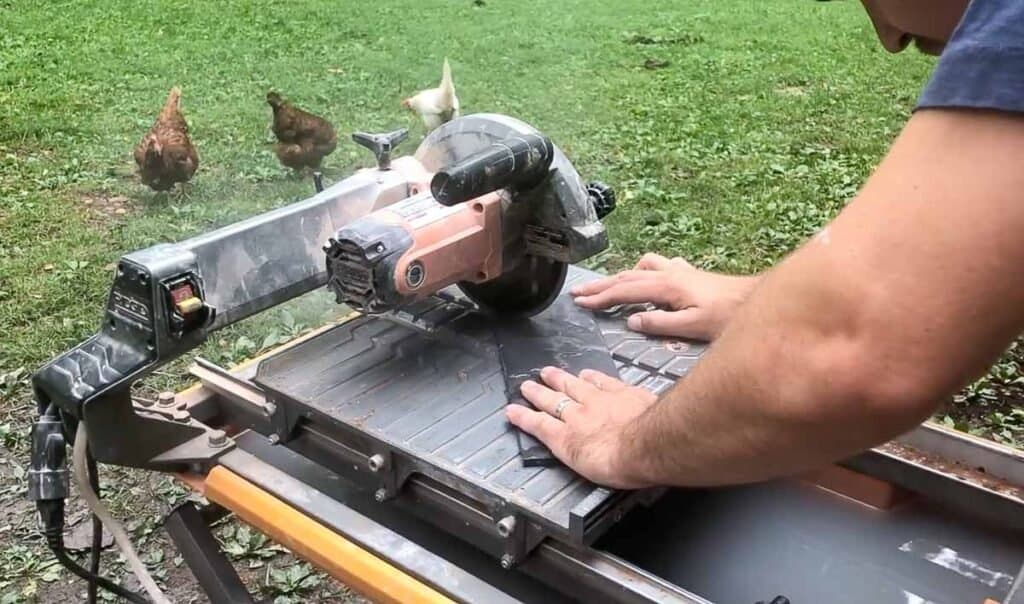
To make the edge cuts, lay the tile down and use a straight edge to mark where it needs to be cut. Cut using a tile saw.
For the really small triangle cuts, I would use a piece of paper and smush it in place to get the outline of the triangle. Then, mark the tile with the paper outline and cut to size.
Grout
Once the tile is in place and is allowed to dry for 24 hours, it is time to grout.
Spread grout on (I used an unsanded charcoal grout) using a grout floater, and then wipe off using a wet sponge or towel.
Finish The Edges
To finish off the raw edges and to give it a nice finished look, we picked up some pine quick corner.
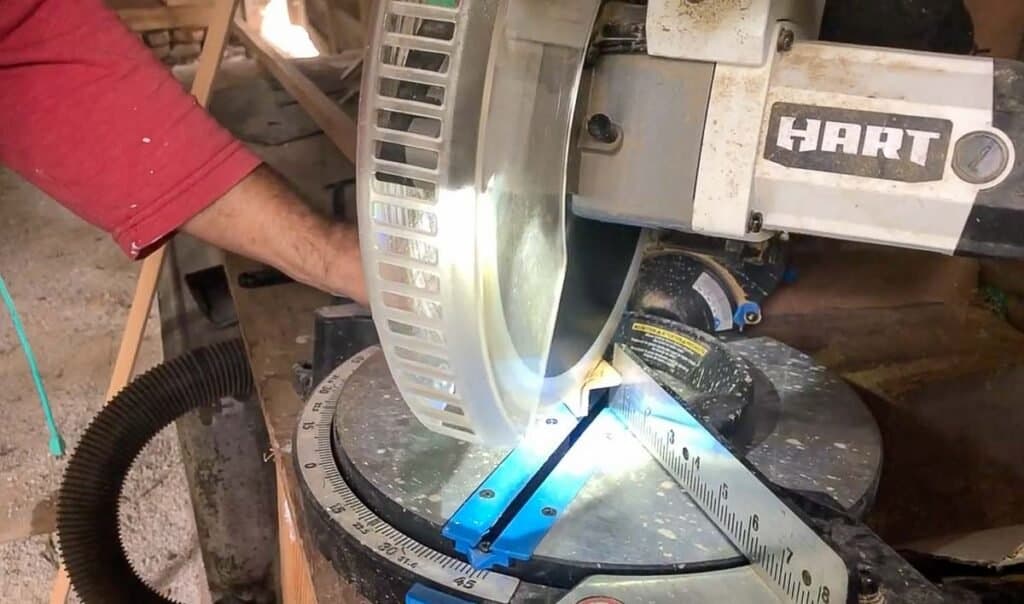
We measured each side and cut the trim on 45-degree angles with a miter saw so the corners would match up.
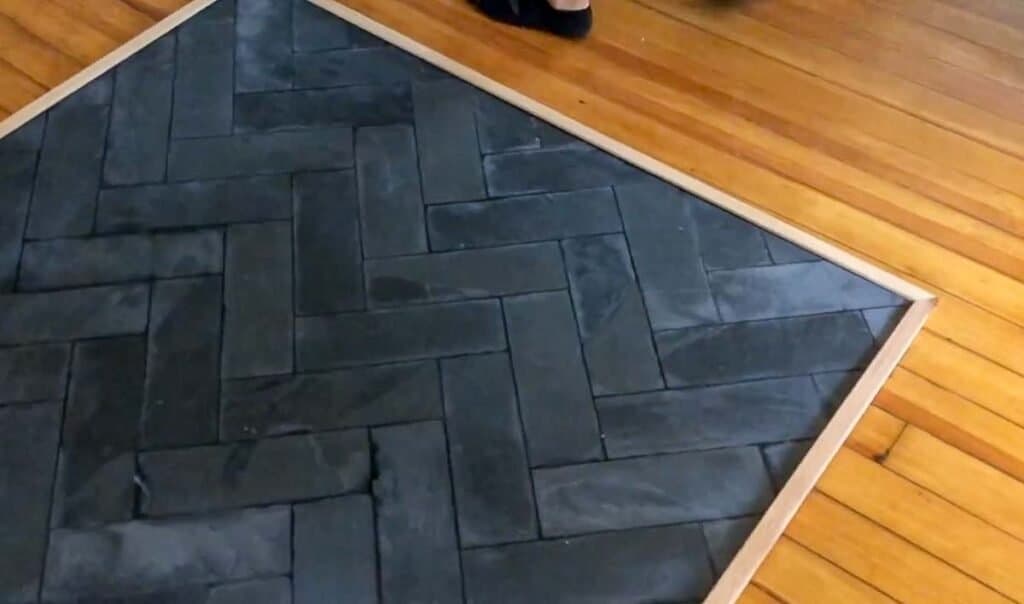
Paint or stain the trim.
Secure into place. We used an adhesive to attach the trim to the tile. To make it more secure, we added a few small screws to the corners. Even though we were trying to avoid putting holes into the floor, the screws are small and minimal.
Enjoy your beautiful hearth. This project ended up costing us around $150. A good chunk of it was the tile, and we still have a box left for another project.
When I looked into purchasing a custom pad, they were coming in around $600, so doing it ourselves really saved us some money and we love the results.
Find More Farmhouse Projects:
DIY Hearth Pad
Equipment
- Sponge
- Tile saw
- Miter saw
- Table saw
- Drill
Ingredients
- Tile
- Grout
- Backer board
- Trim
- Screws
- Adhesive
- Thinset mortar
Instructions
- First, choose your tile. I selected some rectangular, black, slate tile in the 4″ by 12″ size.
- Next, choose the pattern. For this project we went with herringbone.
- Determine the size of the pad. Ours needed to be 54 by 48 inches.
- Cut the backer board to size.
- Find and mark the center of the board (which would also be the center of the chimney), drawing a line from the back to the front.
- Start at the bottom and work your way up, laying the tile.
- Trace the first row of tiles in the correct position, and then butter that space and lay the tiles.
- Set the tile at a 45-degree angle, using a speed square, with one corner touching the center line.
- Add mortar to the backing board and to the tile using a trowel, then place the tile in place making sure it stays at the 45-degree angle.
- Place the next tile under the bottom right corner of the first tile, placing spacers.
- Continue spreading mortar and placing tiles with spacers. Ninety percent of this project was super simple. The hard part comes with having to make all of the small edge cuts.
- To make the edge cuts, lay the tile down and mark where it needs to be cut using a straight edge. Cut using a tile saw.
- Once the tile is in place and is allowed to dry for 24 hours, it is time to grout.
- Spread grout on using a grout floater, and then wipe off using a wet sponge or towel.
- Finish the edgest with some trim.
- Measure each side and cut the trim on 45-degree angles with a miter saw so the corners would match up.
- Paint or stain the trim.
- Secure into place. We used an adhesive to attach the trim to the tile. To make it more secure, we added a few small screws to the corners.
Notes
How thick does a hearth pad need to be?
- This could be directly related to code. Some places require a hearth pad to be as little as two inches thick, where others may require it to be four inches thick.
Nutrition information is automatically calculated, so should only be used as an approximation.