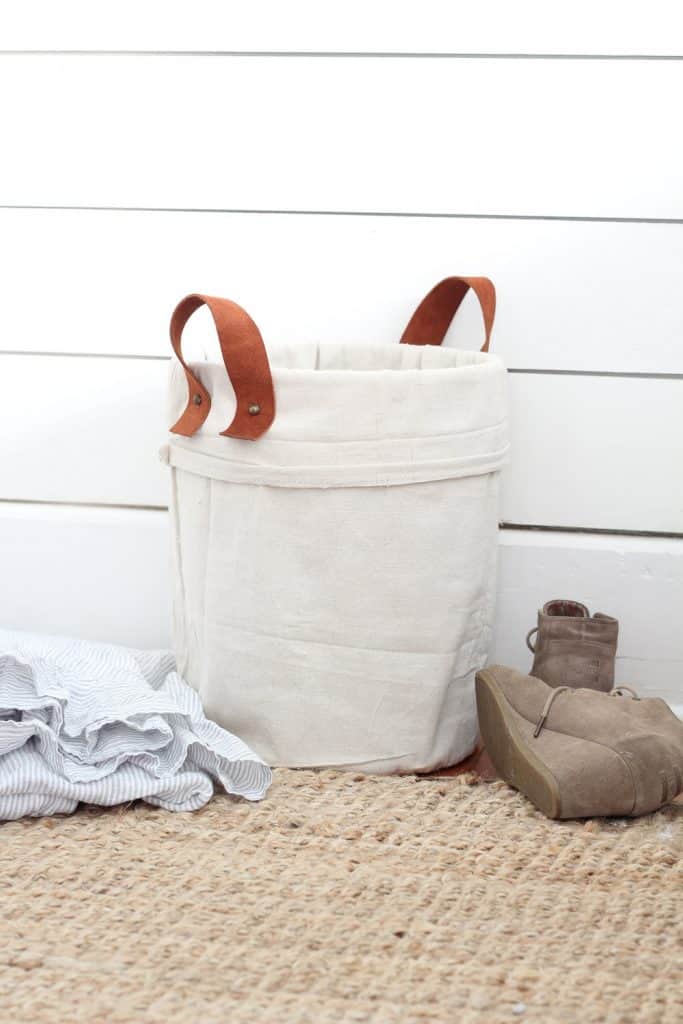
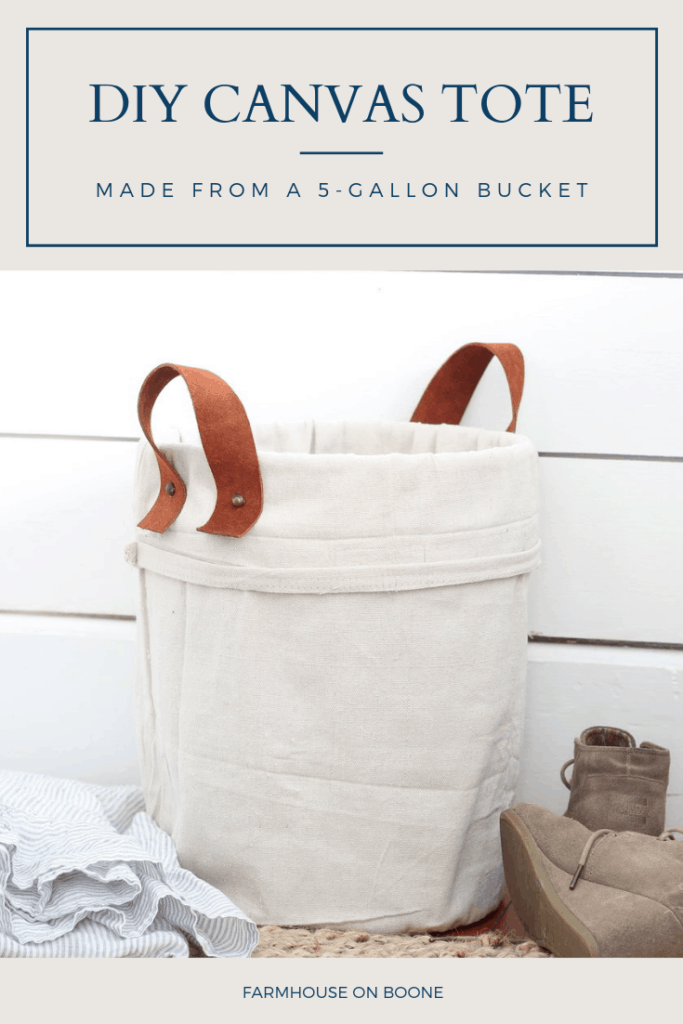
Recently I had an idea to make a 5-gallon bucket in our garage into a beautiful, useful canvas tote for our farmhouse. Sewing a canvas tote is super simple to sew and requires very few supplies. If you have a couple of extra 5-gallon buckets lying around, this is the perfect tutorial for you to create a beautiful and yet useful tote.
A Brilliant Idea
You know those ideas you get and you’re not sure how they’ll work out?
That’s how I felt about my idea to turn a five-gallon bucket into a canvas tote.
We just recently had some built-ins put in upstairs in our old house, to block off a really dangerous ledge that goes out over the staircase. We designed it mostly for the purpose of keeping the kids safe, but I also thought I could use the shelves for storage and pretty things.
I needed a couple of large totes and I had something very specific in my mind. That’s where I decided to try my hand at fixing up a humble old five-gallon bucket. Heavens knows we have plenty of those laying around.
DIY Canvas Tote Using a Five Gallon Bucket and Drop Cloth Supplies
painter’s drop cloth (I show you how to bleach it in this post)
DIY Canvas Tote Using a Five Gallon Bucket and Drop Cloth Instructions
For this project, I used the same painter’s drop cloth that I used for my couch slipcovers, bench slipcover, and that I talked about bleaching in this post.
It’s safe to say I like working with drop cloth.
Measuring and Cutting out the Fabric Pieces
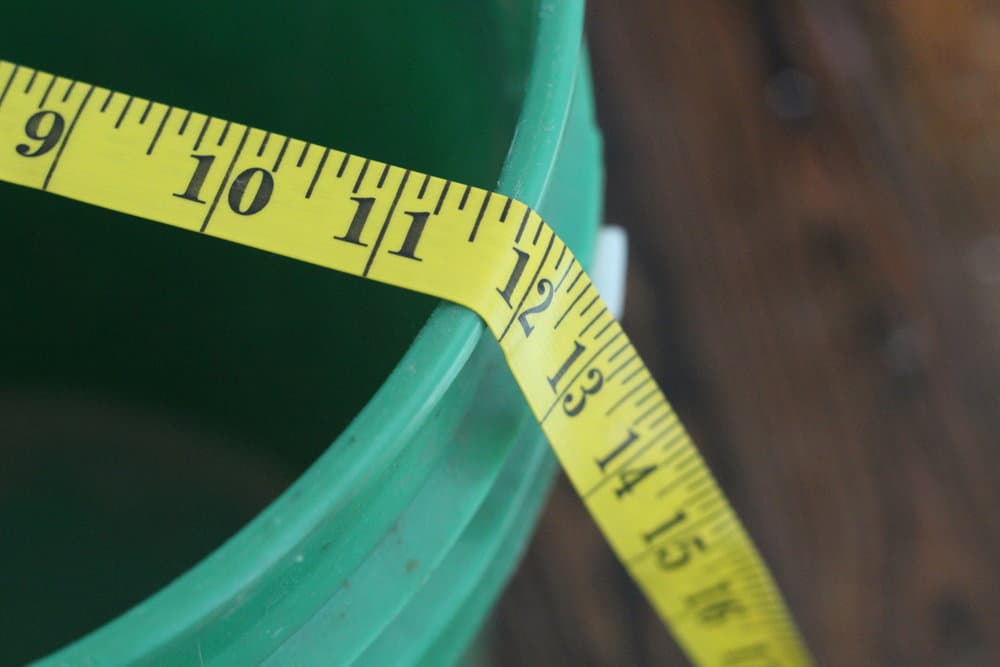
Measuring the Bucket
To begin this project, I measured across the top of the bucket to get the size for the bottom circle. Since the top is larger than the bottom, I thought it would be best to measure the largest point.
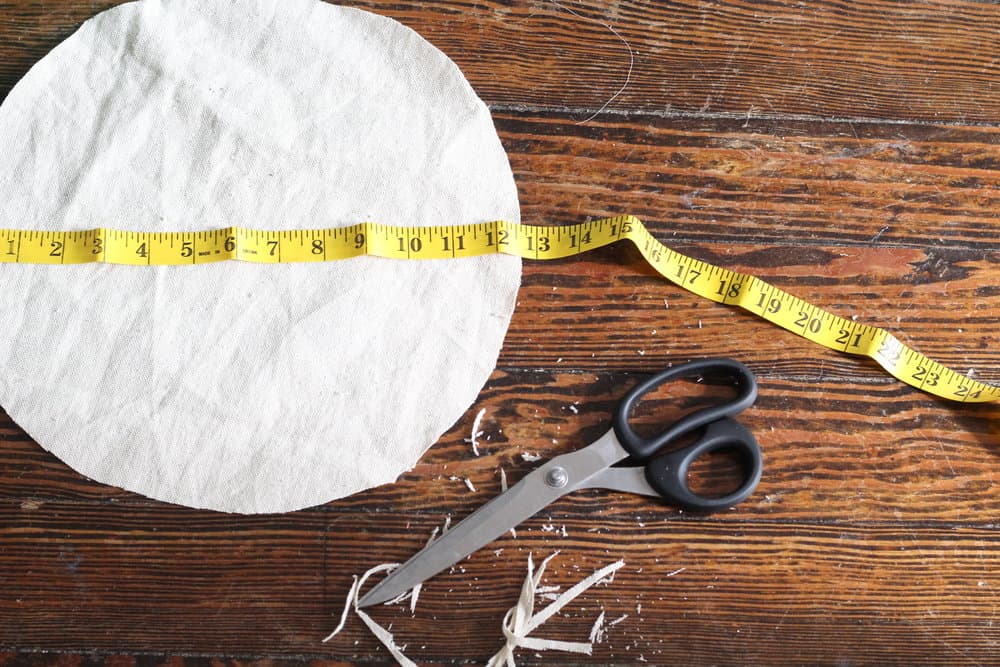
So, for my five-gallon bucket, I cut out two circles 12.5″ in diameter.
The reason I cut two is I will need one for the inside and one for the outside. If this is confusing, you will see what I mean later.
The Bottom Pieces
To get the circle shape I cut around the top of the bucket.
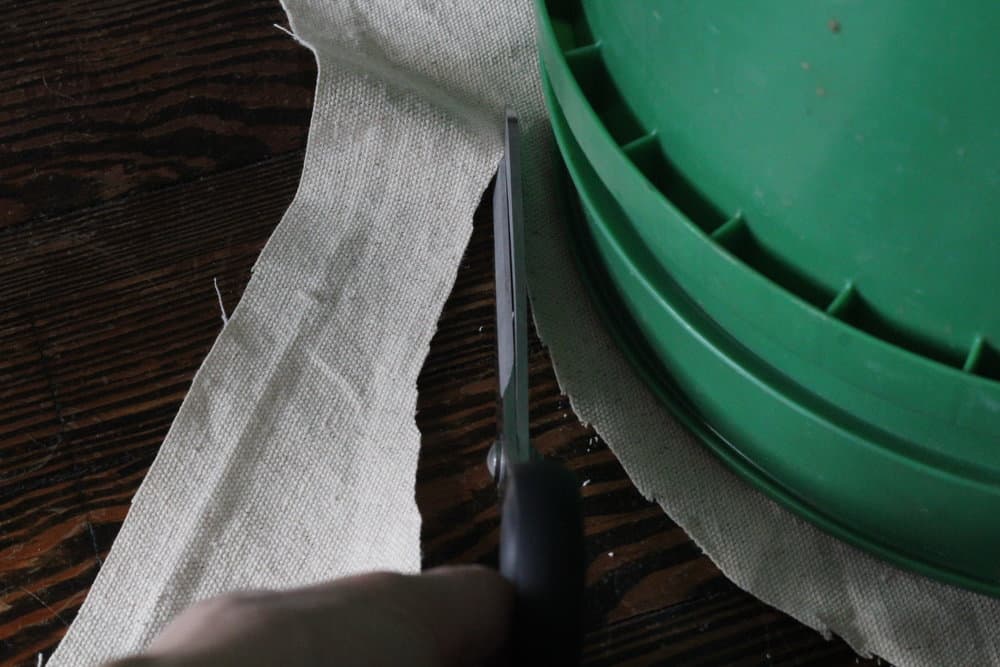
Then I folded it over itself twice to even up the edges.
It took a little tinkering to get to my perfect 12.5″ circle.
Then, I used that circle as a pattern to cut the second one.
The Width and Length Pieces for the sides
Next, I measured around the bucket to determine the width I would need for the main rectangular piece I would use to go around the bucket. I added on an inch for seam allowance.
So, for my bucket, I made the width of the rectangular piece 40″, since the bucket was 39″ in diameter and I would need 1″ for seam allowance.
I didn’t want to make anything fit too tightly, because I wanted it to look like a relaxed canvas tote.
Next, I needed to get the length of the main rectangular pieces.
Again, there would be two. One for the inside and one for the outside.
BUT, here’s the catch. These two rectangular pieces had the same width but not the same length. This is because I wanted to fold the inside piece over the outside of the bucket about five inches and the outside piece needed to be quite a bit longer to secure it to the inside.
That sounds like a whole lot of mumble jumble, but I promise it will totally make sense when you see the upcoming pictures.
This truly was an easy project.
So to recap, the cut list for a standard size five-gallon bucket (is there such a thing?) is as follows:
2- 12.5″ diameter circles
1- 40″ by 29″ rectangle for the outside piece
1- 40″ by 20″ rectangle for the inside piece *For this piece make sure to cut one of your long ends (40″ side) along the drop cloth’s already hemmed edges. This will come in handy later when you go to fold it over the outside of the bucket. You won’t have to do any additional hemming.
The reason the inside piece is 40″ by 20″ is as follows. Since the bucket is 14.5″ tall and I wanted the inside piece to fold over the outside about five inches or so, 20 inches would be the right length to accomplish this.
Sewing the Tote Together
First, fold the rectangle in half along the long side and sew the short ends together, with a 1/2 inch seam.
So, when you sew the 40″ by 29″ piece together you will end up with a piece that is 20ish inches wide and 29″ long when laid down flat.
Next, pin that piece to the circle as I have done below:
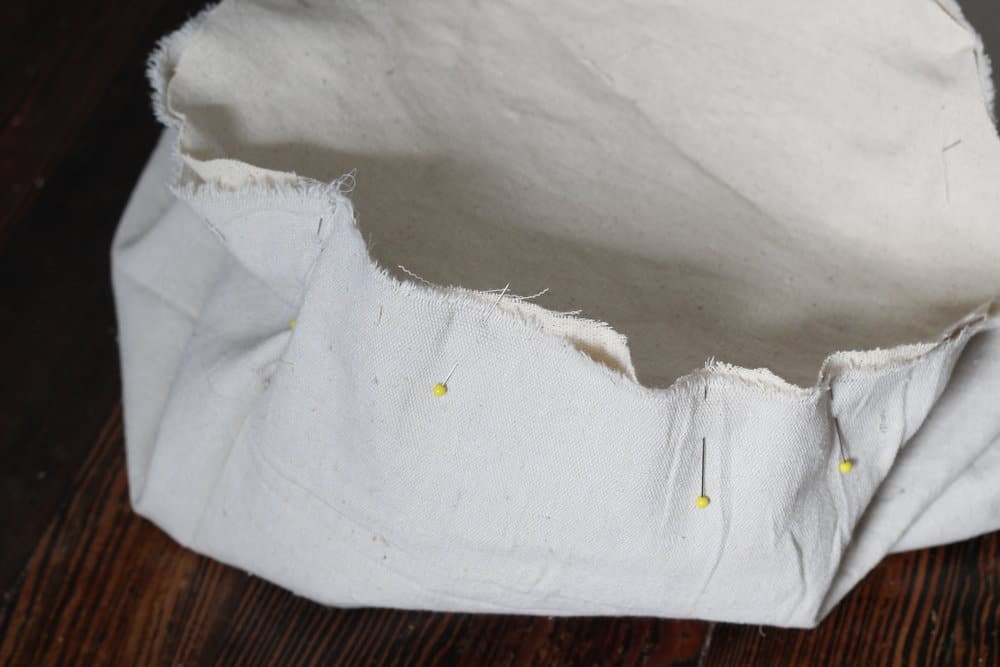
In the picture below I had sewn the circle to the inside piece, so when you look down into the bucket you will not see the raw edges, but a nicely sewn seam.
Just make sure the raw edges of the rectangle and the raw edges of the circle are all on the same side.
Notice how in the picture below the raw edges for the rectangular piece and the raw edges for the circle are all visible? That is because it is going to be placed down inside the bucket.
Also, please note that the top is the drop cloth’s original hemmed edge. If you are using some kind of other canvas fabric, and not pre-hemmed drop cloth, you will need to put a hem in the top, so it will be nicely finished when you go to fold it over the outside of the bucket.
Next, I slipped the outside piece (the original 40″ by 29″ rectangle, the longer one) onto the outside of the bucket.
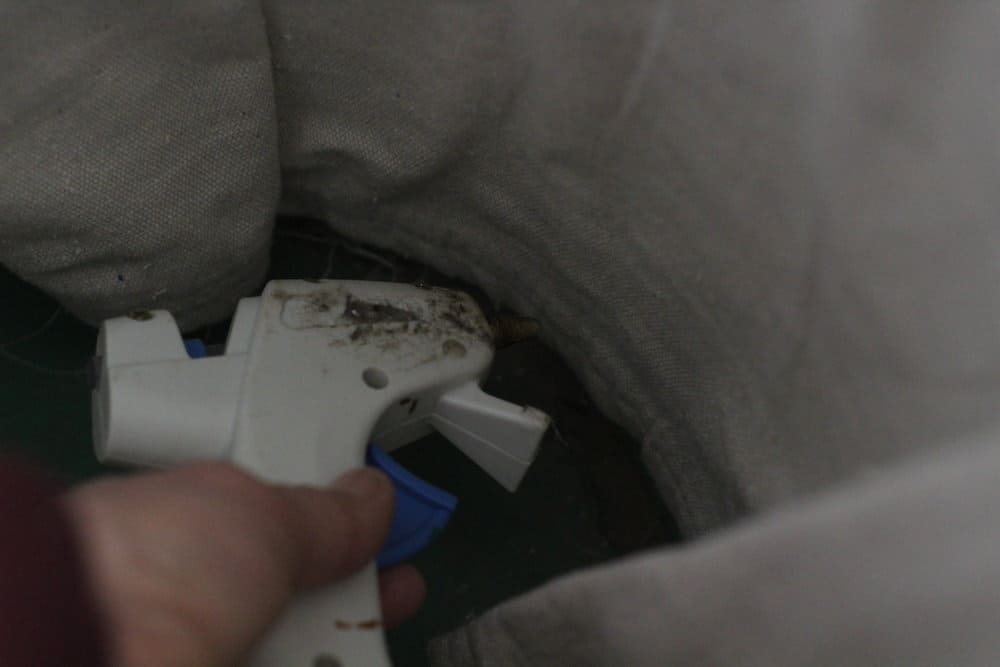
Hot Glueing the Fabric to the Bucket
I pushed all the excess inside and then hot glued it, on the inside, into place.
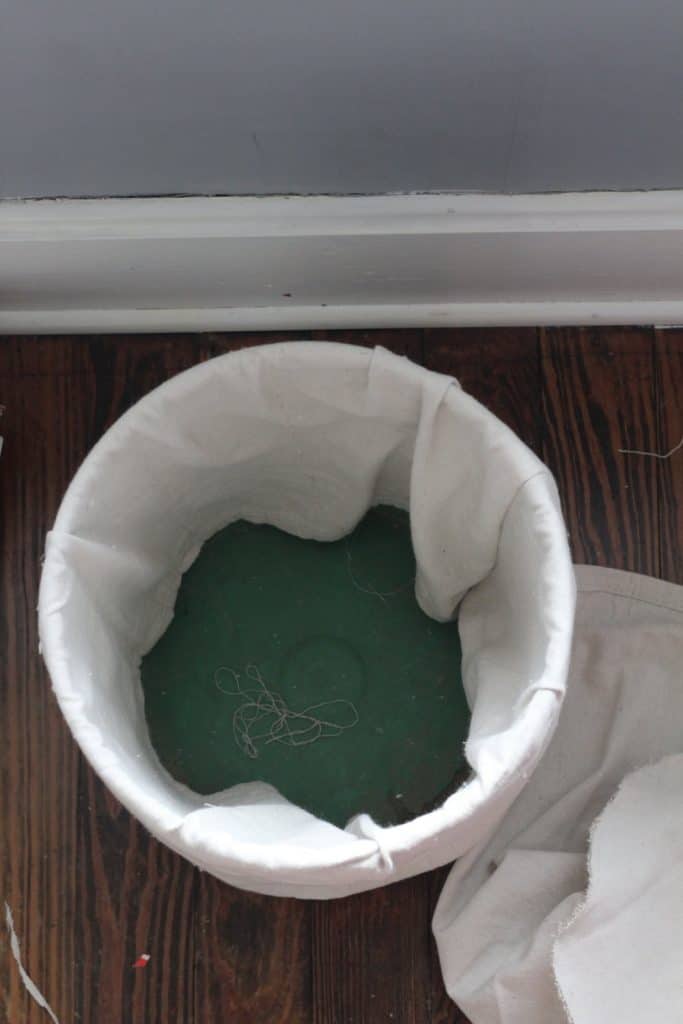
All raw edges are hidden inside.
Next, I took my inside (shorter piece) and placed it inside the bucket hiding the raw edges and hot glue from my outside piece.
I folded the inside piece over the top and to the outside.
*See the image of the completed project at the top of this post to see how I folded the inside piece over about five inches if this doesn’t make sense.
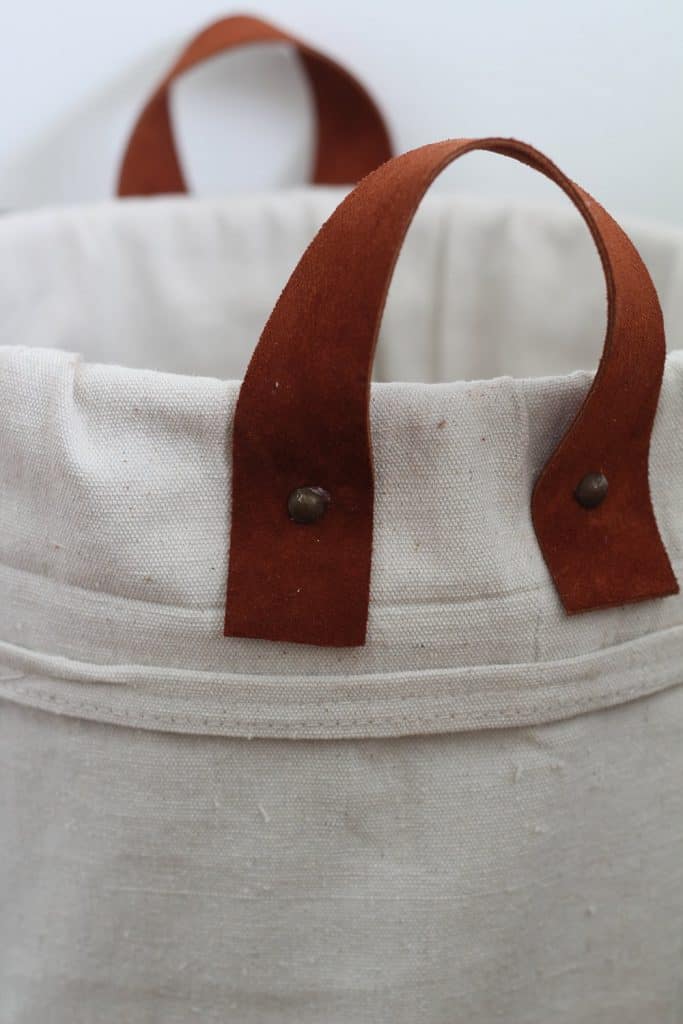
Attaching Handles
I purchased this leather strip from Joann’s to use for making the handles.
I cut out two 12″ pieces.
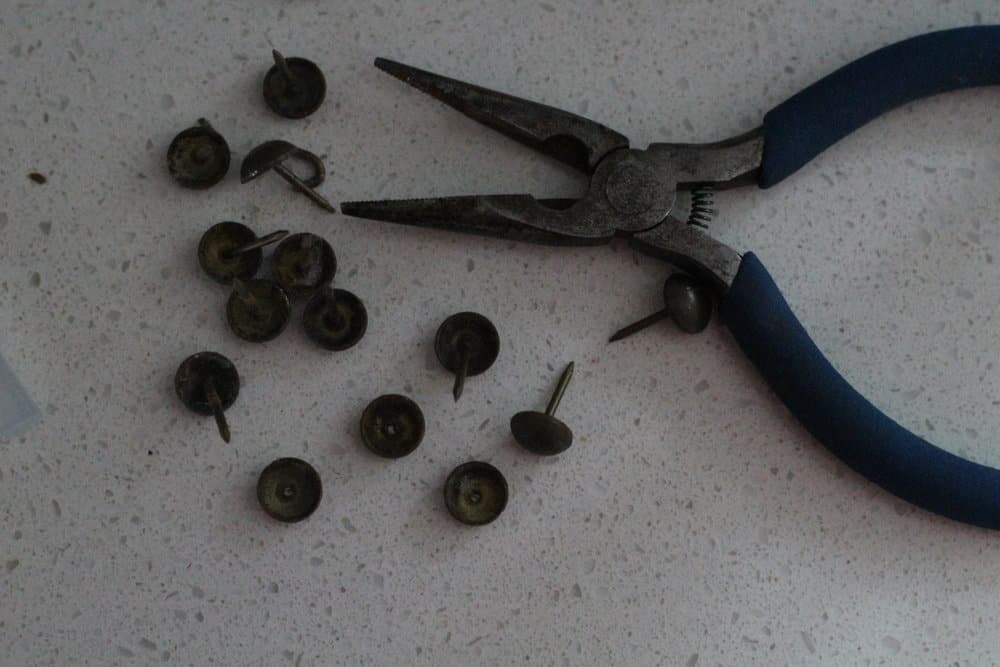
Next, I used some short wood screws, and antique upholstery tacks, to attach the leather straps.
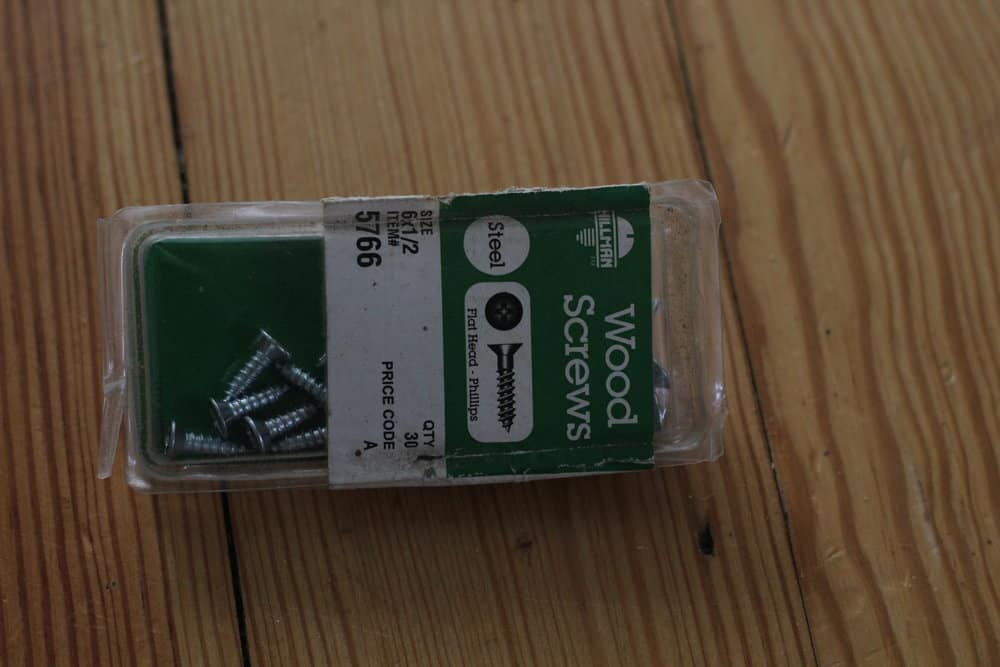
I simply placed the 12″ leather straps on opposite sides of the bucket and used the screws, and my drill, to drive them in.
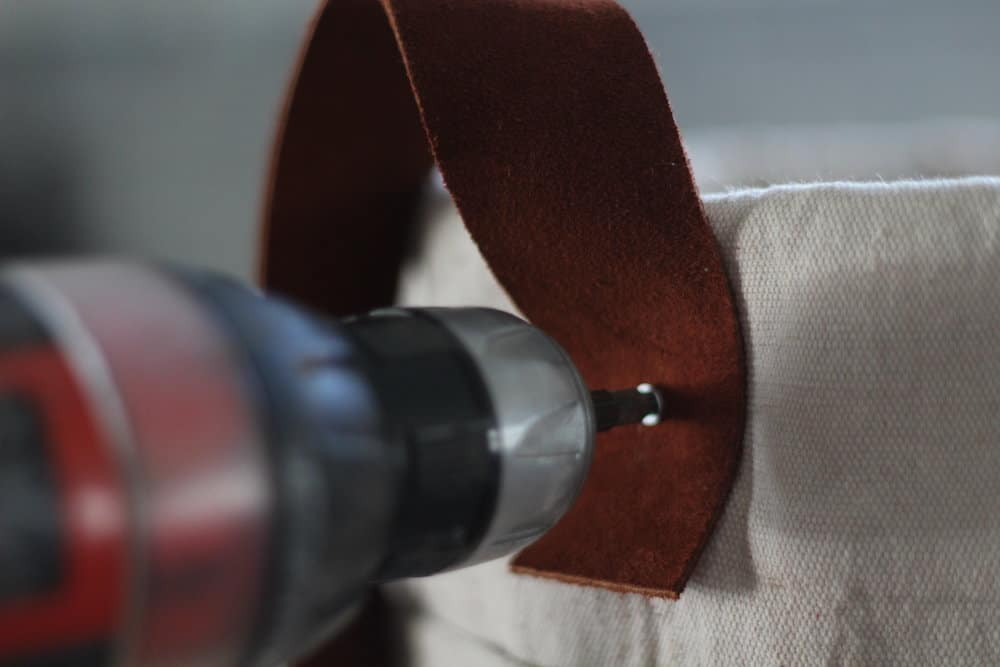
To cover up the screws, and make it look more polished, I broke the tack parts off of some antique upholstery tacks and hot glued the tops over the screws.
I absolutely love the way this project turned out!
I want to make about five more.
Hey, it seems like a great way to put to use some of the five-gallon buckets that we are hoarding in the garage.
Pin it for later
What do you think? Will you try to make your own canvas tote using a five-gallon bucket?
I can’t wait to hear how it goes for you!


you mentioned using wood screws for the handles. how do the screws stay in without falling out. are you able to carry the bag?i love this. thank you for sharing your craft.
I LOVEEEE THIS IDEA. DID YOU MAKE A VIDEO??
Very creative! I love it.
Love this idea! I think I’m going to use this same concept to cover an old, ugly plastic laundry hamper! Thanks!
if purchased, what would be the cost??? not sure I could do it…but interested in purchasing….
What would you use this for? I’d love to make one just not sure where I’d put it and what I’d do with it.
I like it for storing blankets or toys. 🙂 They also just look nice on a shelf.
good to make a bag like that. I ‘d love to make a bucket bag according to your guids find it very helpful and useful. thanks for sharing!
Yayyyyy! I simply cannot wait to start making hundreds of these! Or at least a few…and then more of your diy’s… ;)) hopefully soon because you know how it goes with kiddos.
Very clever! Once again for a few dollars you have an awesome piece.
I love how this turned out! I want to make five too! Definitely trying this! Thanks Lisa!