Flaky danish sourdough pastries with cream cheese and jam filling and drizzled with a glaze makes the most decadent dessert or breakfast.

This is not one of those recipes you will be making on the daily (like sourdough tortillas, bread, or pancakes), but an extra special treat that everyone will be raving about.
Over on YouTube and my podcast, I talk a lot about how homemaking is never boring. There is always something to do, something to learn, and a new skill to cultivate. And learning to make these sourdough danish pastries was a new and fun skill to master.
Sourdough croissants became a staple in the house a little while ago, and one day I just had a thought to try my hand on making danish pastries. Maybe it was a pregnancy craving. The baby needed pastries, how could I say no? And they are to die for.
The flaky pastry with layers of butter filled with a delicious filling and drizzled with a sweet glaze. So good. And they can be totally customizable.
Switch up the fillings. Fresh berries, lemon curd, jam and cream cheese are my favorites.
It takes a little time (ok a long time), a little patience, and a good amount of butter. But it is totally worth it.

Tips:
- During lamination you don’t want the dough to get too warm, so you want to work fairly quickly. The butter will just melt into the dough rather than creating the flaky layers. If the butter does get too warm, you can stick it in the fridge for 10-30 minutes and then continue working on the dough.
- The dough and the butter should be about the same temperature. This is so when you are laminating the dough the butter doesn’t push out.
- This recipe uses natural yeast to give the danish dough rise. If you are totally new to sourdough, make sure to check out how to make a sourdough starter here.
- Sourdough isn’t just for bread! You can check out over a hundred sourdough recipes here on the blog. From breakfast, to dessert, and everything in between.
This post contains affiliate links, which means I make a small commission at no extra cost to you. See my full disclosure here.

FAQ:
Danish pastry is leavened by yeast, whereas puff pastry doesn’t include yeast and is leavened by steam.
Croissant dough and Danish pastries are very similar. The only difference is that danish pastry dough includes eggs since it includes a filling it needs to be able to hold the filling.
They are almost identical except that danish pastry dough is more of an enriched dough (like brioche) and includes eggs.
Sourdough Danish Pastry Ingredients:
Dough
All purpose flour
Sugar – Cane
Sourdough starter– You want this to be bubbly and active. Fed within 4-12 hours and has about doubled in size.
Whole milk – This is an enriched dough, so whole milk is preferred for the fat and flavor content.
Egg
Vanilla extract – Homemade or store bought. It is super easy to make your own homemade vanilla extract.
Salt – Preferably sea salt, real salt, or pink Himalayan salt.
Butter for laminating
Unsalted butter – You want to use unsalted for this recipe so you can control the salt.
All purpose flour
Cheese filling
Cream cheese – Softened. Preferably full fat.
Sugar
Egg yolk (I like to use the yolk that is leftover from the egg wash)
Lemon juice
Vanilla extract
Other Filling ideas:
Lemon curd
Pie filling
Jam – Peach and strawberry are my favorite.
Fresh berries
Egg wash
Egg white, beaten lightly with 1 tablespoon cold water
Glaze
Confectioners’ sugar – This creates a really nice smooth consistency.
Milk – Any kind will work
Vanilla extract – You could also substitute with another extract if desire. Lemon, almond, even cherry. Choose something that would go nicely with the flavors of your filling.
Pinch of salt
Tools you may need:
Stand mixer with dough hook attachment. Could also use a hand mixer for creating the cream cheese filling.
Rolling Pin
Baking sheet – I like these stainless steel baking sheets
Pastry brush
Parchment paper
Large bowl
How To Make Sourdough Danish Pastry

Create the dough
Add the flour, sugar, sourdough starter, milk, egg, vanilla and salt to the bowl of a stand mixer with the dough hook attached. Mix on low speed until the dough becomes smooth and glossy. You can also easily do this by hand. Mix and knead to make a shaggy, sticky dough. Continue to knead for about 5-10 minutes
Form the dough into a ball and place in a bowl. Cover with plastic wrap, foil, or a beeswax wrap and place in a warm spot for about 4 hours.
Place the bowl in the refrigerator to continue fermenting for 8 hours, or up to 3 days.
Laminating the dough with butter
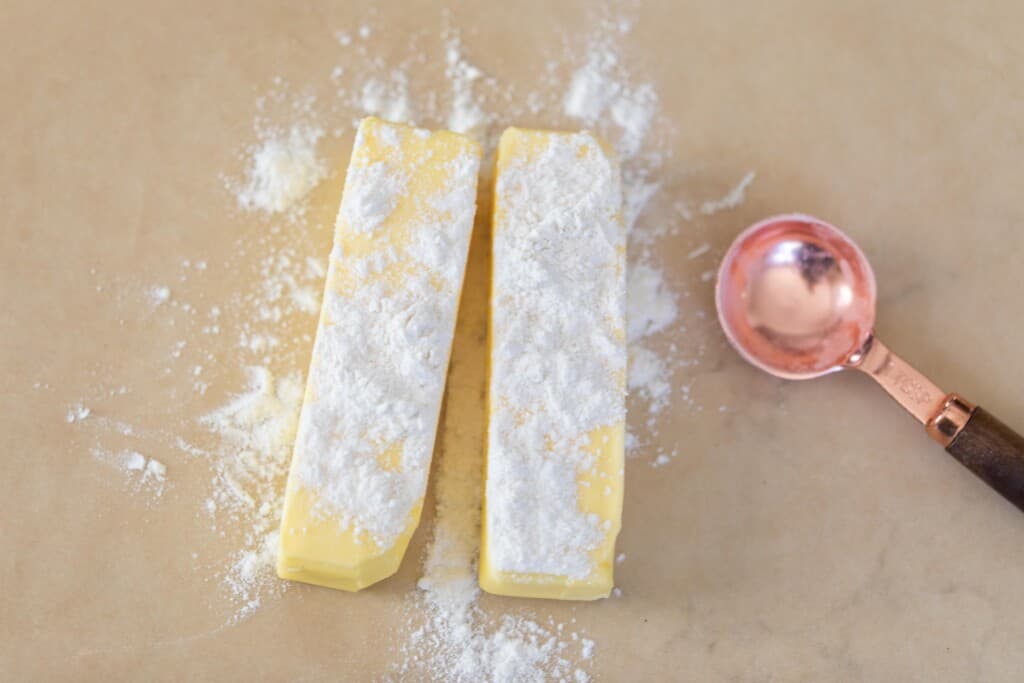
To roll the butter block out into a 6 by 8 inch rectangle, place the sticks of butter on a large piece of parchment paper. Sprinkle it with flour.
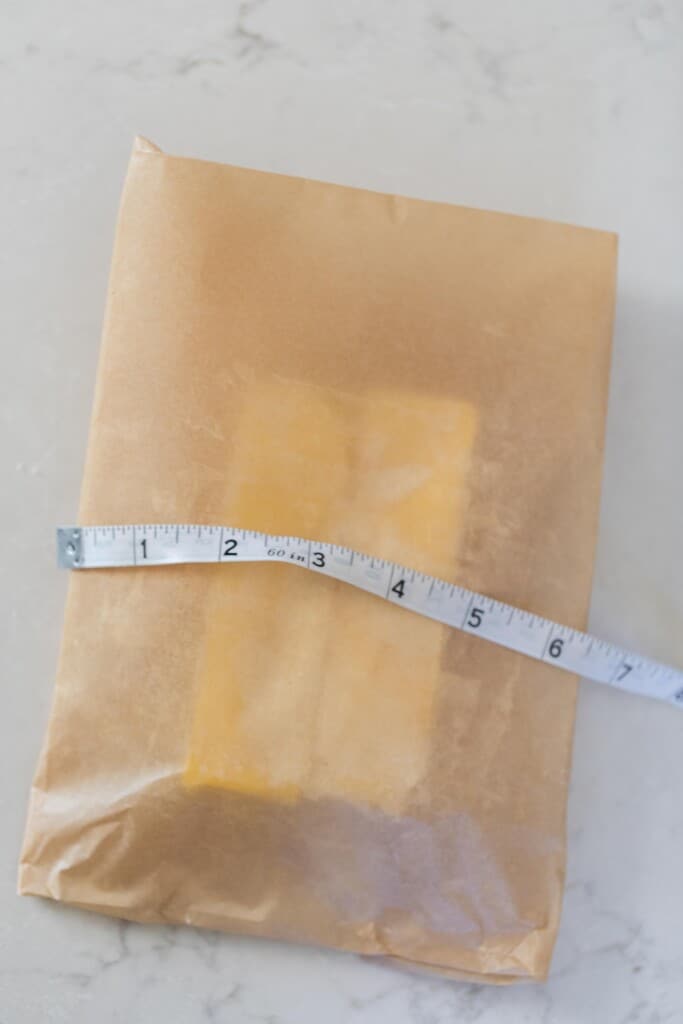
Fold the parchment paper around the butter, so that the butter will fill the entire envelope once you roll it out. You are aiming for a butter block that is 6 inches by 8 inches. It doesn’t need to be too precise here. You just want to make sure the pastry dough can entirely encase the butter when you roll it out for laminating.
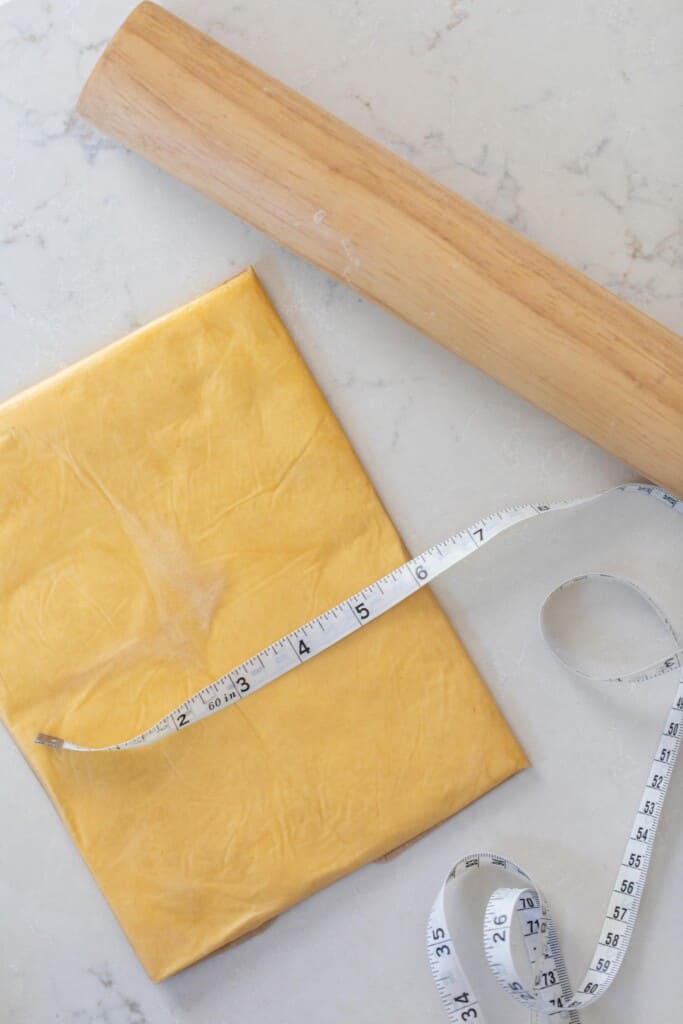
Tap out the butter with a rolling pin lightly to start to spread the butter, then roll smooth.
Chill the butter for 10 minutes. You want the butter to stay nice and cold to create the flaky butter layers. Too warm and it will just smush out. Cold butter is essential.
Remove the pastry dough from the refrigerator and place on a lightly floured surface.
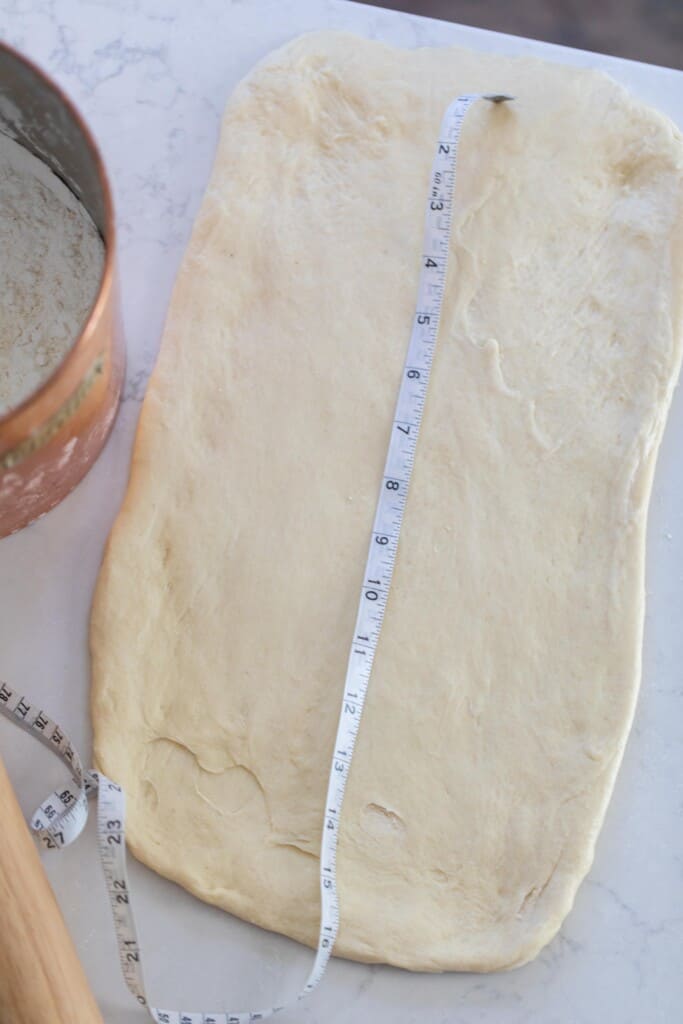
Roll it out into a 16 by 8 inch rectangle.
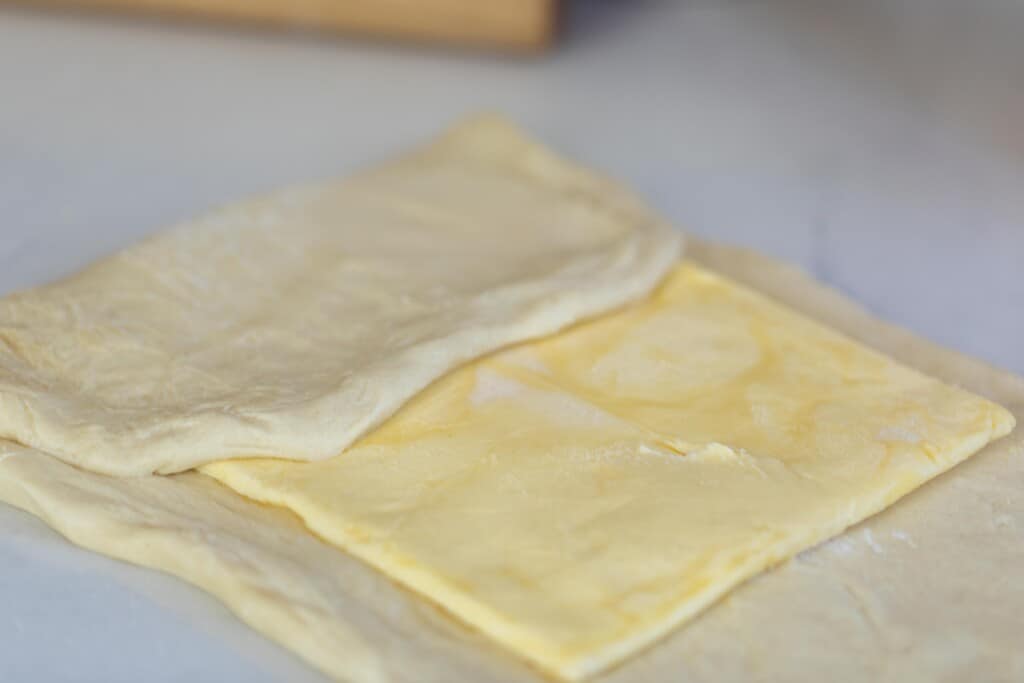
Place the butter packet in the middle of the dough. Fold the edges over, so they meet in the middle and completely encase the butter. Pinch the middle seam and sides closed, so none of the butter can escape.
First fold
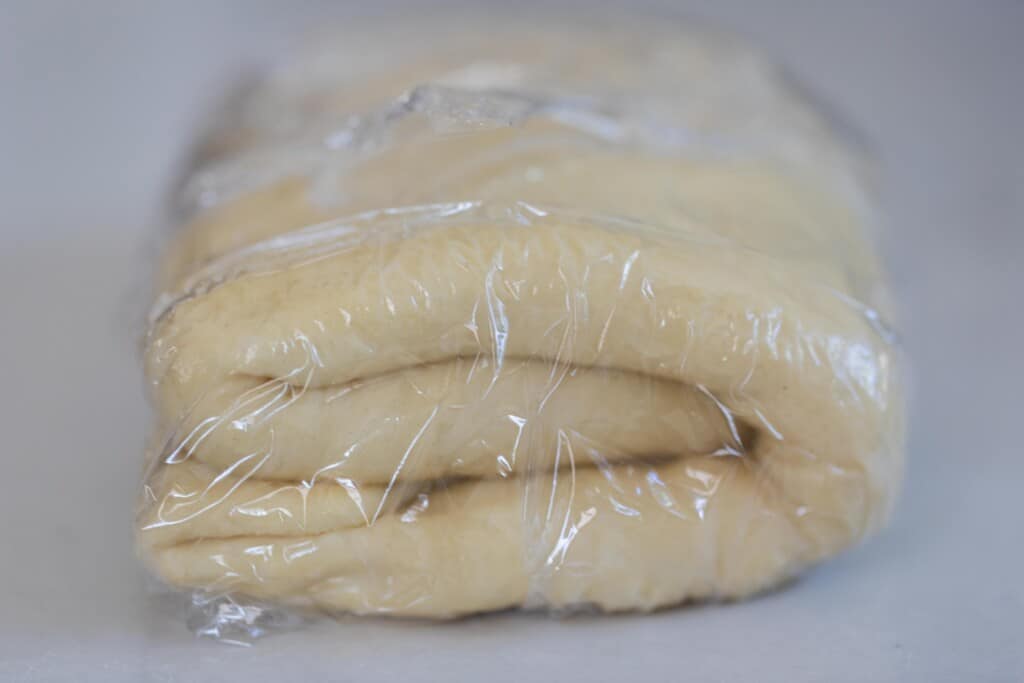
Roll the dough, with the butter sealed inside, back out into a 16 by 8 inch rectangle.
Fold each side into the center again; then fold one side over the other to make a rectangle with 4 layers of dough. (See picture)
Wrap the dough in plastic wrap and put it back in the refrigerator for 30 minutes.
Second fold
Roll the dough out into another 16 by 8 inch rectangle.
Again, fold each side into the center; then fold one side over the other to make a rectangle with 4 layers of dough.
Wrap the dough in plastic wrap and put it back in the refrigerator for 2 hours or up to 12 hours.
At this point in the folding process there should be layers upon layers of dough and butter
Make the pastries
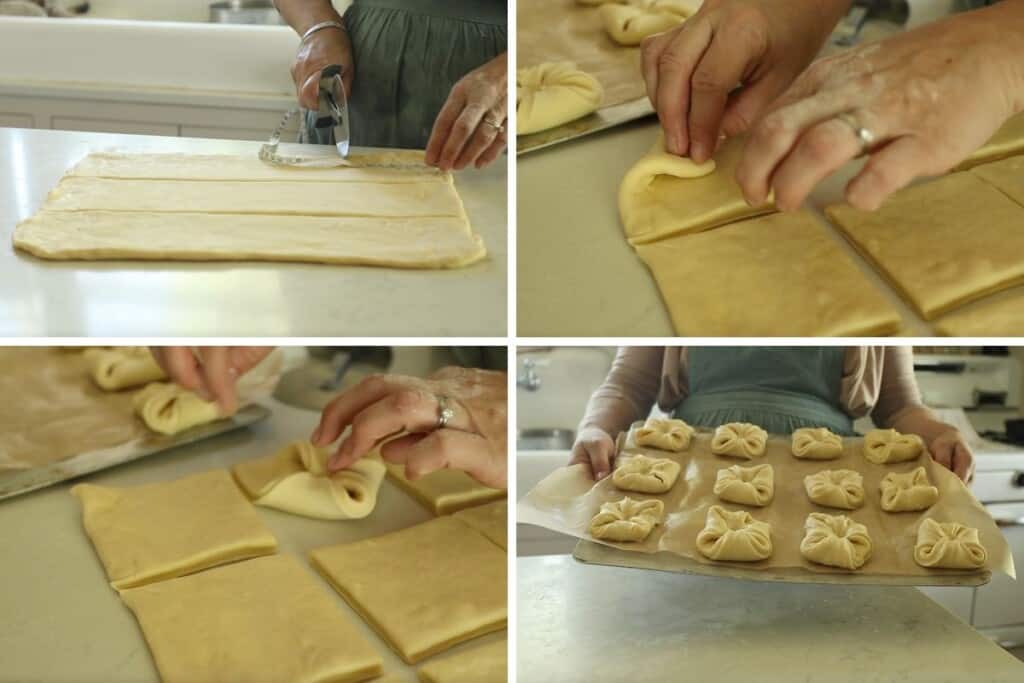
Roll out into a 16 by 12 inch rectangle.
Cut in thirds down the center lengthwise.
Divide the three long strips each into 4 equal parts (We are going for 12 4” by 4” squares.)
Place the 4 corners into the middle and press with your finger to seal.
Place in a warm spot and allow to rise until puffy, about one hour.
Preheat the oven to 400°F.
Create the cream cheese filling
While the oven is preheating, create the cream cheese filling.
In a large bowl, beat the cream cheese, granulated sugar, egg, lemon juice, and vanilla on medium-low speed until well combined.
This makes a small batch of cream cheese filling, so that you don’t have a whole lot leftover. I like to fill a few with cream cheese filling and do some of the others with only jam. I mix it up!
Place the danish pastries onto a parchment lined baking sheet.
Brush with an egg wash.
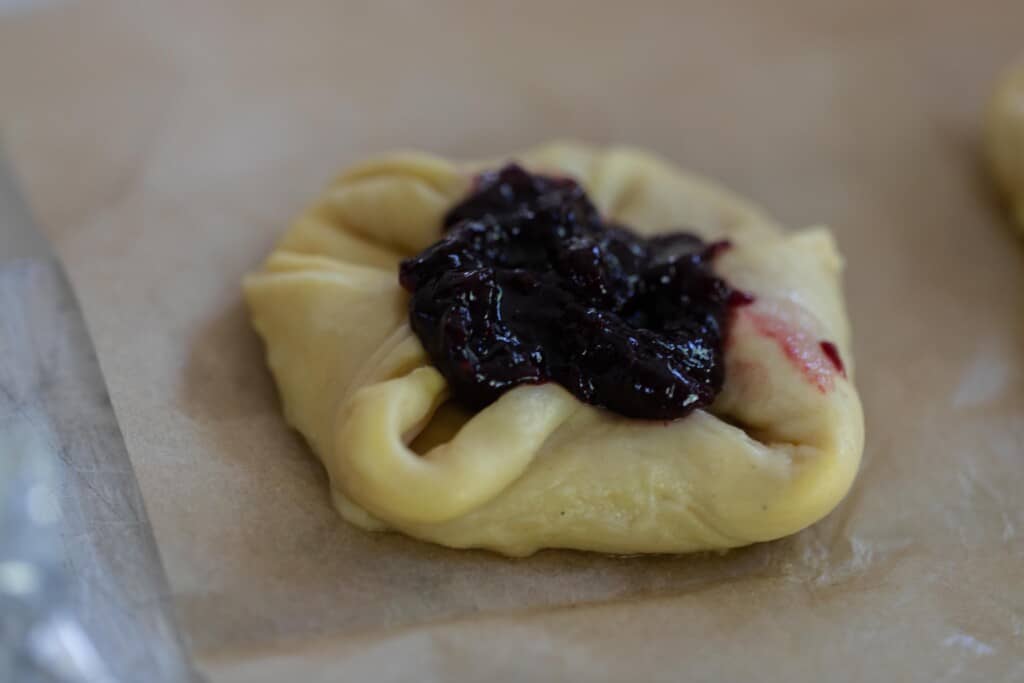
Add a tablespoon of your desired filling into the center of each pastry. I love a combination of the cheese filling and jam, preserves or pie filling. You will use about a tablespoon of filling in each pastry.

Bake for 15 minutes or until golden brown.
Allow to cool for a few minutes and then drizzle with glaze.

Storage:
Store in an air-tight container in the fridge for up to 7 days. Can also be frozen for up to 3 months. Allow to cool completely, wrap in plastic wrap and place in a freezer safe ziploc bag. Remove as much air as possible.
More Of My Favorite Sourdough Recipes:
- No-Knead Sourdough Bread
- The Best Sourdough Pretzels
- Easy Sourdough Discard Bagels
- Same Day Sourdough Bread Recipe
- Sourdough Snickerdoodle Cookies
If you make this recipe and love it, I would love if you gave it 5 stars! Tag me on Instagram @farmhouseonboone with your delicious creation.
Danish Sourdough Pastries

Video
Ingredients
Dough
- 3 cups all purpose flour, 420 grams
- 1/4 cup sugar, 50 grams
- 1/2 cup sourdough starter, bubbly and active (113 grams)
- 3/4 cup whole milk, 183 grams
- 1 large egg
- 1/2 teaspoon vanilla
- 1 teaspoon salt, 5 grams
Butter for laminating
- 16 tablespoons cold unsalted butter, 2 sticks or 227 grams
- 1 tablespoon all purpose flour, 9 grams
Cheese filling
- 3 oz cream cheese
- 2 tablespoons granulated sugar
- 1 large egg yolk, I like to use the yolk that is leftover from the egg wash
- 1/2 teaspoon lemon juice
- 1/2 teaspoon vanilla extract
Filling ideas:
- Lemon curd
- Pie filling
- Jam
Egg wash:
- 1 large egg white, beaten lightly with 1 tablespoon cold water
Glaze
- 1 cup confectioners’ sugar, 120 grams
- 2 tablespoons milk
- 1 teaspoon vanilla
- pinch salt
Instructions
- Add the flour, sugar, sourdough starter, milk, egg, vanilla and salt to the bowl of a stand mixer with the dough hook attached. Mix on low speed until the dough becomes smooth and glossy. You can also easily do this by hand. Mix and knead to make a shaggy, sticky dough. Continue to knead for about 5-10 minutes
- Form the dough into a ball and place in a bowl. Cover with plastic wrap, foil, or a beeswax wrap and place in a warm spot for about 4 hours.
- Place the bowl in the refrigerator to continue fermenting for 8 hours, or up to 3 days.
Laminating the dough with butter
- To roll the butter block out into a 6 by 8 inch rectangle, place the sticks of butter on a large piece of parchment paper. Sprinkle it with flour.
- Fold the parchment paper around the butter, so that the butter will fill the entire envelope once you roll it out. You are aiming for a butter block that is 6 inches by 8 inches. You don’t need to be too precise here. You just want to make sure the pastry dough can entirely encase the butter when you roll it out for laminating.
- Tap out the butter with a rolling pin lightly to start to spread the butter, then roll smooth.
- Chill the butter for 10 minutes. You want the butter to stay nice and cold to create the flaky butter layers. Too warm and it will just smush out. Cold butter is essential.
- Remove the pastry dough from the refrigerator and place on a lightly floured surface.
- Roll it out into a 16 by 8 inch rectangle.
- Place the butter packet in the middle of the dough. Fold the edges over, so they meet in the middle and completely encase the butter. Pinch the middle seam and sides closed, so none of the butter can escape.
First fold
- Roll the dough, with the butter sealed inside, back out into a 16 by 8 inch rectangle.
- Fold each side into the center again; then fold one side over the other to make a rectangle with 4 layers of dough. (See picture)
- Wrap the dough in plastic wrap and put it back in the refrigerator for 30 minutes.
Second fold
- Roll the dough out into another 16 by 8 inch rectangle.
- Again, fold each side into the center; then fold one side over the other to make a rectangle with 4 layers of dough.
- Wrap the dough in plastic wrap and put it back in the refrigerator for 2 hours up to 12 hours.
Make the pastries
- Roll out into a 16 by 12 inch rectangle.
- Cut in thirds down the center lengthwise.
- Divide the three long strips each into 4 equal parts (We are going for 12 4” by 4” squares.)
- Divide the 4 corners into the middle and press with your finger to seal.
- Place in a warm spot and allow to rise until puffy, about one hour.
- Preheat the oven to 400°F.
- While the oven is preheating, create the cream cheese filling.
- In a large bowl, beat the cream cheese, granulated sugar, egg, lemon juice, and vanilla on medium-low speed until well combined.
- Place the danish pastries onto a parchment lined baking sheet.
- Brush with an egg wash.
- Add a tablespoon of your desired filling into the center of each pastry. I love a combination of the cheese filling and jam, preserves or pie filling. You will use about a tablespoon of filling in each pastry.
- Bake for 15 minutes or until golden brown.
- Allow to cool for a few minutes and then drizzle with glaze.
Notes
- Store in an air-tight container in the fridge for up to 7 days. Can also be frozen for up to 3 months. Allow to cool completely, wrap in plastic wrap and place in a freezer safe ziploc bag. Remove as much air as possible.
- During lamination you don't want the dough to get too warm, so you want to work fairly quickly. The butter will just melt into the dough rather than creating the flaky layers. If the butter does get too warm, you can stick it in the fridge for 10-30 minutes and then continue working on the dough.
- The dough and the butter should be about the same temperature. This is so when you are laminating the dough the butter doesn't push out.
Nutrition
Nutrition information is automatically calculated, so should only be used as an approximation.




These are amazing!!!! I’ve made them only once and they turned out super delicious, I can’t wait to make them again! Thank you for the recipe 😊🤍
Well this was my first attempt at puff pastry and at danishes. It went well overall, until I tried to bake them. I had lots of pooling butter, so much so that I transfered the danishes to a new parchment lined tray and baked for an additional 5 min. That seemed to do the trick! I also found my filling was pushed out as they baked, but I think I need to indent the middles a bit more next time. Anyways, they are still delicious, and I look forward to trying again!
Could I possibly use discard?? Thanks!!
They may not rise if you use discard.
First time ever making a laminated dough. These rolls are absolutely delicious. I didn’t feel like my butter was spread out enough so I put it through a third fold. Thank you for this great recipe!
You’re welcome! I’m happy you enjoyed it. Those danishes are my favorite.
Is thete a way to pn this to my board on pintetest? I didn’t see a button for that🙈
There should be a button at the top to save it to Pinterest. You can also click on several of the pictures in the blog and it will let you save them also.
Hi! I was wondering if I could make this with discard and add in some yeast? Do I have to do cold ferment for 8 plus hours? Could I do a few? Thanks
You could do that! You would be able to bypass the cold ferment in this case if you are not using the active starter.
After reading the reviews of this recipe, and many listed excess pooling butter, I wondered if proofing these longer would help prevent that. I’ve been making sourdough croissants for a while now and typically when those leak excess butter, it means I underproofed them. I followed the recipe here as listed, except for the final rise after shaping, I actually left them out 11 hours overnight. Not sure about the food safety perspective on that, so not saying I necessarily recommend doing that – I thought to do it because I typically let my shaped croissants proof for 15-16 hours with success. However they baked up beautifully, and did only take 15 minutes at 400. They were beautifully flakey and delicious. I ended up making the cream cheese filling for half, and lemon curd and blueberry for the others. I’m curious on Lisa’s thoughts on the longer proof time?
Thanks for the recipe, Lisa! Your recipes have been my go-to for all things sourdough.
Hi! It could be a sign of under proofing the dough. I’m glad yours baked up beautifully!
Hi Lisa! I tried this recipe after making the puff pastry dough the day prior and letting it sit in the fridge for 24 hours, but something went wrong in the process and I’m not sure if it was my error or my sourdough starter or something else. My dough was always from the start super tough and felt like I was using old dried playdough. Once baked there was so much butter that pooled around the danish’s and the insides of the pastry never fully cooked even after baking for 40 minutes. The outsides were beautiful but the inside was raw. Any ideas that I could try differently? Thank you!
It sounds like there may have been an issue with your starter. The dough consistency should not feel like dried playdough at all. I would say that because of how dense this dough was, it was hard for the butter to absorb. I would try the recipe again and make sure you have an active starter.
Mine did the same thing and I’ve made tons of sourdough bread before. I think you need to add the flour a cup at a time or so until you get the right consistency. I’ve never added everything to my mixer at one time, I’m so I’m assuming that was the hiccup for me.
Do you think it’s possible to substitute the sugar in this recipe with something like honey or maple syrup?
I wouldn’t substitute it because it may add too much moisture to the dough.
These turned out decent for my first attempt! However, I had more dough than you somehow so the 16×12 rectangle left the danishes too thick. Might be worth to note that the dough should be no more than 4-5mm thick in case this happens to anyone else.